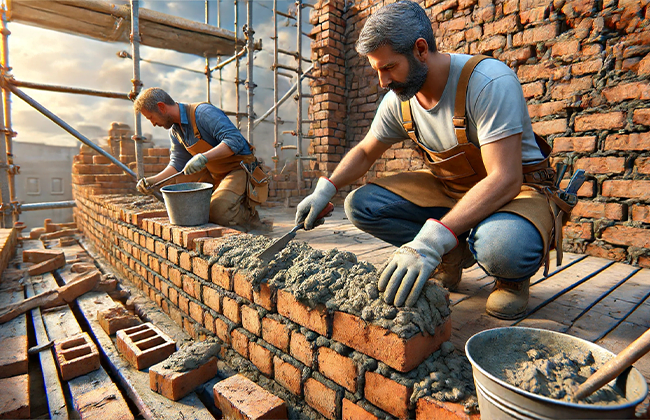
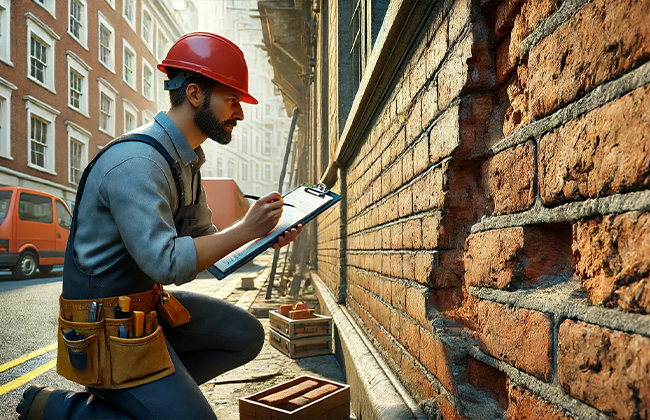
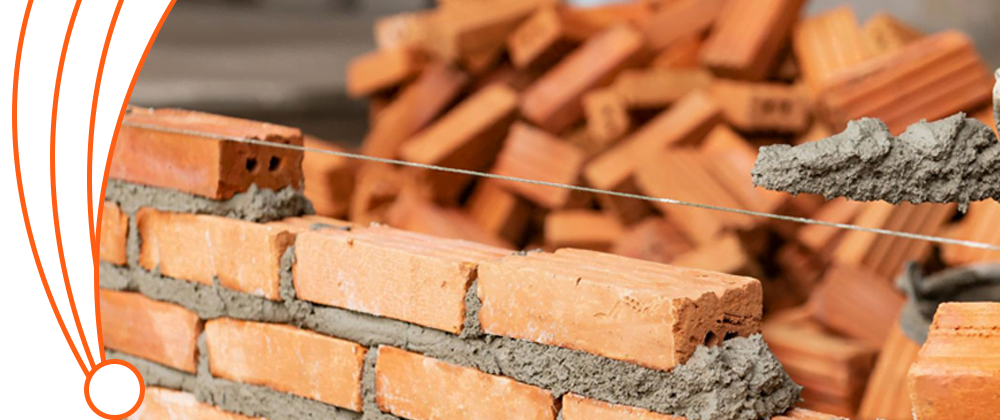
When it comes to maintaining the integrity of your structure, engaging in brick work repair is crucial. Addressing issues promptly not only preserves the aesthetic appeal of your building but also ensures its structural safety. Whether you’re dealing with crumbling mortar, cracks in bricks, or any other type of masonry damage, brick work repair can restore your property to its optimal condition, protecting it from further damage and potentially expensive future repairs.
Table of Contents
What is Brick Work Repair?
Brick work repair involves addressing damage to bricks and mortar in a structure, crucial for maintaining its integrity and appearance. This process may include various tasks such as replacing broken or cracked bricks, repointing deteriorated mortar joints, and applying sealants to protect bricks from future damage. Undertaking timely brickwork repairs not only extends the lifespan of a building but also prevents more costly repairs down the line.
Signs That Brick Work Repair is Needed
Identifying when brick work requires repair is essential for maintaining the structural health and appearance of your property. Let’s dive deeper into the key indicators that signal the need for brick work repair.
1. Cracked Bricks
Cracks in bricks can stem from various sources such as ground movement, temperature fluctuations, or structural pressures. These cracks might appear minor at first but can escalate into more serious problems if not addressed promptly.
a. Minor Cracks
Minor cracks are often superficial and can be repaired easily with some filler and paint. However, it’s crucial to monitor them to ensure they don’t expand over time.
b. Major Cracks
Larger, more noticeable cracks can jeopardize the structural integrity of the wall. Such cracks often require a more thorough assessment and potentially more extensive repair solutions, including potentially replacing sections of the brickwork.
2. Damaged Mortar Joints
The mortar between bricks plays a critical role in maintaining the structure’s stability. Over time, exposure to the elements can cause the mortar to deteriorate—a process known as weathering.
a. Signs of Mortar Deterioration
Look for signs such as cracking, crumbling, or loose mortar. These symptoms indicate that the mortar is losing its adhesive properties and, consequently, its ability to hold the bricks together securely.
b. Repairing Mortar Joints
Repairing mortar joints typically involves repointing, where old mortar is removed and replaced with new mortar. This not only restores the visual appeal of the brickwork but also reinforces its structural stability.
3. Water Infiltration
Water infiltration is one of the most damaging issues for brick structures as it leads to several internal problems.
a. Identifying Water Issues
Signs of water infiltration include visible damp spots, water stains on interior or exterior walls, or a musty smell, especially after rainfall.
b. Addressing Water Infiltration
It’s imperative to address these issues swiftly to prevent more severe damage like mold growth or structural weakening. Solutions might involve improving drainage around the structure, sealing the bricks, or more comprehensive measures like installing new damp-proof courses.
4. Efflorescence
Efflorescence refers to the white, powdery deposits that occasionally appear on brick surfaces. These deposits are not just unsightly; they are symptomatic of moisture issues within the brickwork.
a. Causes of Efflorescence
This phenomenon occurs when water moving through a wall carries natural salts to the surface. When the water evaporates, it leaves these salt deposits behind.
b. Treating Efflorescence
While not harmful to the structural integrity of the brick immediately, efflorescence indicates that water is penetrating the brickwork, which can lead to more serious damage over time. Cleaning the deposits and addressing the underlying moisture issue—often through sealing or improving drainage—is essential.
Tools and Materials Needed for Brick Work Repair
When tackling brick work repair, having the right tools and materials on hand is crucial for effective and efficient results. Let’s delve into the essential items you’ll need to carry out different types of brick repairs.
Essential Tools
Chisel and Hammer
- Purpose: These tools are used for removing damaged mortar and bricks. The chisel helps you carefully chip away the old materials without causing additional damage to the surrounding area.
- Usage Tips: Use a sharp chisel and a sturdy hammer. Apply steady pressure to avoid cracking adjacent bricks.
Trowel
- Purpose: A trowel is used for applying new mortar. It helps in spreading the mortar evenly and pressing it firmly into the joints.
- Usage Tips: Choose a trowel that fits comfortably in your hand and matches the width of the mortar joints for precision.
Wire Brush
- Purpose: This is used to clean out loose debris from the joints after removing the old mortar and before applying new mortar.
- Usage Tips: Brush vigorously to ensure all dust and small particles are removed, providing a clean surface for the new mortar to adhere to.
Masonry Saw
- Purpose: A masonry saw is necessary for cutting bricks or large pieces of mortar, especially when replacing damaged bricks.
- Usage Tips: Always wear safety goggles and follow safety instructions to prevent injuries.
Necessary Materials
Mortar Mix
- Purpose: This is the material used to bond bricks together. It fills the gaps and restores the structural integrity of the brickwork.
- Selection: Choose a mortar mix that matches the strength and color of the existing mortar for consistency and durability.
Replacement Bricks
- Purpose: These are used to replace damaged or cracked bricks that are beyond repair.
- Selection: Ensure that the replacement bricks closely match the original in terms of size, color, and texture to maintain the uniformity of the wall.
Sealant
- Purpose: Sealant is applied to the repaired areas to protect them from moisture and weather conditions.
- Application: Apply the sealant evenly over the surface of the bricks and mortar. Reapply periodically to maintain its protective properties.
Organizing Your Workspace
Before beginning your repair work, organize your workspace. Lay out all your tools and materials for easy access. This organization helps in speeding up the repair process and reduces the risk of errors.
Safety First
Always wear appropriate safety gear, such as gloves, goggles, and a dust mask, when performing brick work repairs. Safety should always be your top priority to prevent accidents.
Step-by-Step Guide to Repointing

Repointing is a vital repair process for maintaining the integrity and appearance of brick structures. It involves removing old, damaged mortar from between the bricks and replacing it with fresh mortar. Here’s a detailed, step-by-step guide to help you navigate this task smoothly.
Step 1: Remove Damaged Mortar
Tools You’ll Need:
- Chisel
- Hammer
Process:
Start by using the chisel and hammer to carefully remove the damaged mortar from between the bricks. It’s important to do this gently to avoid damaging the bricks themselves.
Tips:
- Aim the chisel away from the bricks to prevent accidental chipping.
- Remove mortar to a depth of about twice the height of the mortar joint, or as needed to remove all damaged material.
Step 2: Prepare New Mortar
Materials Needed:
- Mortar mix
Process:
Mix the new mortar according to the manufacturer’s instructions. Ensure that the consistency is firm yet workable. This balance is crucial for easy application and effective setting.
Tips:
- Use clean water and a clean mixing container to prevent contamination of the mortar.
- Adjust the amount of water gradually to achieve the desired consistency.
Step 3: Apply New Mortar
Tools You’ll Need:
- Trowel
Process:
Use the trowel to apply the freshly mixed mortar into the cleaned joints. Pack the mortar tightly to remove any air pockets and ensure a solid fill.
Tips:
- Press the mortar firmly into the joints, working from the bottom up to prevent the mortar from falling out.
- Fill the joints fully to ensure a seamless surface with the existing mortar.
Step 4: Smooth the Joints
Tools You’ll Need:
- Pointing tool
Process:
Once the joints are filled, use a pointing tool to smooth and shape the mortar to match the existing wall’s aesthetic.
Tips:
- Wait until the mortar is thumbprint hard before smoothing it.
- Use consistent pressure and motion to achieve a uniform look.
Step 5: Clean the Area
Tools You’ll Need:
- Wire brush
Process:
After the mortar has set slightly (when it’s firm but not fully hardened), use the wire brush to clean off any excess mortar from the face of the bricks.
Tips:
- Be gentle to avoid pulling fresh mortar out of the joints.
- Cleaning should enhance the work’s neatness without compromising the integrity of the newly applied mortar.
Preventive Maintenance Tips for Brick Work
Maintaining the integrity of brick work is crucial for ensuring the longevity and safety of your structure. By adopting a routine of preventive maintenance, you can significantly reduce the frequency and severity of needed repairs. Let’s explore some essential tips to help you maintain your brick work effectively.
1. Regular Inspections
a. Importance of Routine Checks
Conduct regular inspections of your brick work to identify any signs of damage early on. This proactive approach allows you to catch potential problems before they escalate into more significant issues.
b. What to Look For
During these inspections, look for cracks, loose bricks, deteriorating mortar, and any signs of moisture damage. Also, keep an eye out for fungal growth or efflorescence, which can indicate moisture problems.
c. Frequency
Ideally, inspect your brick work at least twice a year, typically in the spring and fall. This timing allows you to assess any damage that may have occurred during the winter and prepare for potential issues before the next cold season.
2. Proper Drainage
a. Importance of Effective Water Management
Ensuring that water is effectively directed away from your brick walls is crucial. Poor drainage can lead to water accumulation, which is one of the primary causes of brick deterioration.
b. Implementing Solutions
To improve drainage, make sure that gutters and downspouts are clean and functioning correctly. Consider installing additional drainage solutions such as French drains or proper grading around the foundation to prevent water from pooling near the walls.
c. Regular Maintenance
Regularly check and maintain your drainage systems, especially before heavy rainfall seasons, to ensure they continue to function as intended.
3. Cleaning
a. Keeping Bricks Clean
Periodically cleaning your bricks helps maintain their appearance and integrity. Dirt, moss, and other debris can retain moisture against the brick surface, potentially leading to damage over time.
b. Recommended Cleaning Methods
Use gentle cleaning methods to avoid damaging the bricks. A soft brush and a mild detergent solution are usually sufficient for most cleaning needs. For more stubborn stains, a low-pressure wash might be necessary, but high-pressure washing should generally be avoided as it can erode the surface of the bricks and mortar.
c. Frequency of Cleaning
The frequency of cleaning will depend on your environment and the condition of the brickwork. In general, a thorough cleaning once a year can be beneficial, with more frequent light cleanings as needed.
Cost of Brick Work Repair
Understanding the costs associated with brick work repair is crucial for budgeting and planning maintenance or renovations. The cost can vary significantly based on the extent of the damage and the specific methods required for repair. Below is a detailed breakdown of typical costs for common brick work repairs, which should help you estimate the potential expenses involved.
Repointing
Cost Factors
Repointing is the process of renewing the mortar joints between bricks. The cost can vary based on the accessibility of the wall, the condition of the existing mortar, and the area size.
Typical Costs
- Low Complexity: $5 to $10 per square foot. This range applies to jobs that are straightforward with easy access and minimal special requirements.
- High Complexity: $15 to $25 per square foot. This higher rate applies to projects that require special mortars, color matching, or work on historic structures.
Brick Replacement
Cost Factors
- The cost of replacing individual bricks includes the price of the bricks themselves and the labor involved in removing damaged bricks and inserting new ones.
Typical Costs
- Per Brick: $10 to $20. This cost includes labor and materials, with variation depending on the type of brick and the difficulty of the job.
Sealing
Cost Factors
- Sealing brick work involves applying a protective coating to help repel water and prevent damage. Costs vary based on the type of sealant used and the area’s size.
Typical Costs
- Per Square Foot: $0.50 to $1.50. This range reflects different product qualities and application complexities.
Cost Comparison Table
Here is a table summarizing the typical costs associated with different types of brick work repairs:
| Repair Type | Cost Range | Factors Influencing Cost |
| Repointing | $5 – $25 per square foot | Job complexity, accessibility, special mortars |
| Brick Replacement | $10 – $20 per brick | Type of brick, labor involved, site accessibility |
| Sealing | $0.50 – $1.50 per square foot | Type of sealant, size of area |
Choosing a Professional for Brick Work Repair
When it comes to brick work repair, ensuring that the job is done correctly and safely often necessitates hiring a professional. While you might tackle some minor repairs yourself, for more extensive damage, the expertise of a skilled contractor is invaluable. Here’s how you can choose the right professional for your brick work repair needs.
Check Credentials
Importance of Proper Licensing
First and foremost, verify that the contractor you are considering is licensed and insured. This step is crucial as it not only ensures that they are officially recognized by local authorities but also provides you with protection against possible damages or substandard work.
How to Verify
You can check a contractor’s licensing status through your local building department or via online professional licensing boards. Additionally, ask to see proof of insurance to ensure that both liability and worker’s compensation policies are in place.
Get Multiple Quotes
Comparing Offers
Don’t settle for the first estimate you receive. Instead, gather quotes from several contractors. This will give you a clearer picture of what your repair should reasonably cost and what services are included.
Evaluating Quotes
When reviewing these quotes, consider the following:
- Detail of the Estimate: More detailed quotes are usually a sign of a more thorough and prepared contractor.
- Price: While the cheapest option can be tempting, it often reflects poorer quality materials or workmanship. Conversely, the most expensive quote isn’t automatically the best one either.
Ask for References
Importance of Past Work
References are a direct line to past clients who can provide insights into the quality of work and professionalism of the contractor.
How to Utilize References
Contact these references and ask specific questions about their experience:
- Timeliness: Did the contractor complete the work on schedule?
- Budget: Were there any unexpected costs?
- Satisfaction: Were they satisfied with the quality of the work?
- Communication: How well did the contractor communicate throughout the project?
Online Reviews and Testimonials
In addition to personal references, check online review platforms and the contractor’s website for testimonials and ratings. This can provide a broader view of the contractor’s reputation and customer service approach.
Conclusion
Understanding the essentials of brick work repair helps you maintain your property efficiently. If you’re looking for a professional contractor for brick work repair, ensuring you choose someone with the right expertise is crucial. For expert advice or to schedule a consultation, feel free to contact us at (+1) 917-355-8556. We are here to help restore the beauty and integrity of your brickwork.
FAQs
Q: What is the importance of timely brick work repair?
A: Timely brick work repair prevents minor issues from escalating into major structural problems. Addressing brick damage quickly can save you significant repair costs in the future.
Q: How often should I schedule inspections for brick work repair?
A: It’s advisable to schedule inspections for brick work repair at least once a year. Regular assessments help catch potential issues before they become serious.
Q: What are common signs that indicate a need for brick work repair?
A: Common signs include visible cracks in bricks, deteriorated mortar joints, and evidence of water infiltration. These symptoms suggest that brick work repair is necessary.
Q: What should I consider when choosing a contractor for brick work repair?
A: When choosing a contractor for brick work repair, consider their credentials, experience, and the reviews from previous clients. Ensure they specialize in masonry work.
Q: Can DIY methods be effective for brickwork repair?
A: DIY methods for brick work repair can be effective for minor issues. However, for extensive damage, hiring a professional is recommended to ensure the repairs are done safely and effectively.


