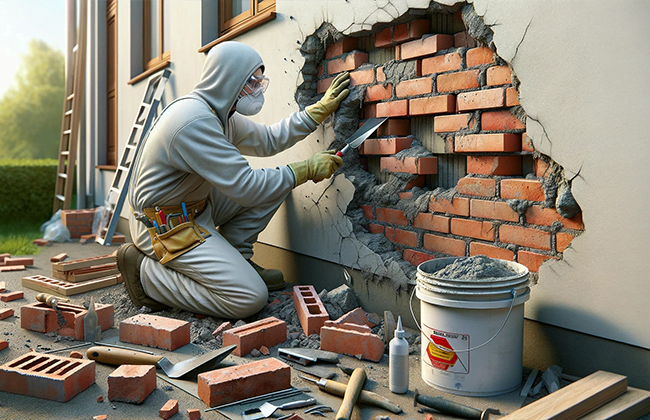
When tackling the issue of how to repair a separating brick wall, it’s essential to understand the task requires not just hard work, but also a keen eye and precision. Brick walls, sturdy as they seem, can become victims of damage due to various factors, from structural shifts to weather impacts. This guide aims to walk you through a step-by-step process to repair these issues, ensuring your brick walls are not only aesthetically pleasing but structurally sound too.
Table of Contents
Understanding the Problem: What Causes Brick Walls to Separate?
Have you ever wondered why brick walls start acting up and separating? It’s like they have a mind of their own sometimes! But there’s always a reason behind it, and knowing these can be super helpful when you’re looking to fix them. Let’s jump into the usual suspects:
Structural Causes in Separating Brick Wall Repairs
So, here’s the deal with buildings: they’re like giant jigsaw puzzles sitting on the earth, which isn’t always steady. Over time, the ground shifts a bit, and buildings settle into their new positions. This movement can mess with your brick walls, causing them to shift too. If the movement’s big enough, you’ll see cracks or even sections of the wall pulling apart. It’s like when your favorite cake cracks on the top as it cools – natural but sometimes a bit unwelcome.
Weather-related Expansion and Contraction
This one’s all about temperature. Just like us, bricks and mortar react to the weather. When it’s hot, they expand, and when it’s cold, they contract. This constant push and pull can stress the walls, leading to separation over time. Imagine it like a dance, where the bricks and mortar are constantly moving in and out of sync with each other.
Poor Construction Techniques
Sometimes, the problem starts right from the beginning. If the wall wasn’t put together correctly in the first place – maybe the mortar was mixed poorly, or the bricks weren’t the best quality – it’s more prone to issues. It’s like building a house of cards with bent cards; it’s bound to wobble!
Water Damage and Erosion
Water can be sneaky; it finds its way into the smallest spaces and starts causing trouble. When water gets into your brickwork, it can weaken the structure over time. This is especially true if you live in an area with lots of rain or snow. It’s kind of like how water slowly carves canyons into rock – slow but mighty!
Understanding these causes is your first step towards fixing that pesky separating brick wall. Each cause gives you clues about what kind of repairs might be needed. It’s a bit like detective work, but for DIY home repairs!
Preparation Steps for Repairing Separating Brick Walls
Alright, let’s gear up for the task! Preparing correctly is key to a successful repair. Think of it like gathering your tools before a big adventure. You’ll need to inspect the wall for damage and then grab the right tools and materials – things like a trusty trowel, the right mortar mix, maybe some new bricks, and, of course, your safety gear. It’s like setting up your workbench with everything within arm’s reach, so once you start, there’s no turning back until the job is done!
Inspecting a Separating Brick Wall Before Repair
Before you start repairing, a thorough inspection is essential. You don’t want to start fixing one part only to realize later that there are other issues you missed. So, what should you look for? Well, start by examining the wall closely for any visible signs of damage. This includes cracks, loose bricks, or gaps in the mortar. Sometimes, these issues are more than just surface level, hinting at deeper structural problems. If you’re unsure about the severity of the damage or if it looks pretty serious, it might be a good idea to get a professional to take a look. They can give you a better idea of what you’re dealing with and whether it’s a DIY job or something more extensive.
Gathering Necessary Tools and Materials
Now, let’s talk about what you’ll need for the job. Repairing a brick wall isn’t something you can do with just your hands, right? You’ll need some tools and materials. Here’s a list to get you started:
- Trowel: This is like your trusty sidekick in bricklaying and repair work. You’ll use it for applying and spreading mortar.
- Mortar Mix: Obviously, you need this to bind the bricks together. Make sure you choose a mix that matches the existing mortar in terms of color and composition.
- Bricks: If some bricks are too damaged to be reused, you’ll need replacements. Try to match them with the existing ones in size, color, and texture.
- Safety Equipment: Safety first, always! Get yourself some gloves and safety goggles. Brick repair can be messy and a bit hazardous without the right protection.
- Spirit Level: This is crucial to ensure that your bricks are aligned and level. No one wants a wonky wall!
- Chisel and Hammer: You’ll need these to remove any damaged bricks carefully.
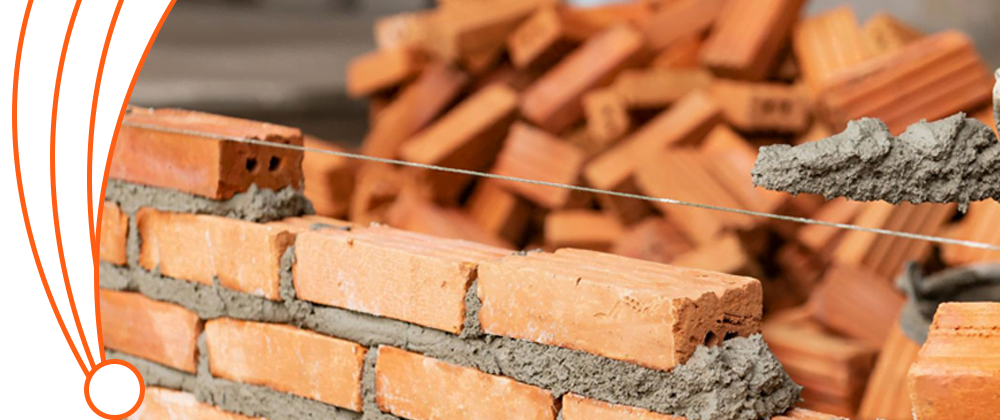
When selecting your materials, especially the bricks and mortar, try to get as close a match as possible to what’s already on your wall. This not only helps with the structural integrity but also keeps your wall looking consistent.
Remember, the right tools and materials are half the battle in any repair work. So, take your time to gather these essentials before you start. This way, you won’t have to pause mid-repair to run to the hardware store! Plus, using the right materials and tools not only makes the job easier but also ensures that your repair work lasts longer and blends seamlessly with the rest of the wall.
Step-by-Step Process to Repair Separating Brick Walls
Alright, let’s roll up our sleeves for some brick wall fixing action! We’re going to methodically remove those pesky damaged bricks, prep the area like a pro, mix and apply mortar like it’s an art, and get those bricks back in place, making sure everything’s as straight as an arrow. This is where we turn that troubled wall back into the sturdy, reliable structure it’s meant to be!
Removing Damaged Bricks in Separating Wall Repair
Alright, let’s roll up our sleeves and get to the first task – removing those pesky damaged bricks. This part needs a bit of finesse and patience. Grab your chisel and hammer, and start chipping away at the mortar around the bricks you want to remove. Be gentle – you don’t want to accidentally damage the good bricks or the wall itself. It’s kind of like playing Operation – try to avoid the sides!
Preparing the Surface
Once you’ve got those damaged bricks out, you’re left with a cavity that needs some TLC. Think of it as prepping a canvas before painting. You want to remove any loose mortar or debris to make sure the new mortar can bond properly. Clean it up nicely, so it’s ready to welcome the new bricks like a cozy little brick bed.
Mixing and Applying Mortar
Time to mix up your mortar. Follow the manufacturer’s instructions to get the consistency just right – think of it like following a recipe for the perfect batch of cookies. Once it’s ready, apply the mortar to both the cavity and the replacement brick. Then, with a steady hand, press the brick into place, making sure it lines up just right with its neighbors. It’s a bit like putting together a puzzle – finding the right piece to fit in just right.
Replacing Bricks and Repointing
If you’ve got some bricks that are still in good shape, you don’t need to replace them – just give them a fresh joint. This process, known as repointing, involves filling in the gaps around the bricks with new mortar. It’s a bit like doing touch-up painting; you’re sprucing up the area to make it look new again.
Ensuring Alignment and Stability
Now, let’s make sure everything is straight and stable. Use a spirit level to check the alignment of your new bricks. It’s a bit like hanging a picture – you want it perfectly level. If anything looks off, adjust it before the mortar sets. You’re aiming for that satisfying moment when the bubble in the spirit level sits right in the middle.
And there you have it! A step-by-step guide to fixing that separating brick wall. Remember, taking your time and paying attention to details makes all the difference in a repair job like this. Plus, there’s a certain satisfaction in stepping back and seeing a wall brought back to its former glory, all by your own hands!
Tips for a Durable Repair
Alright, let’s make sure your hard work stands the test of time with some tips to ensure a durable repair!
Selecting the Right Mortar
This is like choosing the right secret ingredient in a recipe – it’s crucial! Make sure your mortar mix is a good match for the existing one. If the colors are off, your repair will stick out like a sore thumb. Plus, the right composition ensures it holds up well with what’s already there. It’s all about creating a seamless blend that’s not only strong but also looks like it’s always been part of the wall.
Maintaining Consistency
Consistency is key in mortar mixing. You want it just right – not too runny and not too thick. Think of it like the perfect porridge in the story of Goldilocks. This consistency ensures it’s easy to work with and adheres properly, forming a strong bond. It’s a little bit like being a chef, where getting the texture right can make or break the dish!
Allowing Adequate Drying Time
Patience pays off here. After applying your mortar, give it enough time to set and dry – just as the manufacturer advises. It’s like waiting for paint to dry or glue to set; rushing this step could mean your repair won’t hold up under pressure or weather conditions. Imagine you’ve built a sandcastle; you wouldn’t want the tide to wash it away before it’s had a chance to solidify!
Post-Repair Care: Maintenance Tips

Hey, guess what? The repair is done, but your role as the wall’s guardian isn’t over yet. Just like you wouldn’t ignore your car after a tune-up, your wall needs ongoing attention too. Regular check-ups are key. Take a stroll by your wall now and then to look for any new cracks, loose bricks, or signs of mortar wearing out. It’s a bit like playing detective, but for your home. These little inspections can save you from future hassles. And hey, while you’re at it, keep an eye out for any water damage or drainage issues near the wall. Prevention is always better than cure, right?
Safety Considerations
Let’s talk about staying safe. Repairing a wall might not seem like a dangerous mission, but it has its risks. So, gear up! Gloves and safety goggles aren’t just fashion accessories; they’re your first line of defense against flying debris and dust. And if you’re standing back, looking at the wall thinking, “This is way beyond my skill level,” it’s totally okay to call in a professional. It’s like when something’s wrong with your laptop – sometimes, you need a tech wizard.
Advanced Repair Techniques
Now, for the walls that have really been through the wringer, with serious damage, it’s time to talk about the big-league repairs. This isn’t your everyday DIY territory. We’re talking about using things like anchors and ties for stabilization – think of it as the wall’s very own superhero gear. These techniques are a bit more complex and usually need someone who knows their way around structural repairs. It’s almost like needing an architect or a structural engineer – someone who can really bring stability back to your wall. If you’re facing this kind of situation, it’s wise to seek professional help. They have the tools, skills, and know-how to bring your wall back from the brink.
Conclusion
As we wrap up our detailed guide on how to repair a separating brick wall, remember that regular maintenance and prompt action are key to preserving your wall’s integrity. Whether it’s addressing minor issues or undertaking significant repairs, each step contributes to the wall’s longevity. With the right approach and techniques, you can restore the stability and appearance of your brick wall, ensuring it stands strong for years to come.
FAQs
Q: What are common signs that indicate the need to repair a separating brick wall?
A: Recognizing the need for repairs is crucial. Common signs include visible cracks, gaps in mortar, misaligned bricks, and loose bricks. Early detection can prevent more extensive damage.
Q: Can I repair a separating brick wall myself, or should I hire a professional?
A: It depends on the damage extent. For minor issues, a DIY approach might work. However, for significant damage or structural concerns, it’s safer and more effective to hire a professional.
Q: What tools and materials are essential for repairing a separating brick wall?
A: Essential tools include a trowel, hammer, chisel, spirit level, and safety equipment. Materials needed are mortar mix and replacement bricks, if necessary.
Q: How long does it typically take to repair a separating brick wall?
A: The time required varies based on the damage’s extent. Small repairs might take a few hours, while extensive damage could require several days of work.
Q: What maintenance tips should I follow after repairing a separating brick wall?
A: Regular inspections to catch early signs of damage, addressing minor repairs promptly, and ensuring proper drainage around the wall are effective maintenance practices.