Brick paver restoration is essential for maintaining the quality and appearance of your outdoor pavers. If your pathways, patios, or driveways look worn and faded, understanding the correct restoration techniques is key. This guide will help you explore effective methods to ensure your pavers remain durable and visually appealing. Let’s discover how to keep your pavers in excellent condition through proper brick paver restoration.
Table of Contents
What is Brick Paver Restoration?
Brick paver restoration is all about bringing your tired, worn-out pavers back to life. You know, those brick pavers are a top pick for driveways, patios, and walkways because of their gorgeous looks and long-lasting nature. But, just like anything else, they face the brunt of weather, foot traffic, and time. So, when we talk about restoration, it’s the whole shebang to keep them looking sharp and functioning right.
Why Restore Brick Pavers?
Restoring your brick pavers isn’t just a cosmetic fix—it’s essential care that keeps them in prime condition. Think about this: restoration doesn’t just pump up their looks; it prevents big problems before they start. By tackling restoration head-on, you’re helping to stop structural issues that can turn costly. Plus, it revamps their appearance, making them pop like new, and stretches their lifespan, so you’re not shelling out for new pavers anytime soon. It’s a win-win! When you keep up with maintenance, you’re actually saving money in the long run by avoiding major repairs.
Signs Your Brick Pavers Need Restoration
Spotting when your brick pavers need some love is key to keeping them in great shape. Here’s what to keep an eye out for:
- Fading Color: Sunlight and weather can dull the vibrant colors of your pavers. If they start looking a bit lifeless, it’s a clear sign they need a refresh to bring back that rich, original hue.
- Weed Growth: No one likes weeds crashing the party. If you see these uninvited guests sprouting between your pavers, it’s a sign that the joint sand is wearing away, leaving room for weeds to grow. Restoring the joints and re-sanding can kick those weeds to the curb.
- Loose or Unstable Pavers: This is a biggie. If pavers begin to move or feel wobbly underfoot, it’s not just a trip hazard—it’s a sign that the base might be eroding or wasn’t compacted properly in the first place. Securing these pavers back in place is crucial for safety and for the integrity of your paved area.
Catching these issues early can make the difference between a simple weekend project and a major overhaul. Regular checks and quick action keep your brick pavers looking sharp and structurally sound, ready to handle whatever comes their way. So, let’s keep them in top shape together!
Preparing for Restoration
Getting ready for a brick paver restoration isn’t just about jumping straight into fixing things; it’s about setting the stage for a smooth process. Proper preparation is absolutely key to a successful restoration, ensuring that every step that follows is on point.
1. Cleaning the Surface
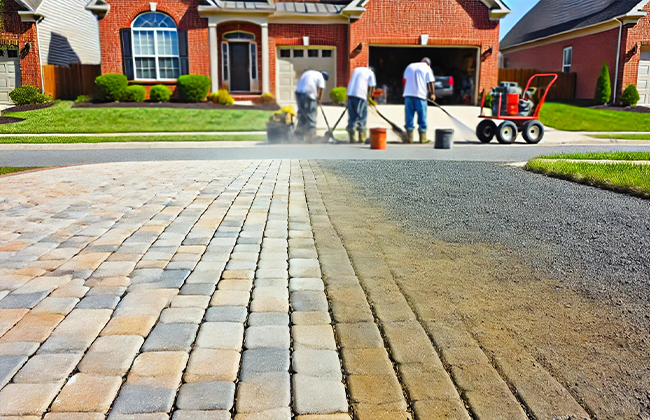
First things first, let’s clean up! Kick off by removing any debris like leaves, dirt, or trash from the surface of your pavers. Once the area is clear, it’s time to bring out the big guns—a pressure washer. This powerful tool will wash away grime, moss, and stains that have built up over time. It’s like giving your pavers a deep clean that preps them for the nitty-gritty work of restoration. Remember, a clean surface ensures that any treatments you apply later, like sand or sealant, adhere properly and last longer.
2. Assessing Damage
With a clean slate, you can see clearly what you’re dealing with. Now, take a close look and inspect for any damaged or sunken pavers. These trouble spots can be tripping hazards and may cause water to pool, leading to further damage if not addressed. Identify pavers that are cracked, chipped, or uneven. These will need to be either replaced or reset to ensure your surface is safe and looks uniformly appealing. This step isn’t just about aesthetics; it’s about making sure your restoration work is durable and your outdoor space remains functional and fabulous.
Properly preparing your pavers isn’t just a precaution; it’s a vital part of the restoration process that ensures everything goes smoothly from start to finish. By cleaning thoroughly and assessing for damage carefully, you’re setting up for a restoration that’s not only effective but also lasting. Let’s get those pavers prepped and ready to shine!
The Restoration Process
Diving into the restoration process is where the magic happens. Taking a step-by-step approach not only ensures that you cover all bases, but it also makes sure that the restoration is thorough and effective. Let’s break it down:
1. Replacing Damaged Pavers
First up, dealing with the damaged pavers. This is crucial because, let’s face it, no one likes a patchy patio or a driveway dotted with cracks. Start by carefully removing the damaged pavers. You might need to use a chisel and a hammer to lift them without disturbing the surrounding pavers. Once they’re out, it’s time to replace them with new ones that match the existing pavers in color and texture. This might sound like a puzzle, but getting it right means your surface will look seamlessly beautiful. It’s like giving your outdoor space a fresh lease on life!
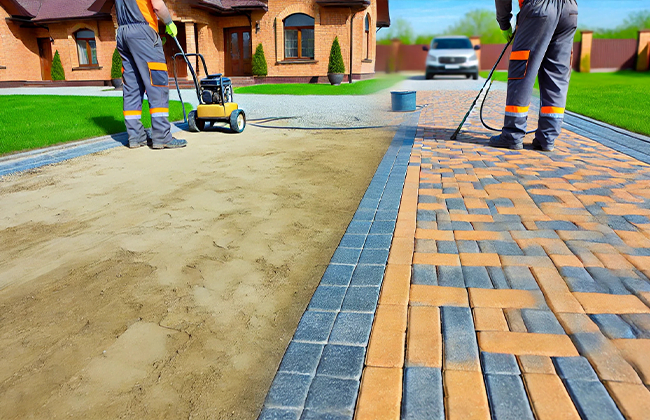
2. Sand Filling
Next, we’ve got the sand filling. This is not just any sand; we’re talking about polymeric sand. Why polymeric sand, you ask? Well, it’s pretty fantastic because when it sets, it forms a firm bond that locks the pavers together, reducing the chances of them shifting. Plus, it helps prevent weeds from sneaking through the cracks. Simply pour the sand over your pavers and sweep it into the gaps. Then, gently spray water over it to activate the binding agent. As it dries, it creates a strong, stable base that keeps everything tight and tidy.
3. Sealing the Pavers
Lastly, let’s not forget sealing the pavers. This is the final touch that not only protects your pavers from the elements—like rain, sun, and snow—but also enhances their color, making them pop! Choose a sealant that’s right for your type of paver and your climate. Apply it evenly with a sprayer or a roller, ensuring every nook and cranny is covered. This seal not only extends the life of your pavers but also reduces maintenance needs by keeping stains and weather damage at bay.
Following these detailed steps in the restoration process will not only revive your pavers but also protect them for years to come. It’s about taking the time to do it right, so you can sit back and enjoy your beautiful outdoor space without worries. Let’s get those pavers looking like new again!
Maintaining Restored Brick Pavers
Once your brick pavers are beautifully restored, keeping them that way is all about regular maintenance. It’s not just about preserving their look; it’s about ensuring they last as long as possible in top-notch condition. Let’s walk through what this maintenance involves:
Routine Cleaning
Keeping your pavers clean is simpler than it sounds, but it makes a huge difference. Regular sweeping is your first line of defense, removing leaves, dirt, and debris that can stain or scratch the surface over time. Also, every few weeks, give your pavers a good wash with a hose or a gentle pressure washer. This not only keeps them looking fresh but also prevents the buildup of grime that can lead to more sinister issues like moss or algae growth, especially in damp, shady areas.
Periodic Re-sealing
Sealing your pavers isn’t a one-and-done deal; think of it as part of their ongoing care routine. Every two to three years, plan to re-seal your pavers. This timeline can vary based on your climate and the amount of traffic they get. Re-sealing not only refreshes their look, making them pop like they’re brand new, but it also renews their resistance to weather, stains, and wear. It’s like renewing a protective shield that keeps them safe from the elements.
By incorporating these simple steps into your regular home maintenance schedule, you ensure that your brick pavers will continue to look great and function perfectly for years to come. Regular cleaning and periodic re-sealing are easy ways to protect your investment and keep your outdoor spaces inviting and impressive. So, grab that broom and sealer, and let’s keep those pavers pristine!
Conclusion:
Having explored brick paver restoration thoroughly, it’s evident that regular upkeep extends far beyond aesthetic improvements—it ensures longevity and functionality. If you need expert help with your brick paver restoration, consider reaching out to a professional. For skilled services in brick paver restoration, please contact (+1) 917-355-8556 to transform your outdoor areas effectively.
FAQs:
Q: What is the best time of year for brick paver restoration?
A: The best time for brick paver restoration typically depends on your climate, but generally, spring or early fall are ideal. These seasons provide mild weather that is perfect for the setting and curing processes involved in brick paver restoration.
Q: How can I prevent weeds from growing between my restored brick pavers?
A: Preventing weed growth is a crucial aspect of maintaining your brick paver restoration. Applying a layer of polymeric sand during the restoration process can block out spaces where weeds might sprout, keeping your pavers neat and clean.
Q: What are the signs that my brick pavers need restoration?
A: Key signs indicating the need for brick paver restoration include noticeable fading of color, the presence of weeds or moss between the joints, and loose or uneven pavers that affect the overall stability and appearance of your pathway or patio.
Q: How often should brick paver restoration be performed?
A: The frequency of brick paver restoration depends on several factors like traffic, weather exposure, and previous maintenance. However, it is generally recommended to assess and potentially restore your pavers every 2 to 3 years.
Q: Can DIY brick paver restoration be as effective as professional services?
A: While DIY brick paver restoration can be effective for minor repairs and maintenance, professional services are recommended for more comprehensive needs. Experts have the tools, materials, and experience to ensure your restoration lasts and protects your investment.