Building a brick wall is a valuable skill that enhances both the aesthetics and functionality of any space. Whether you’re looking to construct a boundary wall, a garden feature, or add a rustic touch to your interiors, understanding how to build a brick wall can greatly contribute to your DIY projects. With the right materials, tools, and technique, you can create a durable and attractive brick wall that stands the test of time.
Table of Contents
What You Need to Know Before Starting
Building a brick wall requires preparation. Here are the initial steps:
Choose the Right Bricks
Selecting the appropriate bricks for your project is crucial. Consider the climate of your location. For example, if you live in a wet climate, you should opt for water-resistant bricks to avoid moisture damage. Furthermore, consider the structural needs of your wall; if it’s load-bearing, you’ll need stronger bricks, typically made of clay. There are several types of bricks to choose from:
- Burnt clay bricks, which are durable and suitable for general work but require plastering or rendering.
- Sand lime bricks, known for their uniform shape and smooth finish, making them a good choice for exposed surfaces.
- Engineering bricks, which have high compressive strength and are used in specific structural and damp-proof courses.
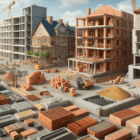
Prepare the Foundation
A strong foundation is vital for the longevity and stability of your wall. Here’s how you can ensure your foundation is well-prepared:
- Measure and Mark: First, determine the length and position of your future wall. Use stakes and string to mark the area.
- Dig the Trench: The depth and width of the trench will depend on the height and thickness of the wall. As a rule of thumb, dig a trench about 12 to 16 inches wide and 6 to 8 inches deep.
- Pour the Foundation: Fill the trench with a layer of gravel for drainage and then pour concrete to create a solid base. Ensure the concrete is level and give it time to cure fully, which can take up to a week.
Gather Your Tools
Having the right tools at hand can make the building process smoother and more efficient. Here’s what you’ll typically need:
- Trowel: Used for applying and spreading mortar.
- Spirit Level: Essential for checking the horizontality and verticality of the bricks.
- Hammer and Chisel: For sizing bricks as per the requirements.
- Mortar Mix: Select a mortar mix that suits the type of bricks and the environmental conditions.
- Measuring Tape: For precise measurements and ensuring the wall is built to the right dimensions.
- Safety Gear: Safety glasses to protect your eyes from dust, gloves to protect your hands from sharp edges and cement burns, and a dust mask, especially if you’re cutting bricks.
By taking these preparatory steps seriously, you ensure that the process of building your brick wall goes smoothly and results in a structure that’s both attractive and durable. Remember, the quality of your preparation work will greatly influence the final outcome.
Step-by-Step Guide to Building a Brick Wall
Building a brick wall may seem complex, but breaking it down into manageable steps can simplify the process. Whether you’re crafting a garden border or adding a decorative feature to your home, following these steps will ensure your wall is both durable and attractive. Let’s walk through each phase of the construction:
Step 1: Lay the First Brick
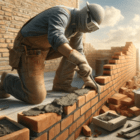
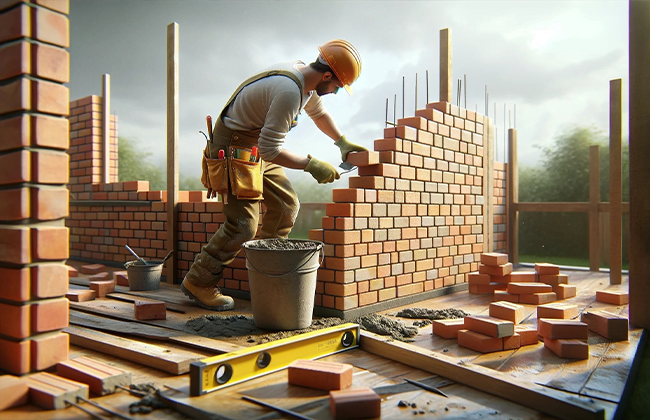
The foundation of your project starts here. Prepare your mortar mix to the right consistency—usually a combination of cement, sand, and water. Spread a layer of mortar along the base where your wall will begin. Place the first brick firmly into the mortar, making sure it’s perfectly level. This brick will set the line and level for every brick that follows, so take your time to get it right.
Step 2: Check Alignment
Once the first brick is placed, it’s vital to ensure it is precisely aligned. Using a spirit level, check both the horizontal and vertical alignment of the brick. If adjustments are needed, gently tap the brick with the handle of your trowel. This step is crucial to ensure your wall is straight and stable as you build upwards.
Step 3: Continue Building the Wall
Now, continue building the wall by applying mortar to the end of each brick before setting it next to the last. Ensure each layer is level, and stagger the joints to enhance the wall’s stability and appearance. Regularly step back to view the wall from various angles, ensuring everything looks aligned and straight.
Step 4: Use Metal Ties for Walls Over One Brick Thick
For thicker walls, integrating metal ties every few rows is essential. These ties will help bind the layers of bricks together, providing additional stability and preventing shifting or separation over time. This is particularly important for structural walls or those that support weight.
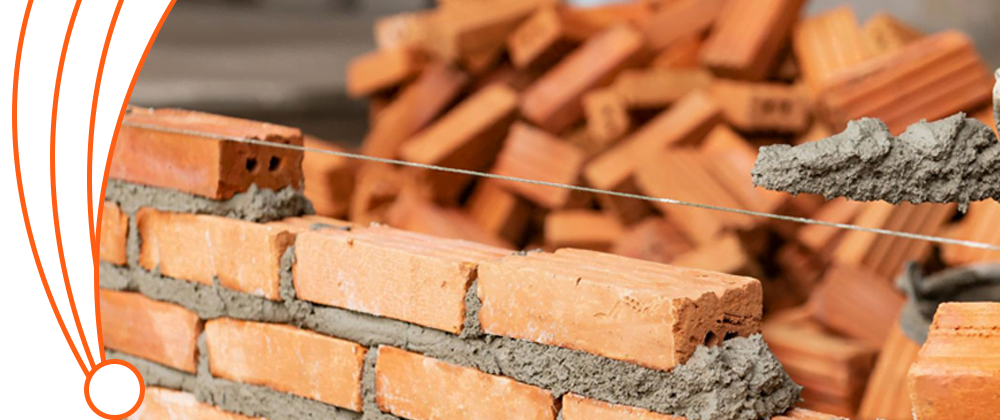
Step 5: Finish with Mortar Joints
Completing your wall involves more than just laying bricks—you also need to finish the joints neatly. Once all bricks are in place, fill any gaps with mortar and use a jointing tool to smooth and seal the joints. This not only improves the wall’s aesthetic but also protects it from the elements by ensuring it is watertight.
By following these detailed steps, you’ll be well on your way to constructing a solid and visually pleasing brick wall. Each step builds on the previous one, reinforcing the structure as you progress and ensuring lasting results.
Maintaining Your Brick Wall
Proper maintenance is crucial to extend the life of your brick wall and ensure it continues to enhance the beauty and functionality of your property. Here’s a detailed look at how to keep your wall in top condition:
Inspect Regularly
Regular inspections are key to catching issues before they become major problems. At least twice a year, ideally during spring and fall, take a close look at your brick wall. Here’s what to focus on:
- Check for Cracks: Small cracks can develop into larger issues if water seeps in and freezes.
- Look for Loose Bricks: These can be signs of foundational issues or mortar failure.
- Mortar Erosion: Over time, mortar may erode. This is normal but needs addressing to prevent moisture penetration and brick displacement.
Cleaning Your Wall
Keeping your brick wall clean not only maintains its appearance but also prevents decay. Use a soft brush and soapy water to gently clean the bricks. Avoid using harsh chemicals or pressure washers, as these can damage the bricks and mortar.
Repointing
Repointing is the process of renewing the external part of mortar joints. Over time, weathering and decay cause voids in the joints between bricks, which allow water to enter, potentially causing serious damage. Here’s a simple guide to when and how to repoint:
- Identify the Need: If the mortar is crumbling or has receded by 6mm or more, it’s time to repoint.
- Choose the Right Mortar: The new mortar should match the existing one in color, consistency, and strength.
- Careful Removal: Remove the old mortar carefully, without damaging the bricks.
- Apply New Mortar: Fill the joints with new mortar and ensure it’s compacted and shaped to match the original style.
Protective Treatments
Consider applying a silicone-based sealant to the wall to help repel water. This is especially beneficial in climates with heavy rain or freeze-thaw cycles.
Brick Wall Maintenance Schedule
Here’s a handy table to help you keep track of maintenance activities:
| Activity | Frequency | Details |
| Inspection | Bi-annually | Spring and fall inspections for damage assessment. |
| Cleaning | Annually | Mild soapy water and a soft brush. |
| Repointing | As needed | When mortar recedes more than 6mm. |
| Protective Seal | Every 5-10 years | Apply a water-repellent sealant based on exposure. |
By following these maintenance steps, you’ll ensure that your brick wall remains strong and visually appealing for years to come. Regular care prevents minor issues from becoming extensive and costly, thereby protecting your investment.
Conclusion
Knowing how to build a brick wall can significantly boost your home improvement skills and property value. If you’re seeking professional assistance for brick wall repair, don’t hesitate to contact us at (+1) 917-355-8556. Our experts are ready to help you ensure your brick wall is built to perfection and lasts for years.
FAQs
Q: What materials do I need to build a brick wall?
A: To build a brick wall, you’ll need bricks, mortar, a trowel, a level, a hammer, a chisel, and safety equipment. Ensure you have all these materials ready before you start your project.
Q: How do I ensure my brick wall is level?
A: Use a spirit level to check the alignment of each brick as you lay them. Consistently checking will help maintain a straight and level brick wall, ensuring structural integrity and aesthetic alignment.
Q: What is the best mortar mix for a brick wall?
A: A good mortar mix for a brick wall typically consists of one part cement to four parts sand. This mixture provides a strong bond that holds the bricks securely in place.
Q: How often should I perform maintenance on my brick wall?
A: Inspect your brick wall at least twice a year to ensure it remains in good condition. Look for any signs of mortar erosion or loose bricks, and address these issues promptly to maintain the wall’s durability.
Q: Can I build a brick wall in any weather?
A: Building a brick wall in extremely cold or wet weather is not advisable. Optimal conditions are dry and mild; otherwise, the mortar may not set properly, compromising the wall’s strength.