Are you looking at those cracks in your old brickwork and wondering how to fix them? Repairing old brick can seem daunting, but with the right approach, it’s entirely manageable. In this detailed guide, we’ll dive into everything you need to know about how to repair old brick, from selecting the proper materials to applying the finishing touches. Whether it’s restoring the charm of a historic building or simply fixing a garden wall, this guide has got you covered.
Table of Contents
Getting to Know Your Old Brickwork
Ever wondered what stories your old bricks could tell if they talked?
Well, they may not chat, but their history and the common issues they face can speak volumes about the care they need. Let’s dive into what makes your old brickwork special and what to watch out for.
The History and Types of Old Brick
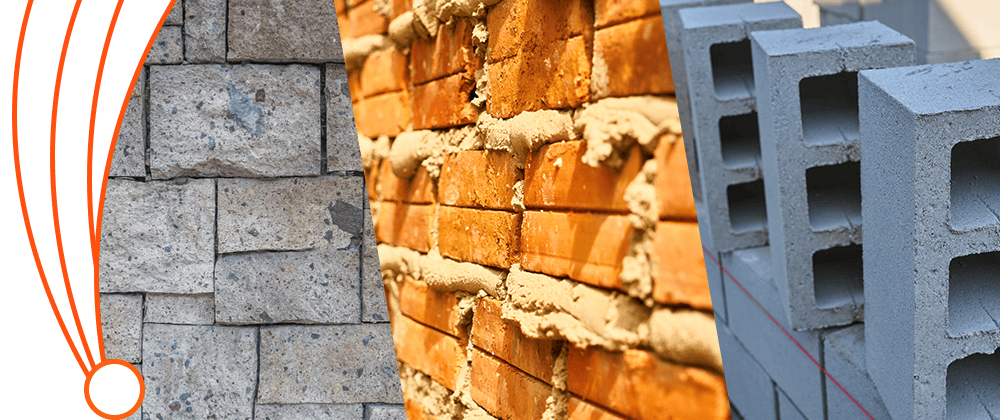
Old brick isn’t just a building material; it’s a piece of history. From the hand-made clay bricks of colonial times to the industrial era’s mass-produced versions, each has its own character and quirks. Here’s a quick look at some common types you might encounter:
- Sand-Lime Bricks: Made by mixing sand, lime, and water, these are known for their smooth finish and uniform color.
- Engineering Bricks: Known for their high strength and low water absorption, these are typically used in civil engineering projects.
- Clinker Bricks: These bricks are over-fired in the kiln, giving them a dense, irregular, and often distorted shape that is highly durable.
These bricks were fired in kilns at various temperatures, which affects their density, color, and durability. Knowing the type of bricks you have can significantly influence how you approach their repair.
Common Issues with Aging Brick
Like anything with a bit of age, old bricks have their set of common issues. Over the years, exposure to harsh weather, settling foundations, and natural wear and tear can lead to problems like cracking, spalling, or even mortar erosion. Recognizing these issues early can be the difference between a simple repair job and a major overhaul.
Cracks in your bricks can be superficial or deep structural problems. Spalling, where the face of the brick starts to flake off, often results from water damage or freeze-thaw cycles. Mortar erosion, on the other hand, happens over time and might make your bricks loose.
Wrapping up, getting a good grasp of your brickwork’s history and current state sets you up perfectly to dive into assessing the damage further. How deep are those cracks?
Are those bricks loose because of eroded mortar, or is there something more?
We’ll need to take a closer look to decide on the best repair methods. Let’s gear up and assess the damage in the next section, shall we?
Assessing the Damage
Now that you’re familiar with your old brickwork’s backstory, it’s time to roll up your sleeves and assess the damage closely. Understanding the extent of damage will guide your next steps—whether a simple fix will do or you’re looking at a full-blown replacement project. Let’s break down how to evaluate your brickwork effectively and decide on the best course of action.
Tools and Techniques for Evaluating Brickwork
First things first, you’ll need the right tools to get a clear picture of what you’re dealing with. Grab a sturdy ladder, a flashlight, and perhaps a small chisel and hammer. You’re not just looking at the surface; you’re playing detective:
- Visual Inspection: Start with a thorough visual inspection from top to bottom. Look for visible signs of damage such as cracks, crumbling mortar, or discolored bricks that might indicate moisture issues.
- Tap Test: Gently tap on various bricks with the handle of your screwdriver. Hollow sounds can indicate internal damage or voids behind the brick.
- Moisture Meter: Use a moisture meter to detect any water absorption issues. Excessive moisture can weaken brick and mortar over time.
Identifying Repair vs. Replace Scenarios
As you assess, you’ll encounter scenarios where you might wonder if a repair is sufficient or if replacement is unavoidable. Here’s how to make that call:
- Repair: Minor cracks, slight discoloration, and small areas of eroded mortar usually fall under repairable damage. These issues often require some repointing or patching.
- Replace: When you see large cracks that compromise structural integrity, bricks that are extensively spalled, or widespread damage, it’s time to consider replacement. This is especially true if the damage affects more than just aesthetics but also the structure’s stability.
Understanding the damage extent helps ensure you gather the appropriate materials and plan the repair. Speaking of materials, in the next section, we’ll cover everything you need to have on hand for brick repairs—whether you’re filling in a few cracks or replacing a section of the wall. Let’s get the right tools and materials ready for a successful restoration!
Transform your home with expert masonry services. Contact us today for a free consultation.
Materials Needed for Brick Repair
Alright, you’ve assessed the damage and have a clear idea of what needs fixing. Now, it’s time to gather all the materials you’ll need to get the job done right. Whether it’s a quick touch-up or a more extensive repair, having the right materials at hand is crucial. Let’s break down the essentials, from the types of mortar to the tools that will make your work smoother.
Types of Mortar and Tools
Choosing the right mortar and tools is like picking the best ingredients for a recipe—it can make or break your project:
Mortar Types:
- Type N: A reliable choice for general applications, offering a good balance of strength and flexibility.
- Type S: Opt for this when dealing with lower sections of walls or areas requiring higher strength due to its ability to withstand soil pressures and wind.
- Lime Mortar: Best for historic brick repair as it provides flexibility and breathability, which helps prevent trapped moisture that can further damage old bricks.
Tools:
- Trowel: Essential for applying and smoothing mortar.
- Jointer: Use this to achieve a professional finish on the mortar joints.
- Masonry Brush: Great for cleaning off excess mortar and dust.
- Chisel and Hammer: Needed for removing damaged mortar and bricks carefully.
- Mixing Drill and Paddle: A must-have for mixing mortar to the right consistency.
Matching Mortar and Brick Color
Getting a perfect match isn’t just about aesthetics; it’s about integrity:
- Color Matching: Use a pre-mixed mortar colorant or custom-mix your own to match the existing mortar. This ensures the repair blends seamlessly with the original work.
- Brick Selection: If replacement bricks are needed, try to source them from the same batch or manufacturer to avoid noticeable differences. For older or historic buildings, you might need to look for reclaimed bricks that match the era and wear of the existing structure.
With your mortar mixed and tools ready, you’re all set to start the actual repair work. Let’s move on to the step-by-step repair process next, where you’ll apply what you’ve gathered to restore your brickwork beautifully and effectively. Hang in there; we’re about to get our hands dirty and make those old bricks look new again!
Step-by-Step Repair Process
Now that you’ve got all your materials lined up, let’s tackle the repair process. I’ll walk you through each step to ensure your old brickwork not only looks great but also stands the test of time. We’re talking about a job well done, where every brick fits perfectly and every mortar line is just right.
Removing Damaged Bricks
First off, we need to clear the damaged area:
- Identify and Mark: Carefully inspect which bricks are damaged beyond repair. Use chalk to mark them, making your job easier when you start the physical removal.
- Cutting Out Damaged Bricks: Using your chisel and hammer, gently tap around the marked bricks to loosen them. Take it slow—rushing could damage the good bricks you want to keep.
- Cleaning the Area: Once the bricks are out, clean up the cavity. Remove all the old mortar and debris to ensure a clean bonding surface for the new mortar.
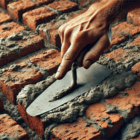
Mixing and Applying Mortar
Next, let’s mix up some mortar and get it just right:
- Mixing: Follow the mortar manufacturer’s instructions to get the consistency spot on. It should be firm enough to hold its shape but moist enough to apply easily.
- Applying Mortar: Start by applying a layer of mortar to the cleaned area. Press the mortar firmly into the joints with a trowel. This is crucial for creating a strong foundation for the new or reused bricks.
Techniques for Seamless Integration
Finally, making sure the new repairs blend in seamlessly:
- Laying the Bricks: Place your new or cleaned bricks into the mortar, pressing them firmly and making sure they’re level with the surrounding brickwork.
- Tooling the Joints: Once the bricks are in place, use a jointer to shape and compact the mortar joints. This not only strengthens the joint but also helps weatherproof your wall.
- Cleaning as You Go: Keep a masonry brush handy to clean off any excess mortar as you work. This will help keep the new work looking neat and matching the old.
By following these steps, you’ll ensure that your brick repair not only holds up structurally but also looks like it’s always been part of your home. Now that the bricks are in place and looking good, the next step is curing and sealing the mortar to make sure your repair lasts as long as possible. So, let’s keep up the good work and move on to the final touches!
Transform your home with expert masonry services. Contact us today for a free consultation.
Curing and Sealing
Great job on those repairs! Now, let’s make sure that effort lasts by properly curing and sealing your brickwork. This step is crucial for the longevity and effectiveness of the repairs, helping to protect against weather and time. Here’s how to do it right.
Proper Curing Times and Conditions
Curing the mortar is not just about waiting; it’s about ensuring the right conditions so it gains strength optimally:
- Temperature and Humidity: Mortar cures best at temperatures between 50°F and 90°F with moderate humidity. If it’s too cold, the curing process slows down; if it’s too hot, the mortar can dry too quickly and weaken.
- Timing: Typically, mortar needs about 24 to 48 hours to set initially. However, full strength curing can take as long as 28 days. During this time, try to keep the new mortar damp with occasional light misting, especially in dry conditions.
Best Practices for Sealing and Protection
After the mortar has cured, sealing the brickwork can further protect it from elements and extend its life:
- Choosing the Right Sealant: Use a breathable sealant that allows moisture to escape from the bricks. This prevents trapped moisture, which can lead to spalling and other damage over time.
- Application: Apply the sealant according to the manufacturer’s directions. Typically, you’d use a sprayer for even coverage, making sure to cover all the new and surrounding areas.
- Frequency: Sealing isn’t a one-time job. Reapply every few years or according to the exposure conditions and the product’s durability. This keeps your brickwork looking fresh and well protected.
With your brickwork now cured and sealed, you’ve set yourself up for fewer headaches down the road. But don’t just sit back yet—regular maintenance is key to avoiding future repairs. Up next, let’s talk about some preventive measures and maintenance tips to keep those bricks in top shape for years to come!
Preventive Measures and Maintenance
Now that your brickwork is looking sharp and well-protected, let’s talk about keeping it that way. Regular maintenance isn’t just about aesthetics; it’s a crucial part of ensuring your repair work doesn’t go to waste. Here are some tips and tricks to help you keep those bricks in the best possible condition.
Regular Maintenance Tips
Maintaining brickwork is all about regular checks and balances:
- Visual Inspections: At least twice a year, do a thorough visual inspection of your brickwork. Look for signs of damage like cracks or loose mortar and address them before they become bigger issues.
- Cleaning: Keep your bricks clean from dirt, debris, and biological growth such as moss or algae, which can retain moisture and cause damage. Use a soft brush and, if necessary, a mild detergent solution to gently clean the bricks. Avoid power washing, which can be too harsh and erode the mortar.
- Weep Holes and Vents: Make sure any weep holes or ventilation bricks are clear of blockages. This ensures proper air circulation and moisture escape, preventing damp issues internally.
How to Prevent Future Damage
Prevention is always better than cure, especially when it comes to brickwork:
- Address Moisture Issues: Make sure your property’s drainage systems are in good working order. Proper guttering and downspouts will direct water away from brick walls, preventing potential water damage.
- Tree and Plant Management: Keep an eye on tree roots and plant growth near your brickwork. Over time, roots can disrupt foundations and walls, while vines can retain moisture against the brick surface.
- Seasonal Preparations: Before winter, check the integrity of the mortar. Freeze-thaw cycles can be brutal on compromised mortar, leading to faster deterioration.
By sticking to these maintenance and prevention strategies, you can extend the life of your brickwork significantly. Keep these practices in mind, and you won’t just maintain the aesthetic appeal of your property; you’ll also uphold its structural integrity. Now, let’s see how these efforts play out in real life with some case studies in the next section, shall we?
Case Studies
Diving into real-life scenarios helps us see how our maintenance and repair strategies stand up under real-world conditions. Here are a couple of case studies that illustrate the impact of proper brick repair and preventive measures, showcasing both the challenges encountered and the lessons learned.
Before and After Scenarios
Case Study 1: Residential Brick Wall Repair
- Before: The homeowner noticed significant mortar erosion and several cracked bricks on the exterior wall, primarily caused by poor drainage and heavy rain exposure.
- Repair Process: The damaged mortar was carefully removed, and the cracks were cleaned out. New mortar was color-matched and applied, and cracked bricks were replaced with similar vintage bricks to maintain the aesthetic.
- After: The wall not only regained its structural integrity but also its original look, blending seamlessly with the undamaged sections.
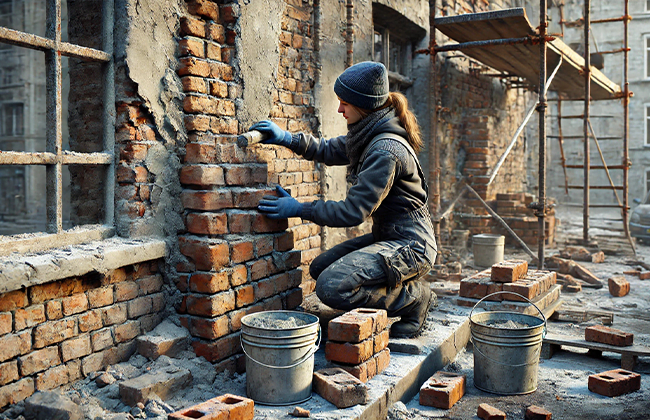
Case Study 2: Historic Building Restoration
- Before: A historic building showcased extensive damage due to age, moisture penetration, and previous inadequate repairs using non-breathable cement mortar.
- Repair Process: Old cement mortar was replaced with a lime-based mortar appropriate for historical restoration, ensuring breathability and flexibility. Damaged bricks were carefully sourced to match the historical era.
- After: The restoration preserved the building’s historical significance and enhanced its resistance to future environmental stresses.
Lessons Learned from Real Repairs
Lesson 1: Always Choose the Right Materials
From these case studies, it’s clear that using materials that match the original specifications of the building is crucial. Incorrect materials can not only detract from the look of the building but also cause further damage down the line.
Lesson 2: Prevention is Key
Regular inspections and maintenance emerged as a common theme. Addressing issues early, such as improving drainage or removing harmful vegetation, can prevent minor issues from becoming major headaches.
Lesson 3: Expert Advice Matters
Especially in the case of the historic building, consulting with specialists who understand the nuances of historical materials was invaluable. Their insights ensured that the repairs were both appropriate and effective.
These case studies remind us that while the challenges may vary, the principles of careful assessment, appropriate material selection, and regular maintenance hold true across the board. Keeping these lessons in mind, let’s review some common mistakes to avoid to ensure your brickwork stays in top condition for years to come.
Transform your home with expert masonry services. Contact us today for a free consultation.
Common Mistakes to Avoid
Now that we’ve seen how things can go right with proper brick repair, let’s talk about a few pitfalls that can make them go wrong. Here are some common mistakes to watch out for, ensuring your brickwork repairs don’t fall short of expectations. Remember, it’s often the little things that make a big difference.
Overlooking Foundational Issues
One of the most significant missteps is ignoring the underlying issues that might be causing damage to your brickwork:
- Structural Integrity: Always check the foundation and structural support before starting any repair. Issues like a shifting foundation can cause recurring cracks and damage, no matter how well you repair the surface.
- Drainage Problems: Poor drainage can lead to water accumulating around your brickwork, exacerbating issues like spalling and efflorescence. Make sure gutters, downspouts, and landscaping do not direct water towards your building.
Incorrect Material Choices
Using the wrong materials can do more harm than good, and unfortunately, it’s a common trap:
- Mortar Match: Not all mortar is created equal. Using a mortar that’s too hard compared to the bricks can cause the bricks to crack under stress. Conversely, a mortar that’s too soft won’t provide enough support and protection.
- Historical Accuracy: For historical buildings, using modern materials can not only detract from the authenticity of the structure but also potentially violate local preservation laws. Always opt for materials that are in line with the period and style of the building.
By avoiding these common mistakes, you ensure a more successful and durable repair. Whether it’s taking the extra time to assess the underlying structure or choosing the correct materials for the job, a little extra care goes a long way. Keeping these tips in mind, you’re well on your way to maintaining and restoring your brickwork effectively, preserving both its beauty and integrity for years to come.
Conclusion
Throughout this guide, we’ve covered the ins and outs of how to repair old brick effectively. By understanding the materials, mastering the techniques, and learning from real-life case studies, you’re now equipped to tackle brick repairs with confidence. If you’re looking for professional assistance to repair old brick, don’t hesitate to reach out. Contact us at (+1) 917-355-8556 for expert help.
FAQs
Q: What tools do I need to repair old brick?
A: To repair old brick, you’ll need a chisel, hammer, trowel, mortar mix, and a stiff brush. These tools help remove damaged bricks and apply new mortar accurately.
Q: How do I choose the right mortar to repair old brick?
A: Selecting the right mortar depends on the type of brick and the repair’s location. For most repairs, Type N mortar is suitable unless the structural demands suggest otherwise.
Q: Can I repair old bricks myself or should I call a professional?
A: Simple repairs like small cracks or repointing can be DIY projects if you’re handy. For extensive damage or historical structures, it’s wise to consult a professional.
Q: How long does it take to repair old brick?
A: The time to repair old bricks can vary. Minor fixes might take a few hours, while larger repairs could need several days, depending on the damage extent and curing time.
Q: What are the signs that old brick needs repair?
A: Key signs include cracking, loose bricks, deteriorating mortar, and moisture issues. Address these early to prevent more significant problems.
Q: Can old brick be restored?
A: Yes, old brick can often be restored if the damage isn’t too severe. Proper cleaning, repointing, and replacing damaged bricks can significantly revive old brickwork.
Q: Can crumbling bricks be repaired?
A: Crumbling bricks can be repaired by removing the damaged portions and replacing them with new bricks, or by filling in the gaps with a suitable mortar mix.
Q: Will new mortar stick to old mortar?
A: New mortar can adhere to old mortar if the old surface is properly prepared. This involves cleaning out loose and deteriorated mortar to provide a solid base for the new mortar.
Q: Can you repair a damaged brick face?
A: Yes, a damaged brick face can be repaired either by patching with a mortar mix designed to match the brick or, in more severe cases, by replacing the entire brick.
Q: How to repair an old brick wall?
A: Repairing an old brick wall involves removing damaged bricks, cleaning the area, and filling it with new mortar and bricks. Ensure the new mortar matches the old in composition and color for durability and aesthetics.
Transform your home with expert masonry services. Contact us today for a free consultation.