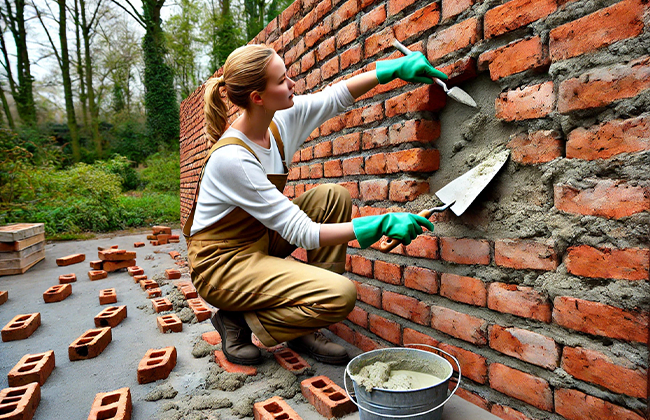
Repair mortar joints effectively to maintain the structural integrity and appearance of your masonry. This guide covers essential techniques and materials necessary for proper maintenance. Whether you’re tackling small cracks or extensive refurbishments, understanding how to repair mortar joints is crucial for any homeowner or construction professional.
Table of Contents
What Are Mortar Joints?
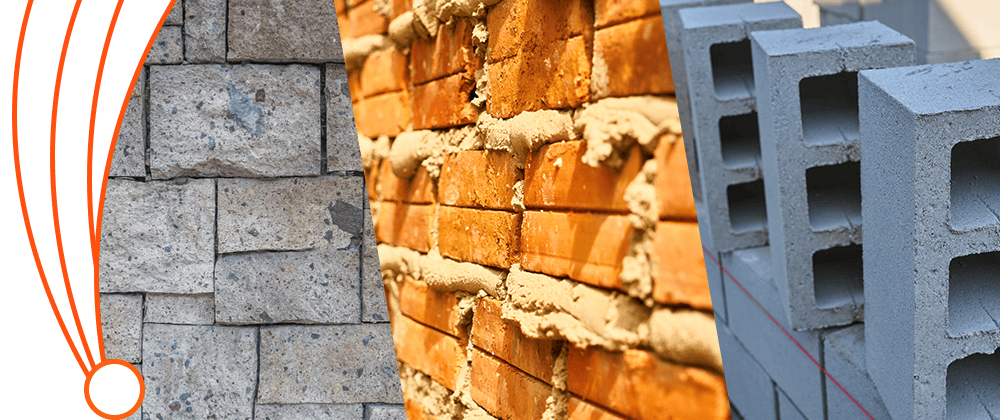
Mortar joints are the lines of mortar that you see between the individual bricks, stones, or other masonry units in constructions. They are crucial for bonding the masonry units together, which helps in distributing the weight evenly across the structure and providing overall structural stability. Without properly maintained mortar joints, the integrity of a building might be compromised, leading to safety hazards.
In masonry construction, mortar joints vary in type and size, which can influence the appearance and functionality of the wall or structure. Some common types of mortar joints include:
- Concave: These are the most common types of mortar joints, which involve indenting the mortar in a concave fashion using a jointing tool. The concave shape helps in repelling water and is known for its durability.
- V-joint: This type has a sharp inward angle. It is less common but can be used for decorative effects and also provides good water runoff.
- Struck: This type of joint has a horizontal ridge and is struck off flush to the top of the bricks but recessed at the bottom. This styling is more common in older or historical buildings and requires careful maintenance to keep water from seeping behind the brick.
Each type of joint requires different techniques and considerations for repair. Understanding these can help in diagnosing issues early and effectively addressing them before they lead to more significant damage. Properly repairing and maintaining these mortar joints not only extends the lifespan of the masonry but also preserves its aesthetic value and structural soundness.
Now, let’s transition into identifying when these mortar joints might need some attention or repair. Recognizing the early signs of wear and damage can save both time and resources in the long run.
Signs That Mortar Joints Need Repair
Identifying when your mortar joints need repair is key to maintaining the longevity and safety of your masonry work. Regular checks can help catch issues before they escalate into more significant problems, potentially saving you from costly repairs in the future. Here’s what to look out for:
- Cracking or Crumbling Mortar: This is one of the most common signs. Mortar may crack or crumble due to weather exposure, temperature fluctuations, or just natural aging. When you notice cracks or the mortar turning powdery, it’s a clear indicator that the joints need to be repaired to restore the integrity of the structure.
- Loose Bricks or Stones: If the bricks or stones in your masonry are moving or can be wiggled, it means the mortar has weakened and is no longer holding the masonry units securely. This not only compromises the structural stability but can also lead to water infiltration and further damage if not addressed promptly.
- Water Infiltration Signs in the Interior Walls: If you see signs of moisture, dampness, or water stains on interior walls, it might suggest that the exterior mortar joints are allowing water to seep through. This infiltration can cause damage not only to the aesthetic elements of the walls but also to the structural components of the building.
Recognizing these signs early and taking action can prevent more extensive damage and ensure that your structure remains strong and appealing. Once these signs are noticed, gathering the right tools and materials is the next step towards effective repair.
With these points in mind, look at what you’ll need to start making repairs to ensure you’re fully prepared to handle the job effectively.
Transform your home with expert masonry services. Contact us today for a free consultation.
Tools and Materials Needed for Repairing Mortar Joints
Before you dive into repairing your mortar joints, it’s important to ensure you have the right tools and materials on hand. Preparing everything not only makes the process smoother but also ensures you complete the repairs correctly and safely. Here’s what you’ll need:
- Hammer and Chisel: These are essential for removing the old, damaged mortar. A good-quality chisel and a sturdy hammer will allow you to carefully chisel away the old mortar without damaging the surrounding bricks.
- Mortar Mix: Choosing the right mortar mix is crucial. You should match the new mortar to the existing mortar’s type, color, and composition. This compatibility is important for the structural integrity and aesthetic of the wall.
- Masonry Trowel: This tool is used for applying and smoothing the new mortar. A trowel that fits comfortably in your hand will make the work easier and more precise.
- Joint Raker: Before applying new mortar, you’ll need to clean out the old joints thoroughly. A joint raker is designed to remove debris and old mortar to ensure that the new mortar adheres well.
- Safety Goggles and Gloves: Safety must never be overlooked. Goggles will protect your eyes from flying debris, and gloves will protect your hands from sharp edges and the caustic nature of mortar.
With these tools and materials ready, proceed confidently to the actual repair process, ensuring you execute each step with care and precision. Now, let’s move on to the step-by-step guide on how to repair these mortar joints effectively, so you can restore your structure to its former glory and ensure it stands strong for years to come.
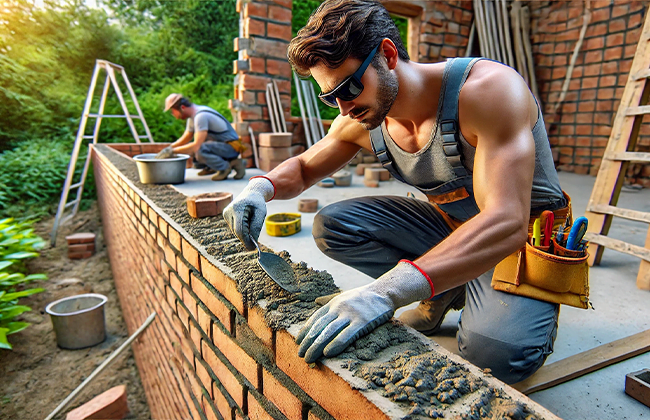
Step-by-Step Guide to Repairing Mortar Joints
Repairing mortar joints is a crucial maintenance task that not only enhances the structural integrity of your masonry but also its aesthetic appeal. Here’s a more detailed breakdown of each step to ensure that your repairs are effective and enduring.
1. Preparing the Area
- Remove Damaged Mortar: Begin by identifying all areas with damaged or deteriorated mortar. Use a hammer and chisel to carefully remove the old mortar. It’s essential to control your force to avoid damaging the surrounding bricks or stones, which can create more work and potential structural issues.
- Clean the Joints: After removing the old mortar, thoroughly clean out the joints. A stiff brush or a joint raker can be used to remove all dust, debris, and remaining fragments. This step is crucial for ensuring that the new mortar adheres properly to the bricks or stones. A clean joint will allow for a stronger bond and a smoother finish.
2. Mixing and Applying the Mortar
- Prepare the Mortar Mix: Accurately mix the new mortar, following the manufacturer’s instructions closely. The mortar should have an ideal consistency for application—neither too wet nor too dry. Achieving the right color and strength to match the existing mortar is critical for the visual and functional integration of the repairs.
- Apply the Mortar: Carefully apply the new mortar into the cleaned joints using a masonry trowel. Make sure to press the mortar deeply into the joints to eliminate any air pockets, which can weaken the joint over time. This step might need to be repeated to fully compact the mortar within the joints, ensuring a solid fill.
- Smooth the Joints: Use a jointer tool to smooth the applied mortar, shaping it to match the existing joint profile. This not only helps in achieving a uniform look but also plays a functional role in directing water away from the brickwork, which prevents future water damage.
3. Curing and Maintenance
- Allow to Cure: Let the mortar cure as specified by the mortar mix, usually for several days. During this time, do not disturb the joints, and keep the temperature stable to allow the mortar to set properly and gain full strength.
- Regular Inspection and Maintenance: Establish a routine to inspect the repaired joints and surrounding areas periodically. Look for signs of cracking, erosion, or loose mortar, which could indicate issues with the original repair or new stress on the structure. Promptly addressing these signs can prevent extensive damage and repair costs in the future.
Follow these detailed steps to effectively repair and rejuvenate your mortar joints, ensuring you restore them to their original condition. Now, let’s move on to some tips that can help you achieve long-lasting results from your repair efforts. These tips will not only improve the durability of your repairs but also enhance the overall resilience of your masonry.
Tips for Achieving Long-Lasting Results
Ensuring that your mortar joint repairs stand the test of time involves more than just filling gaps and smoothing over the surface. Here are some essential tips that can help you achieve durable, long-lasting results in your masonry repair efforts:
1. Choose the Right Type of Mortar:
Selecting the appropriate type of mortar is critical depending on the structural requirements of your building. Mortar types are classified mainly into N, O, S, and M, each offering different strengths and flexibility:
- Type N: A general-purpose mortar with good strength and durability, suitable for above-ground applications.
- Type O: Offers lower strength and is best used for interior non-load-bearing applications.
- Type S: Provides high strength with excellent resistance to soil pressure and wind, making it suitable for foundations, retaining walls, and other load-bearing structures.
- Type M: The strongest option, ideal for structures exposed to severe conditions and heavy loads.
2. Match the Mortar Color to Existing Joints:
For a seamless and professional finish, the color of the new mortar should closely match the existing mortar. This is not only aesthetically pleasing but also prevents the repairs from being overly apparent, maintaining the uniformity of your masonry work. You can achieve this by mixing custom colors or using pre-mixed mortars designed to blend with common mortar colors.
3. Avoid Repairs in Extreme Weather Conditions:
The curing process is vital for ensuring that mortar sets properly and achieves its full strength. Therefore, avoid conducting repairs in extreme weather conditions such as heavy rain, freezing temperatures, or extreme heat. These conditions can adversely affect the curing process, leading to weakened joints that may crack or crumble prematurely.
- Cold Weather: Do not apply mortar if you expect temperatures to drop below 40°F within 24 hours after application.
- Hot Weather: High temperatures can cause the mortar to dry too quickly, leading to poor bonding and reduced strength. It’s advisable to repair during cooler parts of the day, such as early morning or late afternoon.
By following these tips, you ensure not only the immediate effectiveness of your repairs but also their longevity and resilience. Proper preparation, choosing the right materials, and considering environmental conditions play pivotal roles in achieving successful, lasting results in mortar joint repair.
Conclusion
After mastering the techniques shared in this guide to repair mortar joints, you can significantly extend the lifespan and improve the aesthetic of your masonry. If you’re looking for professional assistance to repair mortar joints, ensure high-quality results by contacting skilled contractors. For expert service in your area, don’t hesitate to call (+1) 917-355-8556 and get reliable support tailored to your specific needs.
FAQs
Q: What are the initial signs that indicate the need to repair mortar joints?
A: Early signs requiring you to repair mortar joints include visible cracking, crumbling of the mortar, and moisture penetration. These issues can compromise the structure’s integrity.
Q: How often should I inspect and repair mortar joints in my home?
A: It’s wise to inspect your mortar joints annually. Regular maintenance helps catch early signs of wear, allowing timely repairs that prevent more extensive damage.
Q: What’s the best season to repair mortar joints?
A: The ideal time to repair mortar joints is during mild weather conditions, such as spring or early fall, when temperatures are moderate and there’s little risk of rain.
Q: Can I repair mortar joints myself or should I hire a professional?
A: While minor repairs can be a DIY project, for extensive or structural repair mortar joints, hire a professional. This ensures the work is done safely and effectively.
Q: What should I do if I notice that the repaired mortar joints are deteriorating quickly?
A: If repair mortar joints deteriorate quickly, it could indicate an improper mix or application technique. It’s essential to consult a professional to assess the situation and recommend a solution.
Q: What is the best product to repair mortar joints?
A: A high-quality masonry mortar mix specifically designed for repair, like Type N or Type O, depending on the load requirements.
Q: How to repair a mortar joint?
A: Remove the damaged mortar, clean the joint thoroughly, apply the new mortar, and smooth it to match the existing joints.
Q: Can you fill in mortar joints?
A: Yes, filling in mortar joints involves removing the old mortar and replacing it with new mortar to restore the joint’s integrity.
Q: What tool do you use to repair mortar joints?
A: A masonry trowel, jointer, and a hammer and chisel are essential tools for repairing mortar joints effectively.
Q: Will new mortar adhere to old mortar?
A: Yes, new mortar will adhere to old mortar if you clean the old surface properly and use the appropriate mortar type.
Q: Is Quikrete mortar repair flexible?
A: Yes, Quikrete mortar repair products often include flexible compounds that accommodate slight movements in the structure.
Q: Can you fix crumbling mortar?
A: Yes, you can fix crumbling mortar by removing the damaged areas and repointing with new mortar.
Q: What is the process of repairing missing mortar between brick joints?
A: The process includes removing the old mortar, cleaning the joints thoroughly, and filling them with new, matched mortar.
Q: What is repairing mortar called?
A: In the construction industry, people commonly refer to repairing mortar as “repointing” or “tuckpointing.”
Q: What do you use to patch mortar?
A: You use a patching mortar mix, usually designed for durability and adhesion, to patch mortar.
Q: How do you fix gaps in mortar?
A: You can fix gaps in mortar by chiseling out the loose material and filling the gaps with new mortar.
Q: Is a common repair for deteriorated mortar joints?
A: Yes, repointing is the most common repair method for deteriorated mortar joints, restoring both function and appearance.
Q: How to seal mortar joints?
A: Sealing mortar joints typically involves applying a waterproof sealant over the repaired joints to prevent water penetration.
Q: How to Repair Mortar in a Brick Wall?
A: Identify damaged areas, remove old mortar, clean the joints, and fill with new mortar matched to the original.
Q: How to Repair Mortar Between Bricks?
A: Remove the old, failing mortar, clean the space between bricks, and apply new mortar for a secure and neat finish.
Q: How to Repair Loose Mortar Joints?
A: Chip out the loose mortar, clean the joint thoroughly, and refill it with new mortar designed for joint repair.
Q: What tool do you use with mortar?
A: Typically, a mortar hoe or a mixing paddle mixes mortar in preparation for application.
Q: How do you remove deteriorated mortar joints?
A: A hammer and chisel, or more precise tools like a masonry grinder, usually remove deteriorated mortar.
Q: What tool do you use to clean mortar joints?
A: Commonly, a joint raker or a wire brush cleans out old mortar from joints before repointing.
Transform your home with expert masonry services. Contact us today for a free consultation.