Masonry work in winter presents unique challenges, but with the right preparation, it can be done effectively. Whether you’re asking, “Can you do masonry work in the winter?” or planning a project despite the cold, understanding the specific needs of winter masonry is crucial. From selecting materials that withstand freezing temperatures to ensuring proper site management, every step is vital to achieving a successful outcome. In this guide, we’ll explore how to make the most of your masonry projects, even when the weather is less than ideal.

Table of Contents

Why Consider Masonry Work in Winter?

Masonry work during winter might seem counterintuitive, but there are several compelling reasons to keep those projects moving forward despite the cold. From meeting tight deadlines to taking advantage of strategic timing, winter masonry has its unique benefits.

Deadlines and Strategic Advantages

Why would anyone think about laying bricks in the frosty chill?

Well, you might be surprised, but there are some compelling reasons to keep those mortar mixers running even when the mercury dips. First off, not all projects can hit the pause button—some builds are on tight deadlines, and waiting out the winter isn’t an option. Plus, winter work means you’re ahead of the spring rush, which can be a strategic move for getting more projects lined up for the warmer months.

Perks of Winter Masonry

Now, let’s chat about the perks of winter masonry. Believe it or not, cooler weather can be a boon for the curing process of mortar. That’s right! When mortar sets more slowly due to lower temperatures, it often results in a stronger bond. This slow-curing aspect can enhance the overall durability of the masonry work, giving your structure that extra bit of resilience against Mother Nature’s mood swings.

The Challenges of Cold Weather

But, here’s the kicker—winter masonry isn’t without its hurdles. The most glaring challenge is, of course, the cold itself. Materials like mortar and concrete can be quite finicky when temperatures drop too low. If not handled correctly, you could end up with brittle materials that compromise the integrity of your build. And let’s not overlook the comfort and safety of the crew; working in cold weather requires additional gear and precautions to prevent frostbite and other cold-related concerns.

Balancing the Pros and Cons

So, why push through with masonry during the winter?

It’s all about balancing the benefits with the challenges. If you can manage the cold’s curveballs, the payoff is a robust structure built in off-peak season, setting you up nicely for future projects. Plus, mastering winter masonry could set you apart in the construction world as a versatile contractor ready to tackle projects year-round.

Next up, we’ll explore planning and preparation—because, let’s face it, a good plan is half the battle in overcoming winter’s chilly challenges.

Planning and Preparation

When it comes to masonry work in winter, jumping in without a solid plan is like trying to build a house without a foundation—it’s bound to crumble. Winter conditions add a whole new layer of complexity to masonry projects, so planning and preparation are absolutely crucial. Let’s break it down so you’re not left out in the cold.

1. Site Assessment

First things first, assess the site. Before the first brick is laid or the mortar is mixed, take a good look at the construction site. Winter brings snow, ice, and sometimes muddy conditions, all of which can wreak havoc on your materials and equipment. It’s essential to clear the site of snow and ice, ensuring safe access for workers and machinery. Don’t forget to plan for drainage—melting snow can turn your site into a slushy mess, so make sure you’ve got proper water runoff strategies in place.

2. Adjusting the Schedule

Next up, adjust your scheduling. Winter days are shorter, which means less daylight to get the job done. You might need to start work earlier and end sooner to make the most of the available light. Also, consider the weather forecasts—winter storms can delay your project, so it’s wise to build in some buffer time. Flexibility is key here; if a cold front is moving in, it might be smarter to delay work for a day or two rather than risk poor-quality masonry.

3. Protecting Materials and Equipment

Now, let’s talk about materials and equipment. Winter can be unforgiving on your tools and supplies, so you’ll need to take extra precautions. Store your materials in a dry, heated area to prevent them from freezing. This includes your mortar, bricks, and any other masonry products. It’s also a good idea to invest in thermal blankets and portable heaters to keep the mortar at an optimal temperature for mixing and curing. Cold mortar can be a recipe for disaster, leading to weak joints and a structure that’s not up to code.

4. Preparing the Crew

Crew readiness is another biggie. Working in the cold is tough, and your crew needs to be prepared. This means proper winter gear—think insulated gloves, boots, and clothing that keeps them warm but doesn’t restrict movement. Safety is a priority, so remind your team to stay hydrated (yes, even in winter), take regular breaks to warm up, and watch for signs of frostbite or hypothermia.

5. Communication and Coordination

Communication is key during winter projects. Make sure everyone on the team is on the same page. Daily briefings are a good practice to address the specific challenges of the day, such as temperature changes or impending snow. Keep the lines of communication open, so if something goes wrong, it can be addressed quickly without compromising the quality of the work.

Effective planning and preparation are key to successfully managing winter masonry projects. When you assess the site, adjust your schedule, protect your materials, and ensure your crew is ready, you’re well-equipped to handle the challenges that winter may bring. It’s all about laying the groundwork for success before the first brick is even placed.

Now that you’ve got a solid plan, the next step is just as critical—choosing the right materials to withstand those chilly temperatures. Let’s dig into that next.

Sardar Restoration

Transform your home with expert masonry services. Contact us today for a free consultation.

Get A Free Quote
Sardar Restoration

Choosing the Right Materials

When you’re tackling masonry work in winter, one of the most critical decisions you’ll make is choosing the right materials. The cold can be brutal on your project, and using the wrong materials can lead to all sorts of issues—cracking, weakening, or even complete failure of the masonry work. Let’s dive into why selecting the right materials is so important and which ones you should be considering for winter conditions.

Importance of Selecting Materials for Freezing Temperatures

Imagine you’re building a brick wall, and the temperature suddenly drops below freezing. If you’ve chosen a mortar that can’t handle the cold, it might not cure properly, leaving you with a wall that’s more decorative than functional. The key to successful winter masonry is using materials that can withstand freezing temperatures without losing their integrity.

Here’s the deal: Mortar and bricks react differently to cold weather than they do in warmer months. When temperatures drop, the water in your mortar mix can freeze before it has a chance to properly hydrate the cement, which is essential for setting the mortar. This can lead to weaker bonds between bricks and, ultimately, a compromised structure. That’s why it’s crucial to choose materials that are formulated specifically for colder climates. These materials are designed to set and cure properly, even when the mercury dips.

Using the right materials also means that your masonry work will last longer and require less maintenance. In winter, the freeze-thaw cycle—where water gets into cracks, freezes, expands, and then thaws—can cause serious damage if your materials aren’t up to par. By selecting materials that are resistant to this cycle, you’re essentially future-proofing your project against the harshest winter conditions.

Examples of Suitable Mortars and Bricks for Cold Weather

So, what should you be using? Let’s start with the mortar.

Type N Mortar:

This is a general-purpose mortar that’s commonly used for above-ground applications. It’s known for its medium strength, which makes it a good option for winter masonry work. Type N mortar has a good balance of flexibility and strength, which helps it withstand the stress of the freeze-thaw cycle without cracking.

Type S Mortar:

If you need something a bit stronger, especially for load-bearing walls or structures that are exposed to severe weather, Type S mortar is the way to go. It has higher compressive strength and can handle the rigors of cold weather a bit better than Type N. Just make sure to use it in areas where extra strength is needed because it can be a bit more brittle.

Anti-Freezing Admixtures:

Sometimes, adding an admixture to your mortar can be the best approach. These admixtures lower the freezing point of the water in the mortar, allowing it to cure properly even when temperatures are below freezing. Just be careful with the dosage—too much can affect the strength of the mortar.

When it comes to bricks, you’ll want to use ones that are specifically rated for cold weather.

Clay Bricks:

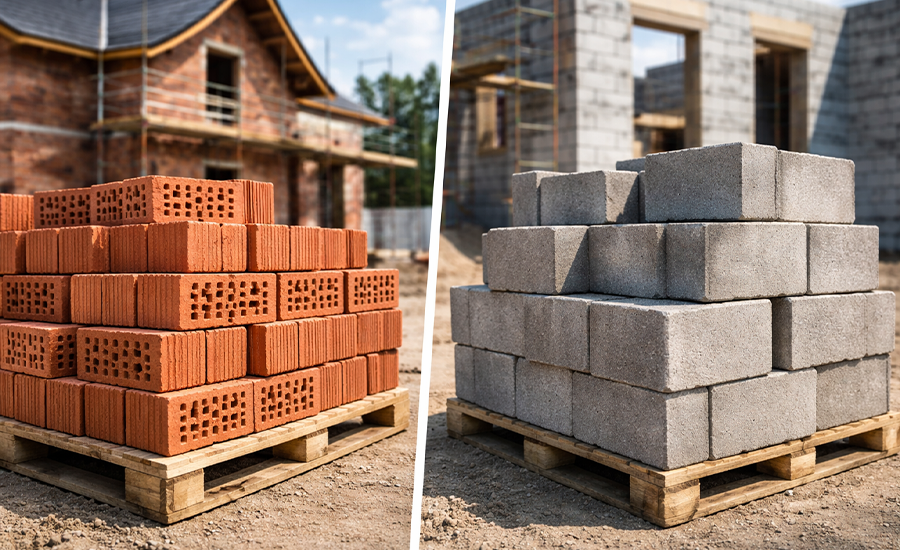
These are a solid choice because they have low water absorption rates, which means there’s less water inside the bricks that can freeze and cause damage. Look for bricks that are labeled as “frost-resistant” or “weather-resistant.” These are designed to handle the cold without cracking or spalling.

Concrete Bricks:

While they’re not as commonly used in winter masonry, concrete bricks can work well if they’re properly treated. These bricks can absorb more water, so it’s crucial to use them in combination with a mortar that can withstand freezing. Concrete bricks are often more porous, so you might also want to apply a sealer to protect them from the elements.

Thermal Insulating Bricks:

If you’re working on a project where insulation is key, thermal insulating bricks are worth considering. These bricks have a high thermal mass, meaning they retain heat longer, which can be beneficial in cold weather. They’re typically more expensive, but the added insulation can make them a worthwhile investment for winter projects.

When it comes to masonry work in winter, the materials you choose play a crucial role—not just in completing the project, but in ensuring that it stands the test of time. By opting for mortars and bricks specifically designed for freezing temperatures, you’re laying the foundation for a successful outcome, even when winter tries to throw you off course.

Now that we’ve covered materials, let’s move on to another pressing question—Can You Do Masonry Work in the Winter?

Let’s tackle that next.

Can You Do Masonry Work in the Winter?

Can You Do Masonry Work in the Winter

The big question that often comes up when planning construction projects is, Can you do masonry work in the winter?

The short answer is yes, you absolutely can—but it’s not as straightforward as working in warmer months. There are specific challenges that winter brings, and overcoming them requires careful planning, the right techniques, and a solid understanding of how cold affects masonry materials.

1. Can Masonry Be Done in Cold Conditions?

Yes, masonry work can be done in cold conditions with proper precautions and techniques to ensure quality results.

The Importance of Temperature Control

Masonry work, particularly the curing of mortar and concrete, relies heavily on temperature. Ideally, the mortar should be kept above 40°F (4°C) during its initial set and early curing period. When temperatures dip below this mark, the water in the mortar can freeze before it has a chance to properly hydrate the cement. This can lead to weakened bonds, increased porosity, and ultimately, a structure that isn’t as strong or durable as it should be.

Keeping Mortar Warm

However, this doesn’t mean that masonry work grinds to a halt once winter arrives. It just means that extra precautions need to be taken. For instance, if you’re working in conditions where temperatures are likely to drop below 40°F, you’ll need to find ways to keep the mortar warm. This might involve using heated enclosures or tents around the work area to create a controlled environment. These enclosures can be heated with space heaters to maintain a consistent temperature, ensuring the mortar cures correctly.

Managing Moisture and Timing

Another critical factor is moisture control. Cold weather often brings snow and ice, both of which can introduce unwanted moisture into your masonry materials. This excess moisture can freeze, expand, and cause cracks in the mortar or bricks. To prevent this, it’s important to keep your materials dry and store them in a covered, heated area when not in use. Additionally, you might need to dry off surfaces before applying mortar to ensure that there’s no residual moisture that could freeze and cause issues later on.

There’s also the issue of timing. In winter, the days are shorter, which means less daylight for working. You’ll need to plan your workday carefully, focusing on the hours when temperatures are highest—usually late morning to mid-afternoon. Starting work too early or continuing too late can expose your materials to temperatures that are too low for proper curing, leading to subpar results.

2. Tips for Managing the Curing Process of Materials

Managing the curing process during winter is probably the most crucial aspect of successful masonry work. Here are some practical tips to help ensure your materials cure properly, even when it’s cold outside:

1. Use Accelerators:

One of the most effective ways to speed up the curing process in cold weather is by using chemical accelerators. These additives can be mixed into the mortar to reduce the setting time and help the mortar cure before it has a chance to freeze. However, be cautious with the dosage—too much accelerator can weaken the mortar, so it’s important to follow the manufacturer’s guidelines closely.

2. Preheat Materials:

Before mixing your mortar, consider preheating the materials. This can be done by storing bags of mortar mix in a heated space or using warm water for the mix. Preheating helps to kickstart the curing process, giving the mortar a head start before it’s exposed to colder temperatures.

3. Cover and Protect:

Once your masonry work is complete for the day, cover the work with thermal blankets or insulated tarps. These coverings help to retain heat within the structure, ensuring that the mortar continues to cure overnight. If temperatures are expected to drop significantly, you might need to keep these coverings in place for several days.

4. Monitor the Temperature:

Use a thermometer to keep an eye on the temperature of your masonry work. If the temperature starts to dip too low, you may need to take additional steps to warm the area, such as using more heaters or adding extra layers of insulation.

5. Plan for Delays:

Winter weather is unpredictable, and sometimes, it’s better to delay a project rather than risk poor-quality results. If a major cold front or snowstorm is on the way, consider pausing work until conditions improve. It’s better to wait than to rush and end up with a compromised structure.

While winter does present some challenges for masonry work, it’s entirely possible to get the job done right with the proper approach. By understanding how cold weather affects your materials and taking proactive steps to manage the curing process, you can achieve high-quality results even in the depths of winter.

Now that we’ve covered whether you can actually do masonry work in winter, let’s look at techniques for effective winter masonry to ensure you’re fully equipped for the job.

Sardar Restoration

Transform your home with expert masonry services. Contact us today for a free consultation.

Get A Free Quote
Sardar Restoration

Techniques for Effective Winter Masonry

When the temperature drops, masonry work doesn’t have to stop. However, it does require a shift in approach, using special techniques and tools designed to handle the challenges that winter throws your way. Whether you’re laying bricks or working with mortar, understanding these techniques can make all the difference in the quality and durability of your work.

1. Special Techniques and Tools Required for Winter Masonry Work

First things first—let’s talk about the techniques. Working in the cold means you need to be aware of how the weather impacts the materials and the process. One of the most important techniques is keeping your materials warm. Mortar, bricks, and tools can all be affected by low temperatures, so it’s crucial to store them in a heated space before use. This helps to maintain the workability of the mortar and prevents the bricks from drawing out too much moisture too quickly, which can lead to weak bonds.

Another key technique is preheating the bricks. This might sound a bit odd, but preheating your bricks can help ensure that the mortar bonds properly. Cold bricks can cause the mortar to cool too rapidly, preventing it from setting correctly. You don’t need to get the bricks hot—just warm enough to avoid a temperature shock when the mortar is applied.

When it comes to tools, portable heaters are your best friend on a winter job site. These heaters can be used to create a warm working environment, especially when you’re working in an enclosed space or a tent. It’s also a good idea to have thermal blankets on hand. These can be used to cover freshly laid bricks, keeping them warm enough to allow the mortar to cure properly.

2. Step-by-Step Guide on How to Lay Bricks in Cold Weather

Now that you’re equipped with the right tools and techniques, let’s walk through the process of laying bricks in cold weather.

Prepare the Site:

Start by clearing the work area of any snow, ice, or water. A clean, dry surface is essential for a successful masonry job in winter. If there’s snow or ice on the ground, remove it and ensure that the surface is as dry as possible. This helps prevent moisture from freezing and interfering with the mortar.

Preheat the Bricks:

As mentioned earlier, warm up the bricks before you start laying them. Store them in a heated area or use a portable heater. The goal is to ensure that the bricks are not so cold that they cool the mortar too quickly, which could hinder proper bonding.

Mix the Mortar:

Use warm water when mixing your mortar. This helps maintain the right consistency and ensures that the mortar remains workable for longer, even in cold conditions. If necessary, consider adding an anti-freezing admixture to the mortar mix to lower its freezing point.

Lay the Bricks:

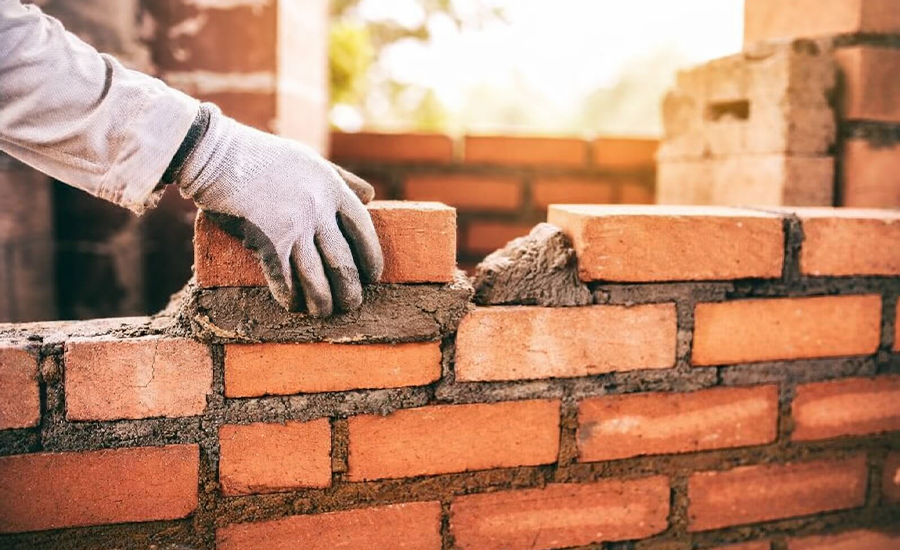
Start laying the bricks as you normally would, but be mindful of the time. In cold weather, the mortar can begin to set more quickly, so work efficiently but carefully. Apply the mortar to the warmed bricks and press them into place, ensuring that each brick is properly aligned and that the joints are filled.

Cover the Work:

Once you’ve laid the bricks, cover the entire structure with thermal blankets or insulated tarps. This helps retain heat and protects the mortar from freezing. If you expect temperatures to drop significantly overnight, keep the coverings in place for a few days to allow the mortar to cure fully.

Monitor the Curing Process:

Check the temperature of the worksite regularly. If the temperature drops too low, use portable heaters to maintain a consistent environment. It’s important to ensure that the mortar doesn’t freeze during the curing process, as this can lead to cracks and weakened joints.

Inspect Your Work:

Finally, inspect the masonry once it has cured. Look for any signs of cracking or weak spots that may have resulted from improper curing. If you find any issues, address them promptly to ensure the integrity of the structure.

By following these steps and using the right techniques and tools, you can successfully complete masonry work even in the coldest weather. It’s all about adapting to the conditions and making sure that each step is done with care.

Now that we’ve covered how to lay bricks in cold weather, let’s move on to another critical aspect of winter masonry—Safety Measures—to ensure that both the work and the workers stay safe throughout the process.

Safety Measures

Working on masonry projects in winter isn’t just about ensuring the materials and techniques are up to par—it’s also about keeping the crew safe. Cold weather introduces a whole new set of risks, so it’s crucial to implement safety measures that protect everyone on the job site. Let’s dive into some essential safety tips and how to maintain a safe work environment when the temperature drops.

1. Essential Safety Tips for Masons Working in Winter Conditions

Working in cold weather brings unique safety challenges that need special attention. By following these essential safety tips, you can help protect yourself and your crew from the harsh conditions.

Dress for the Weather:

The first rule of working in winter is to dress appropriately. Masons should wear insulated, waterproof clothing that protects against wind, cold, and moisture. Layering is key, as it allows workers to adjust their clothing based on activity levels and temperature changes throughout the day. Insulated gloves, hats, and boots are a must, as they help prevent frostbite, which is a real risk when working in freezing temperatures. It’s also a good idea to wear face coverings or balaclavas to protect against wind chill.

Stay Hydrated and Nourished:

It’s easy to forget about hydration in cold weather, but staying hydrated is just as important in winter as it is in summer. Cold, dry air can lead to dehydration, so masons should take regular breaks to drink warm fluids like water or tea. Additionally, eating warm, high-energy foods helps the body maintain its temperature and energy levels, which is crucial when working in the cold.

Monitor for Signs of Hypothermia and Frostbite:

Supervisors and workers alike should be vigilant for signs of hypothermia and frostbite. Hypothermia can set in quickly, especially if someone is wet or exposed to cold winds. Early symptoms include shivering, confusion, and loss of coordination. If these symptoms appear, it’s important to get the affected person into a warm environment immediately. Frostbite, on the other hand, typically affects the extremities—fingers, toes, ears, and nose. It starts with numbness and can progress to hard, pale skin. If you suspect frostbite, gradually warm the affected area with warm (not hot) water and seek medical attention if necessary.

Use the Buddy System:

One effective way to maintain safety is by implementing a buddy system. Workers should pair up and keep an eye on each other throughout the day. This way, if someone starts to show signs of cold-related illnesses, their buddy can alert a supervisor and get help quickly. The buddy system also encourages workers to take breaks together, which can help prevent overexertion and cold stress.

2. How to Maintain a Safe Work Environment

Ensuring a safe work environment during winter requires careful planning and regular monitoring. Implementing the following practices can help maintain a safe and productive site.

Keep the Work Area Dry and Ice-Free:

Snow and ice can make a job site treacherous. Before starting work each day, clear walkways, scaffolding, and work surfaces of snow and ice. Use sand or salt to improve traction on icy surfaces, and consider using temporary flooring or mats in high-traffic areas to reduce the risk of slips and falls. It’s also important to regularly check scaffolding and ladders for ice buildup, as this can create slippery, dangerous conditions.

Ensure Proper Ventilation:

If you’re using heaters or other equipment that generates fumes, proper ventilation is crucial. Carbon monoxide poisoning is a serious risk when using fuel-burning heaters in enclosed spaces. Always follow the manufacturer’s guidelines for heater use, and never operate them in a confined space without adequate ventilation. Using electric heaters can reduce this risk, but it’s still important to ensure there’s enough airflow to prevent overheating and to maintain a comfortable temperature.

Implement Frequent Breaks:

Working in cold weather can be exhausting, so it’s important to schedule frequent breaks in a warm, sheltered area. These breaks give workers a chance to warm up, change out of wet clothing, and rest. Providing warm drinks and snacks during these breaks can help maintain morale and energy levels. It’s also a good time to check in with the crew and ensure everyone is feeling okay.

Educate and Train Workers:

Safety training is always important, but it’s especially critical in winter. Train all workers on the specific risks of working in cold weather, including how to recognize and respond to signs of hypothermia and frostbite. Training should also cover the proper use of personal protective equipment (PPE), safe lifting techniques (since cold muscles are more prone to injury), and emergency procedures in case of an accident.

By following these safety measures, you can significantly reduce the risks associated with masonry work in winter. Keeping the crew safe should always be a top priority, and with the right precautions, you can ensure that everyone goes home healthy at the end of the day.

Next, let’s take a closer look at the Impact of Cold Weather on Masonry Materials, and how you can manage those effects to keep your projects on track.

Sardar Restoration

Transform your home with expert masonry services. Contact us today for a free consultation.

Get A Free Quote
Sardar Restoration

Impact of Cold Weather on Masonry Materials

Winter isn’t just tough on people—it’s hard on masonry materials too. The cold can significantly impact the quality and durability of your work if you’re not careful. Understanding how low temperatures affect different masonry materials is key to ensuring your project stands strong despite the chill. Let’s break down the effects of cold weather on masonry materials and explore some preventative measures to protect them from freezing.

1. How Low Temperatures Affect Different Masonry Materials

Cold weather can severely impact the integrity of masonry materials, causing issues like weakened mortar, cracked bricks, and brittle concrete. Understanding these effects is crucial for maintaining the quality of your construction.

Mortar:

Mortar is one of the most sensitive materials when it comes to cold weather. The biggest issue is that the water in the mortar mix can freeze before the mortar has had a chance to set and cure properly. When this happens, the mortar can lose its strength, leading to weak joints that compromise the entire structure. Frozen mortar doesn’t bond well, and once thawed, it can crumble, leading to cracks and gaps between bricks. This is why maintaining a consistent temperature is crucial for mortar during winter work.

Bricks:

Bricks themselves are usually quite resilient, but they’re not immune to the effects of cold. Thermal shock is a main concern, and it occurs when bricks are exposed to sudden temperature changes. If a brick is too cold and you apply warm mortar, or vice versa, the rapid temperature change can cause the brick to crack. Additionally, bricks are porous, meaning they can absorb water. If this water freezes inside the brick, it can expand, causing the brick to crack or spall (flake off), which can lead to long-term structural damage.

Concrete:

Like mortar, concrete can be heavily impacted by cold temperatures. If the water within the concrete mix freezes before it has a chance to cure, the concrete can become weak and brittle. This weakens the overall structure and can lead to serious issues down the line, such as cracking or crumbling. Furthermore, the freeze-thaw cycle—where water inside the concrete freezes, expands, and then thaws—can cause the concrete to deteriorate over time if not properly managed.

Stone:

Natural stone is generally more resistant to cold weather than other materials, but it’s not completely immune. Like bricks, stone can suffer from thermal shock and the freeze-thaw cycle. Water that seeps into cracks in the stone can freeze, expand, and cause the stone to split or crack. This is particularly a concern in more porous stones, which can absorb more water and are therefore more susceptible to freeze-thaw damage.

2. Preventative Measures to Protect Materials from Freezing

Taking the right precautions can prevent freezing damage to your masonry materials, ensuring they remain strong and durable despite the cold. Simple steps like proper storage and using heated water can make all the difference.

Store Materials Properly:

The first line of defense against cold weather is proper storage. Keep your mortar, bricks, and other materials in a dry, heated space when they’re not in use. This prevents them from getting too cold and helps maintain their workability. For bricks and stone, consider using tarps or thermal blankets to cover them, even when they’re outside but not in immediate use.

Use Heated Water and Additives:

When mixing mortar or concrete, always use warm water. This simple step can make a big difference in maintaining the right temperature for your materials. Additionally, you can use antifreeze additives in the mortar and concrete mix. These additives lower the freezing point of the water in the mix, reducing the risk of the materials freezing before they cure. However, it’s essential to follow the manufacturer’s guidelines when using these additives to ensure they don’t compromise the strength of the mortar or concrete.

Preheat Bricks and Stone:

Just like you wouldn’t jump into freezing water without a wetsuit, you shouldn’t apply mortar to freezing-cold bricks or stone. Preheating these materials, either by storing them in a heated space or using portable heaters on-site, helps prevent thermal shock. Even slightly warming the bricks or stone can make a big difference in how well they bond with the mortar.

Cover and Protect Fresh Work:

Once your masonry work is done for the day, it’s crucial to protect it from the cold. Cover the freshly laid bricks, stone, or concrete with thermal blankets or insulated tarps. This helps retain heat within the materials, allowing the mortar or concrete to cure properly without freezing. If you expect temperatures to drop significantly, keep the coverings in place for several days to ensure everything cures correctly.

Monitor the Weather Closely:

Winter weather can be unpredictable, so it’s important to keep a close eye on the forecast. If a significant drop in temperature or a snowstorm is expected, take additional precautions to protect your materials and worksite. Sometimes, it might be necessary to pause work until conditions improve to avoid compromising the quality of your masonry.

Understand how cold weather affects your materials and take these preventative measures to minimize the risk of damage and ensure that your masonry work lasts, even in the harshest winter conditions.

Next, we’ll move on to discuss Troubleshooting Common Winter Masonry Issues to help you identify and resolve problems that may arise during cold weather construction.

Troubleshooting Common Winter Masonry Issues

Common Winter Masonry Issues

Winter masonry comes with its own set of unique challenges. From freezing mortar to cracked bricks, cold weather can cause a variety of issues that, if not addressed properly, can compromise the integrity of your construction. Let’s go over some common problems faced during winter masonry and the practical solutions to keep your project on track.

1. Common Problems Faced During Winter Masonry and Their Solutions

Winter brings unique challenges to masonry work, but understanding these problems and their solutions can help keep your project on track.

Problem: Mortar Freezing Before It Sets

One of the most frequent issues in winter masonry is the mortar freezing before it has a chance to set. When the water in the mortar mix freezes, it expands, leading to weakened joints that can crack or crumble over time.

Solution:

To prevent this, always mix mortar with warm water and consider using antifreeze additives that lower the freezing point of the mix. Additionally, work in smaller sections so the mortar can be applied and protected quickly. After applying the mortar, cover it with thermal blankets to maintain warmth during the curing process.

Problem: Cracking or Spalling Bricks

Bricks can crack or spall (surface flaking) due to the freeze-thaw cycle, where water absorbed by the bricks freezes, expands, and then thaws, causing damage.

Solution:

Use bricks that are specifically rated for winter conditions, as they have lower water absorption rates. Before laying the bricks, ensure they are dry and, if possible, preheat them slightly to prevent thermal shock. Covering the masonry work after it’s completed will also help protect the bricks from direct exposure to cold and moisture.

Problem: Concrete Setting Too Slowly or Not at All

In cold weather, concrete can take much longer to set, and in extreme conditions, it may not set at all, leading to a weak or unusable foundation.

Solution:

Consider using fast-setting concrete mixes or additives that accelerate curing times. Another approach is to pour the concrete in heated enclosures or use heated blankets to maintain an optimal curing temperature. Monitoring the temperature regularly during the curing process can also help ensure the concrete sets properly.

Problem: Worker Safety Concerns

Cold weather increases the risk of hypothermia, frostbite, and other cold-related health issues for workers.

Solution:

Implement a buddy system so workers can monitor each other for signs of cold stress. Provide plenty of warm breaks in a heated area, and ensure all workers are wearing appropriate winter gear. Safety training on recognizing and responding to cold-related health issues is also essential.

2. Case Studies or Examples from Real-Life Scenarios

Real-world examples show how successful winter masonry projects overcame cold-weather obstacles with effective strategies.

Example 1: A Residential Brick Wall Project

In a residential project in Minnesota, a masonry contractor faced issues with mortar freezing before it could properly set. The team decided to erect a temporary tent around the worksite and used portable heaters to keep the area warm. By carefully controlling the environment, they were able to complete the wall without any significant issues, despite the freezing temperatures outside.

Example 2: Commercial Concrete Pour in Colorado

A construction team in Colorado encountered problems with concrete setting too slowly during a winter pour for a commercial building foundation. To address this, they used fast-setting concrete with antifreeze additives and covered the pour with heated blankets. They also scheduled the pour for mid-day when temperatures were at their highest. The foundation set successfully, avoiding any cold-related issues.

Prepare for these common problems and know how to solve them so you can tackle winter masonry projects with confidence. Even when the weather isn’t on your side, there are ways to ensure your work remains strong and durable.

Next, let’s weigh the Pros and Cons of Winter Masonry to help you decide whether winter is the right time for your project.

Pros and Cons of Winter Masonry

Deciding whether to undertake masonry work during the winter months can be a bit of a balancing act. On one hand, there are clear benefits, while on the other, significant challenges could impact the success of your project. Let’s break down the pros and cons of winter masonry to help you make an informed decision.

1. Analyzing the Advantages and Challenges of Pursuing Masonry Work in Winter

Winter masonry comes with distinct benefits and challenges that require careful consideration before starting your project.

Pros:

  1. Less Competition: One of the biggest advantages of working in the winter is the reduced competition. Many contractors prefer to wait for warmer weather, so fewer projects are competing for materials and labor. This can mean quicker start times and possibly even better deals on supplies.
  2. Faster Permitting: Since fewer construction projects are happening in the winter, you might find that permits and inspections go through more quickly. This can save you time and help keep your project on schedule.
  3. Advanced Planning for Spring: Completing masonry work in the winter allows you to get a jump on spring landscaping or other warm-weather projects. By the time spring arrives, your masonry work will be set and ready for whatever comes next.

Cons:

  1. Weather-Related Delays: The most obvious challenge is the weather itself. Snow, ice, and freezing temperatures can delay work, make sites inaccessible, or require extra precautions that can slow down the project. You’ll need to build extra time into your schedule to account for these potential delays.
  2. Material Handling Issues: Cold temperatures can affect the quality of your materials, as we’ve discussed earlier. Mortar, bricks, and concrete require special handling in winter, which can complicate the process and increase costs.
  3. Increased Labor Costs: Working in cold conditions can be tough on workers, which means you might need to pay a premium to keep your crew safe and motivated. This includes providing heated break areas, hot drinks, and possibly even offering bonuses for working in challenging conditions.

2. Comparative Insights with Warmer Month Masonry Projects

When comparing winter masonry to projects undertaken in warmer months, it’s clear that each season has its trade-offs.

Winter Work:

  • Advantages: Less competition, faster permitting, better material availability, and advanced planning.
  • Disadvantages: Weather delays, material challenges, and potentially higher labor costs.

Warmer Months:

  • Advantages: Easier working conditions, better weather, and less need for specialized equipment or materials.
  • Disadvantages: Higher competition for labor and materials, longer permit and inspection times, and possibly higher material costs due to demand.

Ultimately, whether to pursue masonry work in the winter depends on your specific project needs, timeline, and budget. If you’re ready to handle the challenges of cold weather, take advantage of winter to complete your masonry work, setting the stage for additional projects in the spring.

With a clear understanding of the pros and cons, it’s time to think about how to prepare your masonry site for winter weather to ensure a smooth and successful project.

Sardar Restoration

Transform your home with expert masonry services. Contact us today for a free consultation.

Get A Free Quote
Sardar Restoration

Preparing Masonry Sites for Winter Weather

When winter rolls in, it’s not just about keeping yourself warm—your masonry site needs some extra attention too. Preparing and protecting your site from the harsh winter elements is essential for ensuring your project stays on track and that the work quality remains high. Let’s go through the key steps to get your site winter-ready, and why managing the site and training workers are crucial during this time.

Steps to Prepare and Protect Masonry Sites from Winter Elements

Proper preparation and protection of your masonry site against winter elements are crucial to maintaining both safety and work quality.

1. Clear the Site:

The first step in winterizing your masonry site is to remove any snow, ice, or standing water. These elements can create hazardous working conditions and interfere with the integrity of your materials. Use snow blowers, shovels, or de-icing products to keep pathways and work areas clear. This not only makes the site safer but also ensures that your materials and tools are free from moisture that could freeze and cause damage.

2. Set Up Temporary Enclosures:

Consider erecting temporary enclosures around the work areas. These can be tents, tarps, or even custom-built shelters that protect the site from wind, snow, and cold. By creating a controlled environment, you can maintain a stable temperature for your materials, making it easier to mix and apply mortar or concrete. Enclosures also help keep workers warmer, which can boost productivity and reduce the risk of cold-related illnesses.

3. Use Ground Heaters:

If the ground is frozen, it’s essential to thaw it before laying any bricks or pouring concrete. Ground heaters can help soften the earth, ensuring a solid foundation for your masonry work. This step is particularly important if you’re working on a project that requires a lot of digging or foundation work, as frozen ground can cause shifting and instability once it thaws.

4. Protect Materials and Equipment:

Store your materials, such as mortar and bricks, in a heated and dry area to prevent them from freezing. Cover equipment with tarps or thermal blankets when you’re not using it, and keep tools dry and warm. This helps maintain the workability of the mortar and prevents the bricks from absorbing too much moisture, which could freeze and cause damage.

5. Plan for Proper Drainage:

Winter weather often brings rain and melting snow, which can lead to water pooling on your site. Proper drainage is crucial to prevent this water from freezing and creating dangerous ice patches or damaging your work. Make sure your site has adequate drainage systems in place, such as temporary gutters or trenches, to direct water away from the work area.

Importance of Site Management and Worker Training

Effective site management and thorough worker training are essential to navigating the unique challenges that winter brings to masonry projects.

Effective Site Management:

Managing a masonry site in winter requires more attention to detail than during warmer months. Regular site inspections are necessary to ensure that all safety measures are in place and that the site remains free of snow and ice. Clear communication is vital—inform the crew about daily tasks, potential weather-related delays, and safety protocols to keep the project running smoothly.

Worker Training:

Winter brings a unique set of challenges that workers might not face during other seasons, so proper training is essential. Educate workers on the dangers of cold exposure, such as hypothermia and frostbite, and how to recognize the signs early. Training should also cover the safe handling of materials in cold conditions, including how to properly mix and apply mortar or concrete when temperatures are low.

Workers need to familiarize themselves with the operation of any specialized equipment used in winter, like ground heaters or portable shelters. Additionally, it’s important to emphasize the need for appropriate winter gear, such as insulated gloves, boots, and clothing, to keep everyone warm and safe.

Take these steps to prepare and protect your masonry site, and ensure that your crew is well-trained and aware of the specific challenges of winter work. This approach will help you keep your project on track, maintain the quality of the work, and ensure the safety of everyone involved.

With the site prepared and the crew ready, you’re well-equipped to handle the winter challenges. But there’s more to consider, such as the overall pros and cons of winter masonry, which will help you weigh whether the advantages outweigh the challenges for your specific project.

Conclusion

When it comes to masonry work in winter, the challenges are clear, but with proper planning and the right approach, success is well within reach. From choosing the right materials to preparing your site, every detail matters to ensure a durable and lasting result. Whether you’re dealing with a residential project or a large commercial build, handling masonry work in winter demands expertise and attention to detail. If you’re looking for a professional contractor who can manage these winter conditions effectively, don’t hesitate to reach out. Contact us at (+1) 917-355-8556 to discuss your project today.

FAQs

Q: Can masonry work in winter be as durable as in warmer months?

A: Yes, masonry work in winter can be just as durable as in warmer months if done correctly. By using the right materials and techniques, you can ensure the mortar sets properly and the structure remains strong despite the cold.

Q: What are the key considerations for masonry work in winter?

A: When doing masonry work in winter, it’s important to focus on keeping materials warm, preventing freezing, and protecting the site from snow and ice. Proper planning and using heated enclosures can help maintain the quality of your work.

Q: How do low temperatures affect masonry work in winter?

A: Low temperatures can cause mortar to freeze before it sets, weakening the bond between bricks. Use special additives and proper heating techniques during masonry work in winter to counter this.

Q: Is it more expensive to do masonry work in winter?

A: Masonry work in winter can be more costly due to the need for additional materials, heating, and specialized techniques. However, the benefits, such as less competition and faster permitting, can offset some of these costs.

Q: Should I delay my project or proceed with masonry work in winter?

A: Delaying isn’t always necessary. Masonry work in winter can proceed effectively with the right precautions. Consulting with an experienced contractor can help you decide the best course of action for your specific project.

Q: Can you do masonry work in cold weather?

A: Yes, you can do masonry work in cold weather, but you need special techniques and materials to ensure proper results. It’s essential to keep the materials warm and protect the site from freezing.

Q: What do masons do in winter?

A: In winter, masons continue to work on projects by using heated enclosures, special winter mixes, and other techniques to ensure that mortar and materials set correctly despite the cold.

Q: Do bricklayers work in the winter?

A: Yes, bricklayers can work in the winter, but they must take precautions like using heated water for mortar and working in controlled environments to prevent freezing.

Q: How long does mortar take to dry in cold weather?

A: In cold weather, mortar can take significantly longer to dry, sometimes requiring 48 hours or more, depending on the temperature and humidity levels.

Q: What temperature is too cold for mortar?

A: Don’t use mortar below 40°F (4°C) because lower temperatures can cause the mortar to freeze before it properly sets.

Q: What happens to mortar if it freezes?

A: If mortar freezes before it sets, it can weaken the bond between bricks, leading to cracks and compromised structural integrity, which might require rework.

Q: How long does mortar take to dry before freezing?

A: Mortar should ideally dry for at least 24-48 hours before freezing temperatures hit to ensure it sets properly and maintains its strength.

Sardar Restoration

Transform your home with expert masonry services. Contact us today for a free consultation.

Get A Free Quote
Sardar Restoration