 ChatGPT
 Perplexity
 Google AI
 Claude
Thin brick has become a popular choice in NYC construction and remodeling projects, especially for property owners looking for a classic masonry look without adding structural load. It offers the appearance of traditional brick while being lighter, quicker to install, and more cost-efficient.
In residential and commercial projects, thin brick is commonly used for feature walls, fireplaces, façades, and interior upgrades. Typically, thin bricks range from ½ inch to 1 inch in thickness and are installed on a properly prepared surface using adhesive mortar or a bonding agent.
This guide explains how thin brick installation is carried out, along with practical considerations that contractors follow to ensure long-term durability and proper adhesion.
- Ο Thin brick provides a masonry look without structural load
- Ο Proper surface prep ensures strong and lasting adhesion
- Ο Suitable for both interior and exterior applications
- Ο Faster and more cost-effective than full brick installation
- Ο Acts as a protective and moisture-resistant layer
What Is Thin Brick?
Thin brick is a lightweight brick veneer designed to replicate the look of traditional masonry without requiring structural support. It is widely used in both interior and exterior applications where aesthetics and reduced load are important.
Compared to full brick, thin brick reduces installation time, labor effort, and material usage, making it a practical solution for modern construction projects in NYC.
- Thickness typically ranges from ½ inch to 1 inch
- Installed using polymer-modified mortar or adhesive
- Suitable for drywall, cement board, concrete, or masonry surfaces
- Delivers the visual appearance of full brick construction
- Easier and quicker to install than traditional brick

How To Install Thin Brick (Step-by-Step Process)
Installing thin brick requires proper preparation, accurate placement, and the right materials to ensure strong adhesion and long-term performance. In NYC residential and commercial projects, contractors follow a structured process to avoid bonding issues, uneven alignment, or premature failure.
Below is the standard installation process used by professionals.
Step 1: Surface preparation
Proper surface preparation is essential for long-lasting thin brick installation and strong bonding, especially when working within brickwork in construction and masonry systems, where surface condition directly impacts adhesion.
- Keep the surface clean and free from dust or moisture
- Remove debris, grease, or loose materials
- Install cement backer board when working on drywall
- Ensure the surface is level and structurally stable
- Check for cracks or weak areas before installation
A properly prepared surface allows the mortar to bond effectively and reduces the risk of detachment over time.
Step 2: Plan the Brick Layout
Planning the layout before applying mortar helps avoid alignment issues and unnecessary cutting, especially when repairing damaged brick walls before installation to ensure a stable and even surface.
- Measure the installation area accurately
- Mark horizontal reference lines using a level
- Dry-fit bricks to confirm spacing and pattern
- Plan corner placements and edge alignment
- Avoid very small cuts near visible edges
A planned layout ensures a clean, balanced finish and reduces material waste.
Step 3: Apply Bonding Mortar
Thin brick is installed using polymer-modified mortar or a suitable adhesive, depending on the surface.
- Mix mortar according to manufacturer guidelines
- Use a notched trowel for even application
- Apply mortar in small workable sections
- Maintain consistent thickness across the surface
- Avoid spreading mortar over large areas at once
Applying mortar in controlled sections prevents early drying and ensures proper brick adhesion.
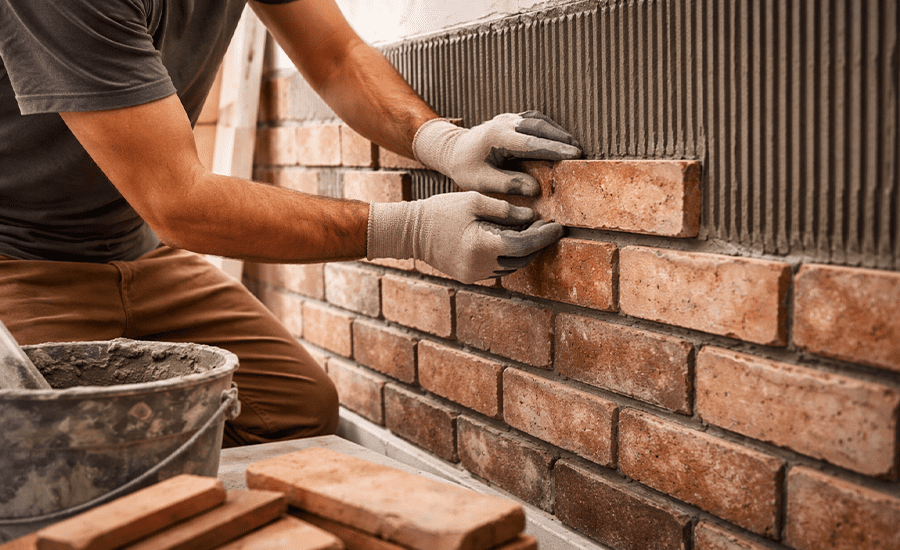
Step 4: Install Thin Bricks
Once the mortar is applied, place the thin bricks carefully to maintain alignment and spacing, especially when working on surfaces that may require repairing cracked fireplace brick surfaces before installation.
- Start installation from the bottom upward
- Press each brick firmly into the mortar
- Slightly adjust or twist for better bonding
- Maintain consistent gaps between bricks
- Use spacers where required
- Check alignment regularly using a level
Installing bricks in a consistent pattern ensures a uniform and professional finish.
Step 5: Cut Bricks for Edges and Corners
Edges, outlets, and corners require precise cutting for a natural finish, particularly when you need to fix spalling or damaged brick surfaces to achieve a clean and seamless look.
- Use a tile saw or masonry blade
- Measure accurately before cutting
- Smooth, sharp, or rough edges
- Use corner pieces for realistic brick detailing
Accurate cutting helps maintain the overall visual consistency of the installation.
Step 6: Allow Proper Curing Time
After installation, the mortar must cure properly to achieve full strength.
- Interior surfaces: approximately 24 hours
- Exterior surfaces: 24 to 48 hours
- High humidity conditions: up to 72 hours
Avoid disturbing the bricks during this period to prevent weakening the bond.
Step 7: Apply Joint Finishing
Joint finishing fills the gaps and completes the brick appearance, especially when fixing weak or deteriorated mortar joints to ensure proper bonding and long-term durability.
- Apply mortar using a grout bag
- Fill joints evenly between bricks
- Allow partial setting before shaping
- Use a joint tool to create a consistent finish
- Remove excess mortar from joints
Well-finished joints improve both durability and appearance.
Step 8: Clean the Surface
Cleaning removes residue and ensures a clean final result.
- Wipe bricks with a damp sponge or cloth
- Remove excess mortar promptly
- Avoid excessive water during cleaning
- Perform final cleaning after full curing
Proper cleaning prevents staining and enhances the final look of the brick surface.
Estimated Cost of Thin Brick Installation in NYC
Thin brick installation is considered a cost-effective alternative to full brick construction, especially for residential and commercial properties in NYC. It provides a similar masonry finish while reducing structural load, labor time, and material requirements.
When estimating costs, it is important to consider material quality, surface preparation, labor complexity, and installation conditions. Pricing can vary depending on whether the project is interior or exterior, as well as the condition of the existing surface.
| Cost Elements | Price Range per Square Foot |
|---|---|
| Thin Brick Material | $8 – $15 |
| Installation Supplies | $2 – $4 |
| Labor Cost | $10 – $25 |
| Total Estimated Cost | $20 – $40 |
Interior installations typically cost less than exterior projects due to lower preparation and exposure requirements. However, in NYC, costs may increase based on accessibility, permits, and building conditions.
Conclusion
Thin brick installation is a practical solution for achieving the look of traditional brick without the structural demands of full masonry. When installed correctly using proper surface preparation, accurate layout planning, and controlled mortar application, it delivers both durability and a clean, professional finish.
For reliable installation, it is important to work with experienced professionals who understand NYC building conditions and material performance.
Sardar Restoration Corp provides residential and commercial services across NYC, including the Bronx, Manhattan, Brooklyn, Westchester, and Queens. If you are planning a project, you can explore our brickwork services in NYC or contact our team at (+1) 917-355-8556, email sardarrestoration@gmail.com, or visit 2770 Fish Ave, Bronx, NY 10469, United States.
FAQs
Can thin brick be installed on drywall?
Yes, thin brick can be installed on drywall, but it is recommended to use a cement backer board for better support and long-term adhesion. This helps prevent bonding issues, especially in high-moisture or high-use areas.
Is thin brick durable for exterior use?
Yes, thin brick performs well in exterior applications when installed correctly. However, in NYC conditions, such as freeze-thaw cycles and moisture exposure, proper surface preparation, mortar selection, and sealing play a key role in long-term durability.
Do thin bricks require maintenance?
Thin brick requires minimal maintenance, including occasional cleaning and periodic inspection of joints. Regular maintenance helps preserve both appearance and structural performance over time.
Can thin brick be installed over existing brick?
Yes, thin brick can be installed over existing brick if the surface is clean, stable, and properly prepared. In some cases, a bonding agent or surface leveling may be required to ensure proper adhesion.
How long does a thin brick installation last?
Thin brick can last for decades when installed correctly and maintained properly. The lifespan depends on installation quality, material selection, and exposure to environmental conditions.
Do you need a permit for thin brick installation in NYC?
In NYC, permits may be required for exterior work or façade changes, especially for larger projects. It is recommended to consult a licensed contractor familiar with local building regulations.
What is the difference between thin brick and full brick?
Thin brick is a veneer used for decorative purposes and does not provide structural support, while full brick is load-bearing and used in structural construction.
Is thin brick waterproof?
Thin brick itself is water-resistant, but proper sealing and joint finishing are necessary to prevent moisture penetration, especially in exterior applications.
Can thin brick be installed in cold weather?
Installation in cold weather is possible but requires special mortar and controlled conditions. In NYC winters, contractors often take precautions to ensure proper curing.


