Repairing brick molding is an essential aspect of maintaining your home’s structural integrity and aesthetic value. This guide offers comprehensive insights into everything from choosing the right materials, such as exterior brick mold and cost-effective options for door casing repair, to detailed instructions on how to replace brick molding. Whether you’re looking to enhance your home’s exterior or ensure its durability, understanding how to repair brick molding is crucial.
What is Brick Molding?
Brick molding is more than just a decorative feature for your home; it plays an essential role in both aesthetics and functionality. Positioned around windows and doors, it helps to bridge the gap between the frame and the wall. This not only enhances the visual appeal of the home but also acts as a protective barrier, keeping water, pests, and other external elements out. By sealing these openings, brick molding safeguards the integrity of the building, preventing potential structural damage and ensuring your home stays in top condition.
Common Materials Used in Brick Molding
The choice of material for brick molding can significantly influence its durability and maintenance requirements:
- Wood: Traditional and versatile, wood allows for easy customization in terms of shape and color. However, it may require more maintenance due to susceptibility to moisture and insects.
- Vinyl: This material offers excellent moisture resistance and durability, making it ideal for homes in variable climates. Vinyl is also low maintenance, as it does not need painting.
- Composite: A mix of wood fibers and plastic resins, composite materials combine the aesthetic appeal of wood with increased resistance to decay. They are an eco-friendly option that withstands weathering effectively.
- Aluminum: Known for its strength and longevity, aluminum can resist severe weather conditions without suffering from corrosion or cracking. It’s a practical choice for those seeking minimal upkeep.
With these options, homeowners can choose the best material that fits their climate, budget, and style preferences. Understanding the importance and functions of brick molding can guide you in making informed decisions about maintenance and replacements, ensuring your home’s exterior remains both beautiful and functional. Next, let’s examine the signs that indicate your brick molding may need repair, helping you maintain your home’s integrity and appearance effectively.
Signs Your Brick Molding Needs Repair
Keeping an eye on the condition of your brick molding is crucial for maintaining your home’s exterior. Here’s how you can tell when it’s time for a repair or a complete replacement.
Common Signs of Wear and Deterioration
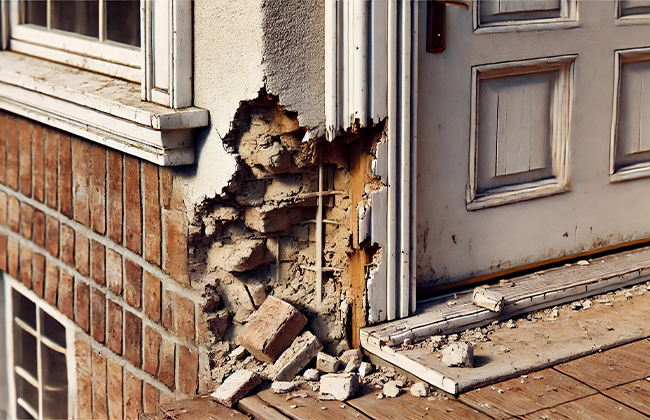
First and foremost, visible signs of wear such as cracking, chipping, or warping are clear indicators that your brick molding is deteriorating. If the paint on the molding starts to peel or if you notice any soft spots in the wood (a sign of rot), these are also red flags. Such damage not only impacts the look of your home but can also lead to more severe issues like water leakage into your walls, which could cause further damage.
How Weather and Age Affect Brick Molding
Brick molding is particularly vulnerable to the elements. Prolonged exposure to moisture from rain, snow, and humidity can lead to mold and rot, especially in wood and composite materials. Similarly, extreme temperatures can cause materials like vinyl and aluminum to expand and contract, potentially leading to gaps and misalignment. Over time, even the sturdiest materials will show signs of age, manifesting as fading color, stiffness, or brittleness.
By regularly inspecting your brick molding and addressing these issues early, you can extend its lifespan and maintain the aesthetic and structural integrity of your home. Remember, addressing these signs promptly can help you decide whether a simple repair will suffice or if it’s time to replace the molding entirely to ensure your home remains protected and looks its best.
Let’s move on to making the right decision between repairing and replacing your brick molding, ensuring you choose the most cost-effective and beneficial option for your home’s needs.
Repair vs. Replace: Making the Right Choice
Deciding whether to repair or replace brick molding can be tricky, but understanding the factors involved will help you make the best choice for your home and budget.
When to Repair and When to Replace Brick Molding
Repairing brick molding is often feasible if the damage is minimal and localized. Small cracks, minor rot, or peeling paint can typically be addressed without replacing the entire molding. Repairs might involve patching up small areas, sanding down rough spots, and applying new paint or sealant. This approach is cost-effective and can extend the life of your existing molding if done correctly.
On the other hand, replacing brick molding becomes necessary when damage is extensive or if the molding is old and continually deteriorating. Signs that warrant a full replacement include significant rot, widespread cracking, or if the molding no longer fits properly due to structural shifts in your home. Replacing old, worn-out molding not only prevents further damage to your home’s structure but also enhances curb appeal and property value.
Cost Considerations and Long-Term Benefits
The cost of repairing brick molding is generally lower than replacing it, especially if you can do the repairs yourself. However, if frequent repairs are needed, these costs can add up over time, making replacement a more economical option in the long run.
Investing in new brick molding might have a higher upfront cost but offers long-term benefits. New materials like vinyl or aluminum provide greater durability and require less maintenance, saving you money and hassle in the future. Moreover, modern materials can offer improved energy efficiency by providing better insulation around doors and windows, potentially lowering energy costs.
By weighing these factors, you can decide whether repairing or replacing your brick molding is the right choice for your home’s needs and your budget. With this decision made, let’s explore the steps involved in repairing brick molding, ensuring you’re equipped to handle this task with confidence.
Step-by-Step Guide to Repairing Brick Molding
Repairing brick molding is a manageable DIY project that can greatly enhance the appearance and durability of your home. Here’s how to tackle it step by step.
Tools and Materials Needed
Before you begin, gather all necessary tools and materials to ensure a smooth process:
- Tape measure
- Pry bar
- Hammer
- Nails or screws (depending on the existing setup and new materials)
- Saw (hand saw or power saw, appropriate for the material of your molding)
- Wood filler or caulk (for minor repairs)
- Sandpaper
- Paint or sealant
- Safety glasses and gloves
Detailed Steps for Removing Old Molding and Preparing the Surface
- Safety First: Put on your safety glasses and gloves to protect yourself throughout the process.
- Remove the Old Molding: Using the pry bar and hammer, carefully remove the existing brick molding. Be mindful to avoid damaging the surrounding wall and the frame of the window or door.
- Clean the Area: Once the old molding is removed, clean up any debris and loose material from the frame. This might include pulling out old nails or screws and scraping off residual caulk or sealant.
- Prepare the Surface: Sand any rough edges to ensure a smooth, clean surface for installing the new molding. Check for any signs of damage to the underlying structure and repair as needed before proceeding.
How to Measure, Cut, and Install New Brick Molding
- Measure Precisely: Measure the height and width of the window or door frame where the new molding will be installed. Always double-check your measurements before cutting.
- Cut the Molding: Using your measurements, mark the new molding and cut it to size. Be sure to cut the ends at a 45-degree angle so they fit together neatly at the corners.
- Install the Molding: Align the cut molding around the frame and secure it in place with nails or screws. Make sure each piece is flush against the wall and the frame, ensuring a tight fit.
Finishing Touches to Ensure Durability
- Fill Gaps: Use wood filler or caulk to fill any gaps at the joints and along the edges between the molding and the wall or frame. This helps create a seamless look and further protects against water and air leaks.
- Sand and Paint: Once the filler or caulk has dried, sand the area until smooth. Finish by applying a coat of paint or sealant to match the exterior of your home and to provide an additional layer of protection against the elements.
Repairing your brick molding not only improves the look of your home but also enhances its resistance to the weather, ensuring lasting durability. With these steps, you’re well on your way to a successful repair. Now, let’s consider the costs involved if you decide to install new brick molding instead of repairing the old one.
Cost to Install Brick Molding
When planning to install brick molding, understanding the associated costs helps in effective budgeting and decision-making. Below is a detailed breakdown of the expenses you might encounter.
Breakdown of Material Costs
The cost of materials can vary based on the type of brick molding you choose. Here’s a general idea:
| Material | Cost per Linear Foot |
| Wood | $1 – $5 |
| Vinyl | $2 – $4 |
| Composite | $3 – $5 |
| Aluminum | $4 – $6 |
These prices can fluctuate based on quality, brand, and retailer.
Labor Costs and Factors That Influence the Overall Price
Labor costs for installing brick molding are influenced by several factors, including the complexity of the installation, the condition of the existing frame, and local labor rates. Typically, you can expect to pay between $70 and $100 per hour for professional installation. The total labor cost will depend on the time it takes to complete the job, which can increase if repairs or modifications to the existing structure are needed.
Tips for Budgeting Your Brick Molding Repair or Replacement
- Get Multiple Quotes: To ensure you get the best price and service, obtain quotes from several contractors. This will also give you a better sense of what the market rates are in your area.
- Consider the Long-Term: Opting for cheaper materials might save money upfront, but higher-quality materials can reduce the need for future repairs and maintenance. Balance initial costs with potential long-term savings.
- DIY to Save: If you’re handy and the project is straightforward, consider doing the installation yourself to save on labor costs. Make sure you have the right tools and understand the process fully before beginning.
- Plan for Extras: Always include a buffer in your budget for unexpected issues, such as damage to the surrounding areas that may need repair during the installation process.
By carefully considering these factors, you can manage the costs effectively and ensure that your investment in brick molding adds value and beauty to your home for years to come. Now, let’s look at how to maintain your new or existing brick mold to maximize its lifespan and effectiveness.
Maintaining Exterior Brick Mold
Keeping your brick molding in top condition is key to ensuring it continues to protect and enhance your home’s exterior efficiently. Here’s how you can maintain it effectively.
Regular Maintenance Tips to Prolong the Life of Brick Molding
- Regular Inspections: Check your brick molding at least twice a year for signs of wear and tear such as cracks, rot, or detachment. It’s especially important to inspect after extreme weather conditions.
- Cleaning: Keep the molding clean from dirt, debris, and fungal growth. A gentle scrub with a soft brush and soapy water will usually suffice to keep it looking fresh and prevent decay.
- Immediate Repairs: Address minor damages immediately to prevent them from becoming major issues. Small cracks can be filled with caulk, and spots of rot can often be treated with wood hardener and filler.
Best Practices for Sealing and Protecting Brick Molding from the Elements
- Sealing: Apply a waterproof sealant to your brick molding to guard against moisture and help prevent rot. This is particularly vital for wood moldings.
- Painting: If your molding is made from a material that benefits from painting, such as wood or composite, apply a fresh coat of paint every few years. Use high-quality exterior paint for the best protection against UV rays and moisture.
- Pest Prevention: Regularly check for signs of pest infestations, such as termites or carpenter ants, especially in wood molding. Treat infestations promptly to avoid serious damage.
By following these maintenance tips, you can significantly extend the life of your brick molding and ensure it remains a functional and attractive part of your home’s exterior. But what happens when a repair goes beyond the scope of typical DIY fixes?
Up next, we’ll explore when it might be best to call in professional help versus tackling the project on your own.
DIY vs. Professional Help
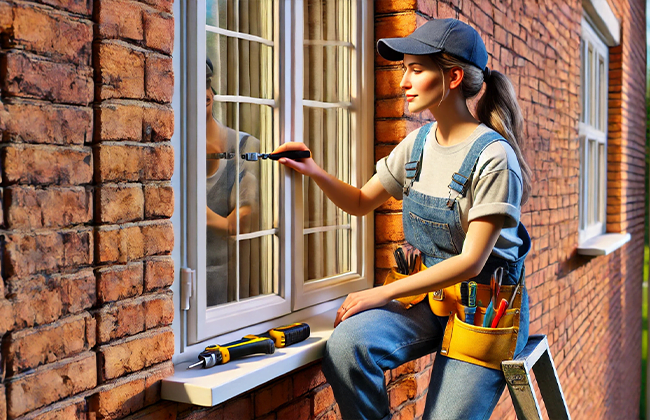
When it comes to maintaining or replacing brick molding, deciding between a DIY approach and hiring a professional can make a big difference in the outcome of your project. Here’s how to determine the best course of action.
When to Handle Repairs Yourself and When to Call in the Experts
- DIY: Simple repairs like filling cracks with caulk, replacing small sections of molding, or repainting are well within the reach of most homeowners who have some basic tools and a willingness to learn. These tasks do not typically require specialized skills and can be completed in a few hours.
- Professional Help: Consider hiring a professional if the damage to your brick molding is extensive, or if the entire molding needs to be replaced. This is especially true if the project involves complex measurements, cutting, or fitting, which might require precise tools and expertise. Also, if the molding is high up or around a complex window structure, professional help ensures safety and quality.
How to Find and Select a Contractor for Brick Molding Installation
- Research: Start by searching for local contractors with good reviews and a solid portfolio of similar projects. Websites, forums, and social media can provide insights into their work quality and customer service.
- Get Multiple Estimates: Once you’ve narrowed down your options, get estimates from several contractors. This will not only give you a sense of what the market rate is but also an opportunity to meet them and ask questions about their approach and materials.
- Check Credentials: Ensure that the contractors are licensed, insured, and have the necessary qualifications to work in your area. This protects you in case of accidents or damage during the project.
- References: Ask for references or case studies of similar work they’ve completed. This can give you a clearer idea of their craftsmanship and the durability of their work.
Making the right choice between DIY and professional help can save you both time and money, while ensuring that your brick molding is installed correctly and durably. With your choice made, let’s move on to understanding common mistakes to avoid during the installation or repair of brick molding. This knowledge will help you ensure your project runs smoothly and results in a finish that enhances your home’s curb appeal.
Common Mistakes to Avoid
When tackling DIY repair or installation of brick molding, awareness of common pitfalls can greatly increase the chances of a successful project. Here’s what to watch out for and how to ensure a quality finish.
Pitfalls in the DIY Repair and Installation of Brick Molding
- Inaccurate Measurements: Perhaps the most common mistake is not measuring the space accurately. Even a small error can lead to gaps or overlap, compromising the fit and finish of the molding.
- Improper Tools: Using incorrect or inadequate tools can damage the material of your brick molding or the surrounding areas. For instance, using a blunt saw can splinter wood, while the wrong type of nails or screws can lead to structural weakness.
- Ignoring the Weather: Installing brick molding in wet or very cold conditions can be problematic, especially for materials like wood that are sensitive to temperature and moisture.
- Skimping on Materials: Opting for cheaper materials might save money initially but can lead to increased maintenance and shorter lifespan of the molding.
- Overlooking Pre-Finish: Applying a sealant or paint after installation is crucial, especially for wood molding. Skipping this step exposes the material to the elements unprotected.
How to Ensure a Quality Finish
- Double-Check Measurements: Always measure twice before cutting. This rule cannot be overstressed and ensures that each piece fits perfectly, eliminating gaps and the need for adjustments.
- Use the Right Tools: Invest in or rent the appropriate tools for the job. Sharp blades, the correct type of hammer or nail gun, and proper safety gear can make a significant difference in the quality of the installation.
- Prepare the Surface: Ensure that the area where the molding will be installed is clean, dry, and smooth. Repair any damage to the underlying surfaces before beginning the installation.
- Apply Finishing Touches: Seal or paint the brick molding before or immediately after installation, depending on the material. This not only enhances the appearance but also protects against weather and wear.
- Regular Maintenance: Once installed, regular inspection and maintenance can prevent small issues from becoming major problems. This includes cleaning the molding, touching up paint or sealant as needed, and making minor repairs promptly.
By avoiding these common mistakes and following best practices for installation, you can achieve a professional-looking finish that not only boosts your home’s curb appeal but also stands up to the elements, providing long-lasting protection and style.
Conclusion
If you’re nearing the completion of your project and need expert advice or services to repair brick molding, professional help is just a call away. Ensuring your brick molding is correctly installed or repaired can significantly impact the longevity and appearance of your home. If you’re looking for a skilled contractor to help you with brick molding, please don’t hesitate to reach out at (+1) 917-355-8556 for expert assistance.
FAQs
Q: What are the signs that I need to repair brick molding?
A: If you notice cracks, rot, or peeling paint on your brick molding, it’s time to consider repairs. These issues can compromise both the appearance and structural integrity of your home if left unattended.
Q: How often should I inspect my brick molding for potential damage?
A: It’s advisable to inspect your brick molding at least twice a year. Regular checks in the spring and fall can help you catch and address damage early, preventing more extensive repairs later.
Q: What materials are best for long-lasting brick molding repairs?
A: Composite and vinyl are excellent choices for brick molding repairs as they offer durability and resistance to weather elements, ensuring your repairs last longer.
Q: Can I repair brick molding on my own or should I hire a professional?
A: Simple repairs like caulking or minor patching can be DIY projects. However, for extensive damage or replacements, hiring a professional is recommended to ensure the job is done right.
Q: What should I consider before starting a brick molding repair project?
A: Before beginning, assess the extent of the damage, choose the appropriate materials, and consider the weather conditions. Planning can prevent complications and ensure smoother repairs.
Q: How to fix brick mold?
A: To fix brick mold, remove the damaged sections. Prepare the surface by cleaning and sanding. Then measure and cut new mold to fit. Secure it with appropriate fasteners and sealants.
Q: What nails to use for brick mold?
A: For brick mold installation, use corrosion-resistant nails such as galvanized or stainless steel nails to prevent rust and ensure a durable hold.
Q: How to remove brick mold?
A: Remove brick mold by carefully prying it away from the frame using a pry bar or chisel, taking care not to damage the underlying materials.
Q: How do you attach brick mold to brick?
A: To attach brick mold to brick, use masonry screws and anchors that are designed to grip into the brick securely, ensuring stability and durability.
Q: Is mold common in brick homes?
A: Mold can be common in brick homes with moisture intrusion or inadequate ventilation. Bricks can absorb moisture, creating a conducive environment for mold growth.
Q: How do you treat mold on brick walls?
A: Treat mold on brick walls by cleaning the area with a solution of water and mild detergent, or use a mixture of bleach and water for more stubborn mold. Rinse thoroughly and allow to dry.
Q: Is brick mold better than no brick mold?
A: Brick mold is beneficial as it provides a finished look. It helps seal the gap between the frame and masonry. It also protects against water intrusion, making it superior to having no brick mold.
Q: What is the fuzzy mold on brick?
A: Fuzzy mold on brick is usually a type of mildew or fungal growth that occurs due to high moisture levels and can be cleaned using a fungicidal solution.
Q: How do you fix rotting bricks?
A: Fix rotting bricks by removing the damaged ones. Clean the area. Replace them with new bricks that match in color and texture. Secure them with mortar.
Q: What are the options for brick mould?
A: Options for brick mold include materials like wood, vinyl, aluminum, and composite, each offering different aesthetics, durability, and maintenance levels.
Q: What causes black mold on brick?
A: Black mold on brick is typically caused by persistent dampness, often due to poor drainage or inadequate waterproofing of the brickwork.
Q: What is exterior brick mold?
A: Exterior brick mold is trim molding used around windows and doors. It closes gaps on brick exteriors, enhances appearance, and provides a protective edge against the elements.
Q: Can you paint over mold on brick?
A: You should never paint over mold on brick. Always clean and treat the mold first to ensure it is completely removed before applying paint.
Q: Is it efflorescence or mold on brick?
A: Efflorescence appears as a white, powdery deposit. It is caused by salt migrating to the surface of the brick. Mold is usually black or green and indicates moisture issues.
Q: How to get rid of black spots on bricks?
A: Get rid of black spots on bricks by cleaning them. Use a mixture of bleach and water. Apply it to the affected areas. Scrub gently with a brush and rinse thoroughly.

