Hey there! If you’re wondering what repointing brickwork is all about, you’ve come to the right place. Repointing brickwork is the art of renewing the mortar joints between bricks, which over time can decay or wash away due to exposure and weathering. This process not only enhances the structural integrity of your masonry but also boosts its visual appeal, keeping your building strong and stunning for years to come. Stick around as we dive deeper into why, when, and how to repoint brickwork efficiently and effectively.
What is Repointing Brickwork?
Repointing, you know, is pretty much like giving your brick wall a fresh start. It’s all about renewing the external part of the mortar joints in masonry construction. Imagine this: your brick wall is like a sponge cake, and the mortar is the cream holding all the pieces together. Over time, just like how a cake might dry out, weathering and decay can create little voids in the joints between bricks. These gaps, they’re not just ugly; they let water sneak in, which is a big no-no because it can lead to damage.
Now, here’s the scoop on repointing: it’s the process of scooping out the old, tired mortar and packing in new, fresh mortar. This isn’t just about making the wall look good—it’s crucial. By filling these gaps, repointing locks out water and keeps your brickwork standing strong and looking sharp. It’s like refreshing the cream in our sponge cake analogy, ensuring everything holds together just right and stays tasty—or in the case of your wall, stays sturdy and protected. So, when you repoint, you’re not just patching up old bricks; you’re giving your building a new shield against the elements.
Now that we understand what repointing is and how it’s done, let’s dive into why this process is absolutely necessary for maintaining the integrity of your brickwork.
Why is Repointing Necessary?
So, why fuss about repointing?
Well, it’s more than just a facelift for your brick walls. Here’s the breakdown:
1. Weather Resistance:
First off, imagine your brick wall is like a warrior shield. It’s out there facing rain, wind, and sun every day. Properly maintained mortar joints act like the waterproof coating on that shield. If these joints are compromised, water can seep in, causing damage not just on the surface, but deep within the wall. Repointing seals these joints back up, making sure your wall stands strong against whatever the weather throws at it. It’s kind of like making sure the shield is ready for battle, rain or shine!
2. Structural Integrity:
Here’s where things get a bit technical, but stick with me. The strength of a masonry structure relies heavily on the condition of the mortar joints. Weak or damaged mortar can lead to bricks shifting, and in some cases, the entire structure could be compromised. By repointing, we’re basically re-bonding the bricks together, firm as ever. It’s like reinforcing that shield with a fresh layer of armor, ensuring everything stays exactly where it should be.
3. Aesthetic Appeal:
Now, let’s not forget about looks—because who doesn’t appreciate a good-looking brick wall?
Over time, mortar can get discolored, crumbly, and just plain ugly. Repointing gives your wall a makeover, restoring its original beauty. It’s like giving your building a fresh coat of paint, but for bricks. This not only makes your property look sharp but also increases its value. Talk about a win-win!
Repointing isn’t just about patching up old walls—it’s essential for keeping your building safe, sound, and sleek. And knowing just when to undertake this task can save you a lot of hassle and expense down the line. Let’s see when you should consider grabbing those tools and getting down to business!
When Should You Repoint?
So, when is it time to roll up your sleeves and get down to the nitty-gritty of repointing?
Knowing the right time to intervene can be a game-changer for maintaining your building’s integrity and appearance. Here’s a more detailed look at when to bring out the mortar and trowel:
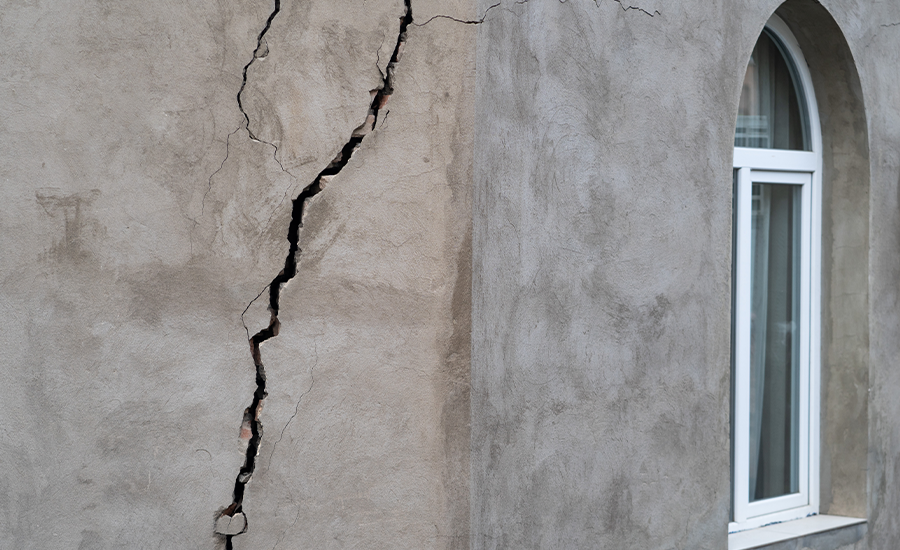
1. Visible Cracks:
Let’s start with the obvious. If you can spot cracks from a reasonable distance, it’s a clear indicator that your mortar is yelling for help. These cracks are more than cosmetic flaws; they are potential entry points for water, which can lead to more serious damage internally. Keep an eye out for these signs, especially after extreme weather conditions or if your building is in a freeze-thaw area where the seasons can be tough on masonry.
2. Loose Bricks:
Now, if the bricks themselves start to move or you can physically wiggle them, this is an urgent sign. Loose bricks not only compromise the structural stability of the wall but can also be a safety hazard for anyone near the building. This looseness often occurs from a deeper level of mortar erosion, and addressing it quickly can prevent more extensive repairs later.
3. Degradation of Mortar:
Over time, your mortar might begin to lose its fight against the elements, resulting in a powdery or sandy texture. This degradation reduces the wall’s ability to resist moisture and can accelerate the deterioration of your bricks as well. If you notice that your mortar crumbles easily upon touch, it’s time to plan for repointing. This kind of wear and tear is particularly common in areas with high humidity or frequent rain.
4. Regular Inspections:
Think of these like routine health check-ups but for your building. Regular inspections by a professional can catch early signs of mortar failure that you might miss. Ideally, these should be carried out every few years, depending on your building’s age and environmental exposure. They’re particularly crucial if you live in an area with severe environmental conditions.
5. Environmental Conditions:
The local climate plays a significant role in the longevity of your mortar. Buildings in areas with drastic temperature fluctuations, heavy rainfall, or high humidity might require more frequent repointing. The freeze-thaw cycle, for instance, can be particularly brutal as water trapped in the joints freezes and expands, causing significant damage over time.
6. Age of the Structure:
Older buildings, especially those with historical value, might need more frequent upkeep. Mortar used in older constructions can vary in composition and might not have been designed to withstand modern environmental stressors.
Catching these issues early can save you a lot of time, money, and hassle. Now, knowing when to repoint is just part of the battle. Choosing the right mortar for the job is equally important to ensure the durability and aesthetic appeal of your brickwork. Let’s take a closer look at how to pick the perfect mortar for your repointing project.
Choosing the Right Mortar
When it comes to repointing, not just any mortar will do. You’ve got to pick the right mix that meshes well with your building’s historical charm and structural needs. Here’s a deeper dive into how to select the perfect mortar for your repointing project:
1. Match the Historical Composition:
Understanding the original composition of your building’s mortar is crucial. Older buildings, especially historical ones, may have used different materials compared to modern mixes. For instance, lime-based mortars were common in older constructions and offer better flexibility, which is great for handling building movements without cracking. Matching the mortar not only maintains the integrity of the structure but also preserves its historical authenticity.
2. Consider the Color and Texture:
Aesthetics matter too! The new mortar should not only be structurally sound but also visually blend with the existing brickwork. This involves matching the color and texture of the old mortar. Getting this right maintains the uniform appearance of your masonry, making the repointing work look seamless rather than patchy.
3. Strength and Durability:
The strength of the mortar should be compatible with the brick. Mortar that is too strong can actually harm older bricks, which might be softer than modern ones. The rule of thumb here is the mortar should be weaker than the bricks. This ensures that in case of any movement, the mortar will give way before the bricks do, preventing more serious damage to the bricks themselves.
4. Permeability and Thermal Expansion:
It’s also important to consider the permeability and the coefficient of thermal expansion of the mortar. The new mortar should breathe in sync with the old masonry to allow moisture to evaporate naturally. Additionally, it should expand and contract at rates similar to the existing mortar, avoiding stresses that could lead to cracks.
5. Consult with Experts:
When in doubt, consult with a masonry expert or a historic preservation specialist. They can analyze the old mortar and recommend a mix that will be compatible in terms of chemistry, strength, and appearance.
Selecting the right mortar is a critical step that ensures your repointing project not only looks good but also lasts for many more years. Now that you’ve got the perfect mortar picked out, let’s walk through the step-by-step process of repointing your brickwork to restore its glory effectively.
Step-by-Step Guide to Repointing
Repointing your brickwork can seem daunting, but with the right approach, it’s like any DIY project—just follow the steps, and you’ll see amazing results. Here’s a detailed, step-by-step guide to make sure you repoint like a pro:
1. Joint Preparation:
This is where precision meets patience. You’ll start by removing the old, damaged mortar. But hold on, don’t go all out with the chisel just yet! It’s crucial to remove the mortar to the right depth, typically about twice the width of the joint, but never less than ½ inch. This ensures that the new mortar has enough room to bond effectively. Use hand tools like a chisel and hammer for greater control—power tools can be too harsh and damage the bricks.
2. Mixing the Mortar:
Now, it’s time to mix up your chosen mortar. Follow the specific guidelines you’ve determined based on the original mortar’s composition. Consistency is key—you’re aiming for a mix that holds its shape but is pliable enough to work into the joints. Think of the consistency of peanut butter. If it’s too dry, it won’t bond well; too wet, and it’ll be messy and weak.
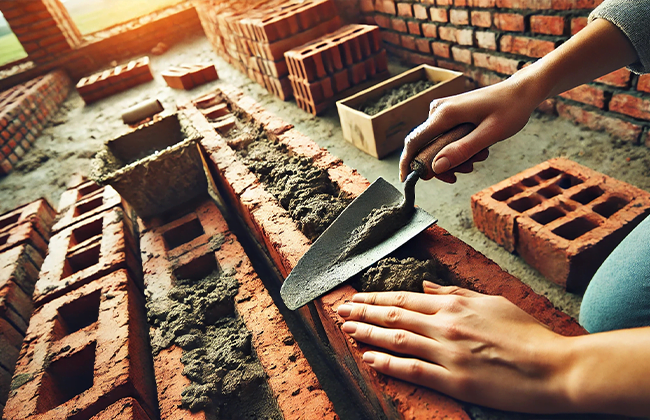
3. Filling Joints:
With your mortar ready, begin the satisfying job of filling the joints. Use a pointing trowel to press the mortar firmly into the freshly cleaned joints. Make sure the mortar is packed tightly with no air pockets, which can lead to water intrusion and frost damage. After filling, strike the mortar with a jointing tool to compact it further and shape the joints to match the original style, whether that’s beaded, flush, or weather-struck.
4. Curing:
Patience is a virtue, especially when it comes to curing. Mortar needs time to set and reach its full strength. Protect the fresh mortar from direct sunlight, wind, and rain, which can cause it to dry too quickly and weaken. Ideally, keep it moist and let it cure slowly and naturally, which can take several days depending on the weather and mortar type.
Following these steps carefully will ensure that your repointing not only looks professional but also lasts for decades, protecting your brickwork against the elements and wear.
Now, with the basics down, let’s explore some advanced repointing techniques that can take your skills to the next level and ensure even better durability and aesthetic match.
Advanced Repointing Techniques
When you’ve got the basics of repointing down, it’s time to level up your game with some advanced techniques. These methods aren’t just for show—they can significantly enhance the durability and appearance of your masonry work. Let’s dig into a couple of sophisticated tactics that the pros use:
Ribbon Pointing:
This technique isn’t as common as others, but it’s a real game-changer for achieving crisp, clean lines between bricks, making the entire wall look meticulously detailed. Ribbon pointing involves applying a thin strip of fine, lime-based mortar in a straight, narrow line along the center of the joint. It’s particularly effective on historical buildings where visual impact and precision are critical. The key here is to ensure the ribbon is uniform, enhancing the brickwork’s pattern without overwhelming it.
Use of Specialized Tools:
Upgrading your toolkit can also make a big difference. For example, using a pointing gun—a syringe-like tool filled with mortar—can help you inject mortar deep into the joints, ensuring a dense, even fill without air pockets that can lead to moisture penetration. Other specialized tools, like joint rakers and profiled trowels, allow you to shape the mortar precisely to match historical profiles, which is crucial in restoration work.
Tuck Pointing:
Another advanced technique is tuck pointing, where you use two contrasting mortar colors to create a striking visual effect. One color matches the bricks to make the joints appear fine and tight, while a lighter or darker filler mortar sits behind. This method was originally developed to mimic the appearance of finely jointed rubbed brickwork, giving a uniform, refined look to the facade.
Lime Putty Mortar:
For those really looking to embrace traditional methods, mixing your own lime putty mortar can be a game-changer. This old-school approach involves slaking lime in water to create a putty, then mixing it with an aggregate. Lime putty mortars are excellent for historic repointing because they offer superior flexibility and breathability, adapting to the subtle movements of older buildings without cracking.
Applying these advanced techniques can elevate the quality of your repointing project from standard to spectacular. Now, while pushing the boundaries with these methods, it’s equally important to steer clear of common pitfalls. Next up, let’s take a look at some frequent mistakes people make in repointing and how you can avoid them to ensure your work stands the test of time.
Common Mistakes in Repointing

Repointing can be a real game-changer for your masonry’s longevity and appearance, but even the best of us can slip up. Being aware of common mistakes—and knowing how to dodge them—can make all the difference between a job well done and one that might need a redo sooner than you’d like. Here are some typical repointing blunders and tips on how to steer clear of them:
1. Using the Wrong Mortar Type:
This is a biggie. The wrong mortar can not only look out of place but also cause physical damage to your bricks. Modern cement mortars, for example, are often too hard for historic bricks, which are typically softer and need a lime-based mortar that’s more forgiving. Matching the mortar to the brick’s strength and porosity is key; get this wrong, and you’re setting yourself up for cracked bricks down the road.
2. Improper Joint Filling:
Skimping on removing old mortar or not filling the joints completely can lead to a weak bond and new mortar falling out prematurely. Ensure you remove old mortar to the necessary depth—generally, at least twice the width of the joint and clean out all debris and dust. When filling, pack the mortar tightly to avoid air pockets, which can expand and contract with temperature changes, leading to cracks.
3. Inadequate Joint Profiling:
The shape of the mortar joint affects how water sheds off the surface. A poorly shaped joint can trap water, leading to faster deterioration. Make sure to profile the joint in a way that complements the building’s style and directs water away from the brickwork.
4. Rushing the Curing Process:
Mortar needs time to cure slowly and develop strength. Rushing this process by not protecting the new mortar from extreme weather or not keeping it moist can result in a weak and crumbly joint. Cover the repointed areas with a protective sheet if rain is expected, and mist the joints with water to keep them moist in hot, dry weather.
5. Not Testing the Mortar Match:
Before going all-in on your project, it’s wise to test the mortar mix on a small, inconspicuous area. This lets you see how well the mortar matches in color and texture and how it behaves as it sets. Making adjustments after a full-scale application is not something you want to tackle.
By keeping these pitfalls in mind and preparing accordingly, you can ensure your repointing effort is successful, enhancing both the structural integrity and curb appeal of your property. Getting these details right can help maintain your building’s health and beauty for decades to come.
Conclusion
And there you have it! Now you know the ins and outs of what repointing brickwork involves and why it’s so crucial for maintaining both the beauty and durability of your buildings. If you’re on the hunt for a professional contractor to handle your repointing brickwork needs, look no further. Feel free to reach out at (+1) 917-355-8556 to get top-notch service tailored to your project. Don’t let those bricks crumble—give them the care they deserve!
FAQs
Q: What exactly is repointing brickwork?
A: Repointing brickwork is the process of renewing the mortar joints in brick masonry. This maintenance work is crucial for preventing moisture from seeping into the walls and causing damage.
Q: Why is repointing brickwork necessary?
A: Repointing is vital as it protects the building against water damage, restores structural stability, and refreshes the aesthetic appeal of the masonry, ensuring your structure remains safe and visually pleasing.
Q: How often should repointing brickwork be done?
A: The frequency of repointing brickwork depends on the building’s exposure to harsh weather and the quality of the original mortar work. Generally, it’s a good practice to check your masonry every few years, but actual repointing might not be needed for several decades.
Q: Can I do repointing brickwork on my own or should I hire a professional?
A: While DIY repointing is possible, professional expertise ensures that the right materials are used and the job is done correctly. For best results, hiring an experienced contractor is recommended.
Q: What are the signs that my building needs repointing brickwork?
A: Key indicators include deteriorating mortar, visible cracks, and loose bricks. If you notice any of these issues, it’s time to consider repointing to prevent further damage and potential structural issues.
Q: What happens if you don’t repoint brickwork?
A: If brickwork is not repointed, water can infiltrate the walls, leading to structural damage, mold growth, and ultimately, the deterioration of your building’s integrity and value.
Q: How do you know if bricks need repointing?
A: Signs that bricks need repointing include visible cracks in the mortar, mortar that crumbles or powders when touched, and loose bricks that can be moved or shifted by hand.
Q: Why does brick need to be repointed?
A: Brick needs to be repointed to restore the integrity of mortar joints that deteriorate over time due to weather exposure, preventing water ingress that can cause serious structural damage.
Q: How much does it cost to repoint brickwork?
A: The cost to repoint brickwork can vary widely based on the location, the condition of the walls, and the extent of the work required, but generally ranges from $5 to $25 per square foot.
Q: Is repointing cheaper than tuckpointing?
A: Yes, repointing is generally cheaper than tuckpointing because it involves simpler techniques and materials, whereas tuckpointing requires more detailed work to achieve its decorative look.
Q: How much does it cost to have a brick house repointed?
A: Repointing a brick house typically costs between $2,000 and $10,000 in total, depending on the size of the house and the condition of the mortar.