Paving a driveway is a significant investment that can enhance the curb appeal and functionality of your property. In this guide, we delve into the cost to pave a driveway, exploring various materials, installation processes, and financial considerations to help you make an informed decision that aligns with your budget and aesthetic goals.
Driveway Cost Overview
When considering paving a driveway, the overall cost is often one of the most significant factors for homeowners. This section will explore how different elements like material choice, labor, and preparatory work collectively influence the per square foot cost, helping you understand where your money goes in a paving project.
Introduction to Cost Factors Per Square Foot
Understanding the cost per square foot is crucial for anyone planning to pave a driveway. It’s a fundamental aspect that helps in budgeting and comparing different paving options. Factors affecting this cost include the choice of material, the size of the driveway, labor costs, the geographical location of your property, and the extent of preparation needed before paving begins.
Average Costs and What Affects These Figures
Here’s a simple table that outlines average costs based on material, providing a clear, at-a-glance comparison:
| Material Type | Cost Per Square Foot |
| Asphalt | $7 – $13 |
| Concrete | $4 – $8 |
| Gravel | $1 – $3 |
| Pavers | $10 – $30 |
The variation in costs can be attributed to factors like material thickness, design complexity, seasonal demand fluctuations, and site accessibility. Materials that are thicker or require more intricate designs generally cost more, as do situations where site access is challenging.
To better grasp how each material stacks up in terms of cost and suitability for different types of driveways, we will explore detailed cost analyses in the subsequent sections. This will allow you to assess which options best meet both your aesthetic desires and budgetary constraints.
Detailed Cost Analysis by Material Type
Choosing the right material for your driveway is crucial as it affects both the initial cost and the long-term maintenance. Each material offers different benefits and comes with specific cost implications. In this section, we’ll delve into the costs, lifespan, and suitability of various driveway materials, providing a detailed breakdown to help you make an informed decision that fits your budget and aesthetic needs.
Asphalt: Cost per Square Foot, Lifespan, and Suitability for Climates
| Aspect | Details |
| Cost per Square Foot | $7 – $13 |
| Lifespan | 15 – 30 years |
| Climate Suitability | Best for colder climates |
Asphalt is a popular choice due to its flexibility, which is particularly advantageous in areas with freeze-thaw cycles. It’s less prone to cracking under such conditions and offers a smooth, durable surface.
Concrete: Durability, Design Flexibility, and Long-Term Value
| Aspect | Details |
| Cost per Square Foot | $4 – $8 |
| Durability | Up to 30-40 years |
| Design Flexibility | High (colors, patterns, finishes) |
Concrete driveways are highly durable and can be customized with colors, stamps, and other finishes to enhance the property’s curb appeal.
Gravel: Affordable Options and Maintenance Needs
| Aspect | Details |
| Cost per Square Foot | $1 – $3 |
| Maintenance Needs | Regular raking and topping up |
| Suitability | Ideal for large, rural properties |
Gravel is one of the most economical choices for driveways, especially suitable for long or large rural driveways where other materials can be cost-prohibitive.
Pavers and Specialty Materials: Costs for Custom Designs and Unique Finishes
| Aspect | Details |
| Cost per Square Foot | $10 – $30 |
| Customization | High (variety of pavers and styles) |
| Long-Term Value | High, adds to property value |
Pavers provide a premium aesthetic with a wide range of options, including natural stone and innovative eco-friendly materials, offering durability and a distinctive appearance.
By understanding these costs and characteristics, you can better navigate the decisions involved in selecting the appropriate material for your driveway project. In the following section, we’ll show you how to calculate these costs based on your specific requirements, ensuring you can plan your budget accurately.
Calculating Driveway Costs Per Square Foot
When it comes to calculating the cost per square foot for your driveway, understanding the methodology and considering the various materials and their complexities is key. This section provides a clear approach to estimating these costs, ensuring you can budget effectively for your project.
Methodology for Calculating Total Costs Based on Size and Material
To figure out the total cost per square foot of your driveway:
- Measure the Area: Start by measuring the length and width of your driveway area to determine the total square footage.
- Select Material: Choose the material for your driveway. Each material has a different cost associated with it, influenced by factors such as availability and durability.
- Calculate Material Cost: Multiply the total square footage by the cost per square foot for the selected material to estimate the base material cost.
- Adjust for Design and Thickness: If your design is more complex or requires thicker layers of material, adjust the cost per square foot to accommodate these changes.
To provide a more comprehensive overview, here’s an expanded table that includes a variety of materials as mentioned in the competitor’s content:
| Material Type | Cost Per Square Foot |
| Asphalt | $7 – $13 |
| Concrete | $4 – $8 |
| Gravel | $1 – $3 |
| Pavers | $10 – $30 |
| Chip Seal | $2 – $5 |
| Heated Driveways | $12 – $21 |
| Permeable Pavers | $4 – $6 |
| Grass Pavers | $4 – $6 |
| Exposed Aggregate | $4 – $12 |
Price Ranges for Different Materials and Design Complexities
The cost per square foot can vary widely, influenced not only by the material chosen but also by the design’s complexity:
- Simple Designs: These generally have lower costs, particularly for straightforward materials like gravel or basic asphalt.
- Complex Designs: Costs can escalate with the addition of decorative features like stamping, coloring, or using high-end pavers.
- Material Quality and Type: The higher the quality and uniqueness of the material (e.g., imported stone pavers or recycled materials), the higher the cost.
Understanding these factors will help you navigate your options more effectively, aligning your material choice with both your budget and design preferences. As you prepare for the actual installation, it’s crucial to consider additional factors such as labor and site preparation, which we’ll discuss in the next section on installation costs and considerations.
Installation Costs and Considerations
When paving a driveway, understanding the nuances of installation costs is as crucial as choosing the right material. This section delves into labor costs and the decision between DIY and professional installation, helping you decide the best approach for your project.
Labor Costs: Proportion to Total Expenses and Factors Influencing Rates
Labor costs can vary significantly based on several factors and typically account for a substantial portion of the total paving expenses. Here’s what influences these costs:
- Region: Labor rates can differ greatly depending on your geographical location. Urban areas generally have higher labor costs compared to rural locations.
- Scope of Work: The complexity and size of the driveway project also dictate labor costs. More intricate designs and larger areas typically require more labor hours.
- Type of Installation: Different materials require different levels of skill and time. For example, installing pavers is usually more labor-intensive than spreading gravel.
Here’s a general breakdown of how labor costs might look as a proportion of total expenses:
| Material Type | Approximate Labor Cost as % of Total |
| Asphalt | 30-40% |
| Concrete | 20-35% |
| Gravel | 15-20% |
| Pavers | 40-50% |
DIY vs. Professional Installation: When to Hire Experts
Deciding whether to DIY or hire professionals depends largely on your skill level, the complexity of the project, and the potential for significant savings:
- DIY Installation: Suitable for simpler, smaller projects like gravel driveways or basic concrete jobs. DIY can save on labor costs but might require an investment in tools and machinery.
- Professional Installation: Recommended for most asphalt, paver, and complex concrete driveways. Professionals ensure the job is done right the first time, potentially saving you from costly repairs down the line.
Professionals also bring expertise in handling unexpected issues such as poor soil conditions or drainage concerns, which can significantly affect the longevity and functionality of the driveway.
Choosing the right installation method will not only impact the upfront cost but also the long-term value and maintenance needs of your driveway. As we look beyond the installation phase, it’s also important to consider additional factors that can impact the total cost of your driveway project. We will explore these in the next section on additional factors impacting total cost.
Additional Factors Impacting Total Cost
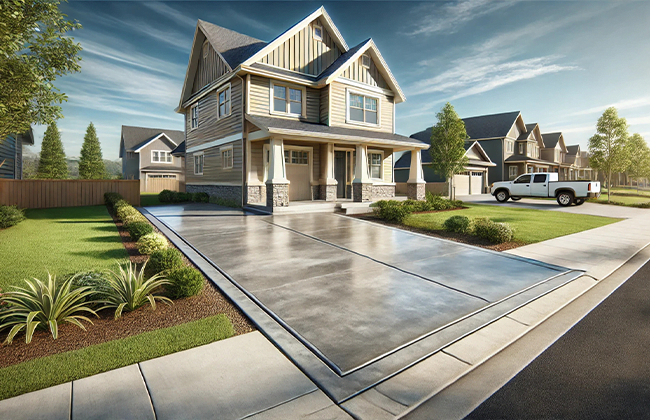
When planning your driveway, it’s not just the choice of material or installation costs that you need to consider. Several additional factors can significantly influence the overall expense. Understanding these can help you manage your budget more effectively and avoid surprises during the project.
Site Preparation: Excavation, Grading, and Necessary Drainage Solutions
Site preparation is often the first step in a driveway installation, involving:
- Excavation: Removing existing materials or soil to reach the required depth for the new driveway.
- Grading: Leveling the ground to ensure proper slope for drainage.
- Drainage: Implementing systems to direct water away from the driveway and your home to prevent damage.
These preparatory steps are crucial for ensuring the longevity and effectiveness of your driveway. Here’s a look at how these can affect your costs:
| Preparation Type | Typical Cost Range |
| Excavation | $0.50 – $2.50 per sq. ft. |
| Grading | $0.50 – $2.00 per sq. ft. |
| Drainage | $1,000 – $5,000 total |
Design Enhancements: Costs for Stamped Patterns, Colors, and Borders
Choosing to enhance your driveway with decorative designs can elevate the aesthetic appeal but also the cost:
- Stamped Patterns and Colors: Adding custom designs or colors to concrete driveways can increase costs by 10-30%.
- Borders: Installing borders around the driveway for contrast or aesthetic flair typically adds to the cost depending on materials used.
These enhancements are optional but can significantly impact the project’s final look and feel.
Special Installations: Additional Expenses for Heated Driveways
For those living in colder climates, installing a heated driveway can be a beneficial addition:
- Heated Driveway Systems: These systems prevent snow and ice accumulation, making driveways safer in winter. However, they can add substantially to both installation and operational costs.
Incorporating a heated system typically involves:
| System Type | Additional Cost |
| Electric Heating Mats | $12 – $21 per sq. ft. |
| Hydronic Systems | $14 – $24 per sq. ft. |
These systems require careful planning and installation, often by specialized professionals.
Considering these additional factors is crucial as they contribute to the total cost and functionality of your driveway. By preparing for these aspects, you can ensure a smoother project flow and no unexpected financial surprises. In the next section, we will explore how to choose the right material for your driveway, considering all these factors to match your specific needs and budget.
Choosing the Right Material for Your Driveway
Selecting the best material for your driveway involves balancing several key factors, including durability, maintenance needs, aesthetics, and how well the material will perform in your local climate. This section will guide you through these considerations, helping you make a choice that aligns perfectly with your requirements and expectations.
Factors to Consider
- Durability: Some materials, like concrete and asphalt, are known for their longevity and ability to withstand a great deal of wear and tear. Consider how much traffic your driveway will endure and the weight of vehicles it will need to support.
- Maintenance: Every driveway material has different maintenance needs. For instance, gravel needs regular leveling and replenishment, while pavers might require weeding and re-sanding between joints. Weigh the ongoing maintenance against your willingness and ability to perform these tasks.
- Aesthetics: The appearance of your driveway can dramatically affect the curb appeal of your home. Materials like stamped concrete or pavers offer more decorative options and styles compared to more utilitarian materials like asphalt.
- Climate: The material you choose should be suitable for your local climate. Asphalt, for example, is ideal for colder climates as it flexes with freeze-thaw cycles, whereas concrete is better suited to warmer areas.
How to Match Material Properties with Your Driveway Requirements
Matching the right material to your specific needs involves a detailed assessment of your driveway’s intended use and your personal preferences:
- Assess Usage: Determine the expected traffic and usage of your driveway. High-traffic areas may require more durable materials like concrete or asphalt.
- Consider Long-Term Costs: Factor in the long-term costs associated with maintenance. While some materials may have a higher upfront cost, they might be cheaper to maintain in the long run.
- Visualize the Finished Product: Think about how the driveway will look once it’s completed. Consider materials that complement the exterior of your home and landscape.
By carefully considering these factors, you can select a material that not only meets your practical needs but also enhances the beauty and value of your property.
In our next section, we will outline the project timeline from start to finish, ensuring you have a clear understanding of what to expect during the installation process.

Project Timeline: From Start to Finish
Planning your driveway project involves understanding the timeline from the initial preparation to the final touches. Different materials and project scales can significantly affect the duration, and knowing what to expect can help you manage your schedule and expectations effectively.
Expected Duration for Different Materials and Project Scales
Here’s a table outlining typical installation and curing times for various driveway materials, helping you plan the timeline from start to finish:
| Material Type | Installation Time | Curing/Settling Time |
| Asphalt | 1-2 days | 24 hours |
| Concrete | 3-5 days | Up to 28 days |
| Gravel | 1 day | Immediate use |
| Pavers | Several days to 1 week | Immediate use |
Curing and Settling Times: Planning for Full Usability
Understanding the curing and settling times is crucial for ensuring the longevity and durability of your driveway:
- Curing Time: This is especially important for materials like concrete and asphalt, where early use can cause significant damage or deformity to the surface.
- Settling Time: For materials like gravel, allowing some time to settle can result in a more compact and stable surface.
Planning around these timelines will help you avoid disruptions and ensure that your driveway is durable and fully functional from the start. Keeping these timelines in mind allows for effective planning and a smooth project flow, ensuring your driveway is completed on time and to your satisfaction.
Conclusion
Throughout this guide, we’ve covered the essential aspects of determining the cost to pave a driveway. From choosing the right materials to understanding installation nuances and additional costs, it’s clear that thorough planning is crucial for a successful outcome. If you are aiming to keep the cost to pave a driveway within your budget while ensuring quality, these insights should prove invaluable. If you’re looking for a professional contractor for a blacktop driveway, don’t hesitate to contact (+1) 917-355-8556.
FAQs
What is the average cost to pave a driveway with asphalt?
The average cost to pave a driveway with asphalt typically ranges from $7 to $13 per square foot. This depends on regional prices and the driveway’s size.
How long does it take to complete the cost to pave a driveway project?
The time required to pave a driveway varies by material. Most projects are completed within a few days, allowing for immediate or short-term use depending on the material chosen.
What factors can increase the cost to pave a driveway?
Factors that can increase the cost to pave a driveway include the choice of high-end materials, complex designs, and extensive site preparation. Enhanced durability features also contribute to the overall cost.
Is it more cost-effective to pave a driveway with concrete or asphalt?
While asphalt may be less expensive initially, concrete driveways typically offer longer lifespan and fewer maintenance costs. This might make them more cost-effective in the long run.
Can DIY methods reduce the cost to pave a driveway?
DIY can reduce the cost to pave a driveway, especially for simpler materials like gravel. However, for more complex installations like concrete or pavers, professional assistance is recommended to ensure quality and durability.
What’s the cheapest type of driveway material?
Gravel is the cheapest driveway material, typically costing between $1 to $3 per square foot. It’s easy to install and maintain, making it ideal for large rural areas and budgets.
How long can a driveway last?
The lifespan of a driveway varies by material. Asphalt can last up to 30 years, and concrete up to 40 years. Gravel needs more frequent top-ups but can remain functional indefinitely with proper care.
How long does it take before you can drive on a new driveway?
For asphalt driveways, it is typically safe to drive on them after at least 24 hours of curing. For concrete driveways, it’s best to wait at least seven days to allow adequate curing for vehicle traffic.
What’s the difference between asphalt and blacktop?
Asphalt and blacktop are often used interchangeably. Technically, blacktop is a type of asphalt with a higher stone content. This makes it more durable and suited for high-traffic areas.
Should I sealcoat my driveway?
Sealcoating is recommended for asphalt driveways as it extends their lifespan by providing protection against weathering, cracks, and oil spills. It’s typically advised to sealcoat every three to five years.


