Learning how to fix brick mortar is essential for maintaining the structural integrity and aesthetic appeal of your brick walls. Whether you’re dealing with minor cracks or more significant erosion, understanding the right techniques and materials can make all the difference. This guide provides step-by-step instructions to ensure your brick mortar remains in excellent condition, preserving the longevity and beauty of your home.
What is Brick Mortar and Why Does it Need Repairs?
Brick mortar, essentially the glue that holds bricks together in a wall, is a mixture primarily made of water, sand, and cement. This mortar fills the gaps between bricks, ensuring structural stability and weather resistance in masonry structures. Over time, however, mortar can deteriorate due to various factors, necessitating repairs to maintain the integrity and appearance of the brickwork.
Definition of Brick Mortar
Mortar acts as a bonding agent in brick constructions. Its quality and durability are crucial for the wall’s strength and longevity. The right mix ensures that the structure can withstand environmental stress and load-bearing demands.
Common Reasons for Mortar Damage
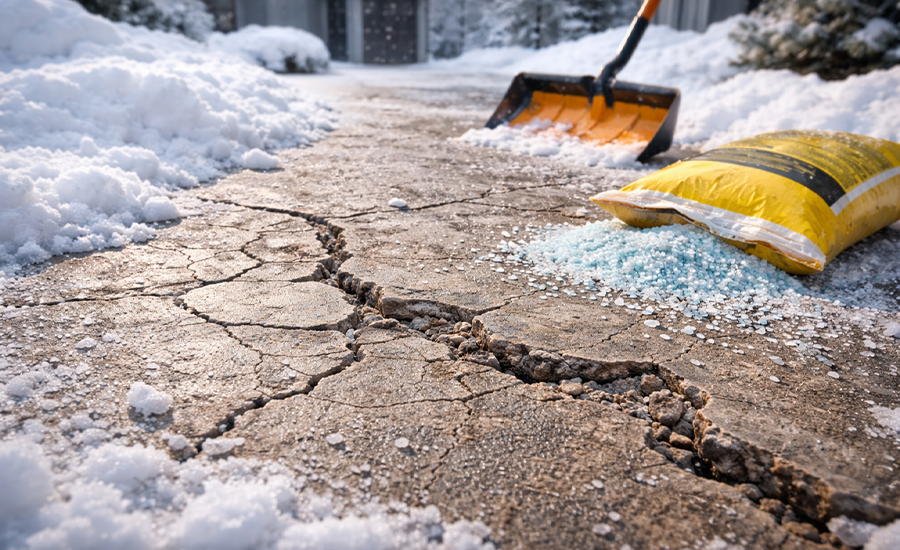
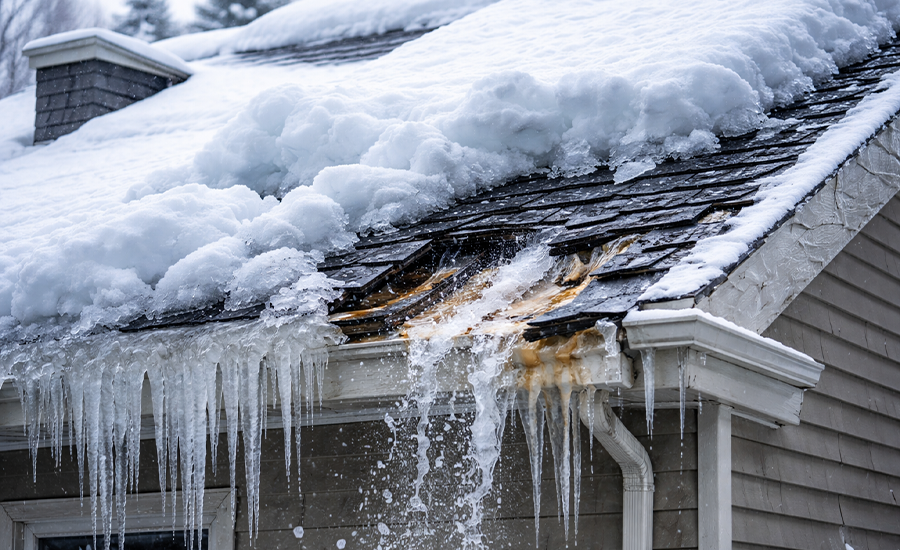
- Weathering: Exposure to the elements, like rain, snow, and temperature fluctuations, can erode mortar over time. Water entering the cracks freezes and expands, causing further damage.
- Chemical Damage: Acid rain and pollution can chemically react with the components of mortar, leading to weakening and disintegration.
- Physical Impact: Accidental impacts from vehicles, heavy machinery, or falling objects can crack and dislodge mortar.
- Aging: As mortar ages, it loses its bonding properties. Over decades, this natural degradation can compromise the mortar’s ability to hold bricks together.
- Improper Installation: If the mortar mix was not properly prepared or applied during the construction phase, it might show premature signs of failure.
Understanding these factors is essential for diagnosing issues with your brick mortar and addressing them promptly. Regular maintenance and timely repairs can extend the life of your brick structures significantly, keeping them safe and aesthetically pleasing.
By identifying the early signs of mortar damage, you can take appropriate actions to repair it before minor issues become major structural concerns. Let’s explore these signs next, so you know exactly when to act.
Signs That Your Brick Mortar Needs Repairs
When it comes to maintaining brickwork, spotting early signs of mortar deterioration is key to preventing more significant issues. If you know what to look for, you can address problems before they compromise the structural integrity of your walls. Here’s what to keep an eye out for:
1. Cracking
Cracks in the mortar are often the first sign that repairs are needed. These can range from thin hairline cracks, which are mostly cosmetic, to wider cracks, which can indicate more severe structural issues. Cracks usually occur due to thermal expansion, building settlement, or external impacts. Monitoring these cracks can help you decide when to take action, ensuring they don’t widen and allow moisture or pests into your walls.
2. Erosion
Erosion in mortar, often seen as mortar wearing away from the brick face, is typically caused by prolonged exposure to water and wind. In areas with harsh weather conditions, this is particularly common. If the depth of the eroded mortar exceeds half an inch, it’s time to consider repointing, which involves renewing the external part of mortar joints.
3. Discoloration
Changes in the color of the mortar can be due to moisture issues, mold growth, or salt efflorescence, which appears as a white powdery residue. Discoloration doesn’t always threaten the wall’s structural stability but can be unsightly and indicate moisture problems that could lead to more serious damage if not addressed.
Identifying these signs early can save you time and money, allowing for repairs before more extensive damage occurs. Once you’ve identified the need for repairs, the next step is gathering the necessary tools and materials to get the job done right. Let’s take a look at what you’ll need to start your repair project.

Transform your home with expert masonry services. Contact us today for a free consultation.
Tools and Materials Needed for Repairing Brick Mortar
Before diving into the actual repair process, it’s crucial to gather all the necessary tools and materials. Having everything on hand not only makes the job smoother but also ensures that the repair work lasts. Let’s break down what you’ll need:
List of Necessary Tools
- Chisel and Hammer: For removing the damaged mortar, a chisel and hammer are essential. A cold chisel of the right width allows for precision in removing old mortar without damaging the bricks.
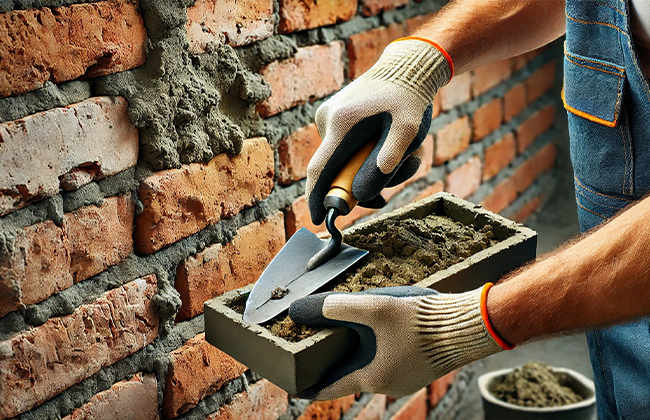
- Mortar Hawk: This tool will hold the mortar while you work, making it easier to apply the mix into the joints.
- Pointing Trowel: A small, pointed trowel is used for applying and smoothing the mortar in the joints.
- Wire Brush: Before applying new mortar, a wire brush is used to clean out the joints thoroughly to ensure a clean bonding surface.
- Masonry Brush: Used for dampening the bricks and joints before applying new mortar, ensuring better adhesion.
- Bucket and Mixing Tool: For mixing the mortar, you’ll need a sturdy bucket and a mixing tool, like a paddle mixer attached to a drill for consistency.
- Safety Glasses and Gloves: Safety should never be compromised. Always wear safety glasses and gloves to protect yourself from flying debris and caustic mortar mix.
Types of Mortar Mixes
Choosing the right type of mortar mix is just as important as the technique used to apply it. The ideal mix depends on the existing mortar and the environmental conditions.
- Type N Mortar: Commonly used for general repair work, this type offers a good balance of flexibility and strength, suitable for exterior walls not exposed to severe weather.
- Type S Mortar: With higher bond strength and resistance to soil pressure and wind, Type S is ideal for below-grade applications and exterior walls in regions with severe weather.
- Type M Mortar: This type is used when strength is a primary concern, such as in retaining walls. It’s the strongest available but also the least flexible, which can make it susceptible to cracking if used improperly.
- Lime Mortar: For older buildings, lime mortar may be necessary to match the historic character and compatibility. It offers good flexibility and self-healing properties but less strength compared to modern cement-based mortars.
With your tools and materials ready, you’re all set to move on to the actual repair process. Next, we’ll take you through a step-by-step guide on how to fix brick mortar, ensuring your repairs are effective and enduring. This will help you not just restore the mortar but also preserve the longevity and beauty of your brickwork.
Step-by-Step Guide on How to Fix Brick Mortar
Repairing brick mortar might seem daunting, but with the right approach and tools, it’s a task you can tackle with confidence. Here’s how to do it effectively:
1. Preparing the Damaged Area
Removing Old Mortar:
- Safety First: Wear your safety goggles and gloves. Chunks and dust can fly, so protection is key.
- Chisel and Hammer: Use the chisel and hammer to carefully remove the old, damaged mortar. Aim to remove it to a depth of about ½ to ¾ inch, or until you reach solid mortar.
- Be Gentle: Avoid damaging the bricks. Work patiently and let the tool do the job.
Cleaning the Bricks:
- Wire Brush: Once the old mortar is out, use a wire brush to clean the joints thoroughly. This will remove any residual mortar dust.
- Masonry Brush: Dampen the joints with a masonry brush and water. This helps the new mortar adhere better and cures more evenly.
2. Choosing the Right Mortar Mix
Types of Mortar:
- Refer back to the “Types of Mortar Mixes” section to choose the best fit based on your wall’s exposure and location.
Matching Mortar to Brick Type:
- Color and Composition: Ensure the new mortar matches the existing in color, composition, and strength. This preserves the look and integrity of the wall.
3. Mixing the Mortar
Ingredients and Proportions:
- Follow the manufacturer’s instructions for the best results. Typically, a mix ratio of 1 part cement to 1 part lime to 6 parts sand works well for many applications.
Mixing Techniques:
- Consistency: Aim for a consistency similar to peanut butter. If it’s too dry or too wet, it won’t set properly.
- Mix Thoroughly: Use a drill with a paddle mixer if available, or mix by hand until the color and texture are uniform.
4. Applying the Mortar
Techniques for Filling Joints:
- Load the Trowel: Scoop some mortar onto your trowel, then press it into the joints using the pointing trowel.
- Compact: Ensure the mortar is compacted into the joint, filling it completely with no air pockets.
Tools for Application:
- Use the pointing trowel for precision and the mortar hawk to hold your material close at hand.
5. Curing the Mortar
Time Required:
- Mortar generally needs to set for about 24 to 48 hours before it can be exposed to any significant movement or moisture.
Conditions for Effective Curing:
- Weather Conditions: Avoid doing the repair in extremely hot or cold weather. Ideal temperatures are between 50°F and 70°F.
- Moisture: Keep the newly filled joints damp for several days if possible, to help the mortar cure slowly and gain strength.
With these steps, you’ll ensure that your brick mortar repair is not only successful but lasting. Next, we’ll move on to some tips that will help you further ensure the quality and durability of your repairs.

Transform your home with expert masonry services. Contact us today for a free consultation.

Tips for a Successful Brick Mortar Repair
Achieving a durable and visually pleasing mortar repair requires attention to detail and adherence to best practices. Here are some tips to guide you through the process and help you avoid common pitfalls:
Best Practices
- Proper Preparation: Before applying new mortar, ensure that all old, loose mortar is removed and that the bricks are clean and damp. This preparation is crucial for good adhesion and long-lasting results.
- Correct Mortar Mix: Choose a mortar mix that matches the existing mortar in terms of strength, color, and texture. This compatibility helps maintain the structural integrity and aesthetic of your brickwork.
- Adequate Mixing: Mix the mortar thoroughly to a uniform consistency, similar to peanut butter. Under-mixed mortar can lead to weak joints and premature deterioration.
- Consistent Application: Use consistent force and depth when repointing the joints to avoid uneven surfaces and to ensure the mortar compacts well into the joints.
- Curing Conditions: Keep the newly repaired mortar damp for several days to allow it to cure slowly and develop strength, especially in hot or windy conditions.
Common Mistakes to Avoid
- Rushing the Job: Allowing insufficient time for removing old mortar or for curing can compromise the quality of the repair. Patience is key.
- Ignoring Weather Conditions: Avoid doing mortar repairs in extreme weather conditions. Ideal conditions are dry and mild. High humidity or freezing temperatures can hinder the curing process.
- Mismatched Mortar: Using a mortar that doesn’t match the physical and chemical properties of the original mortar can lead to problems like cracking or color discrepancies.
- Overfilling Joints: Applying too much mortar can lead to excess material on the brick faces, which not only looks untidy but can also affect the wall’s breathability.
- Neglecting Safety: Always wear appropriate protective gear, such as gloves and goggles, to protect against sharp tools and caustic mortar ingredients.
By following these tips and avoiding common errors, you can ensure that your mortar repair enhances both the durability and the appearance of your brickwork. Maintaining your brickwork after the repair is just as crucial for ensuring its longevity and preserving the beauty of your masonry. Let’s explore how to maintain your brickwork post-repair to keep it in top condition.
Maintaining Your Brickwork Post-Repair
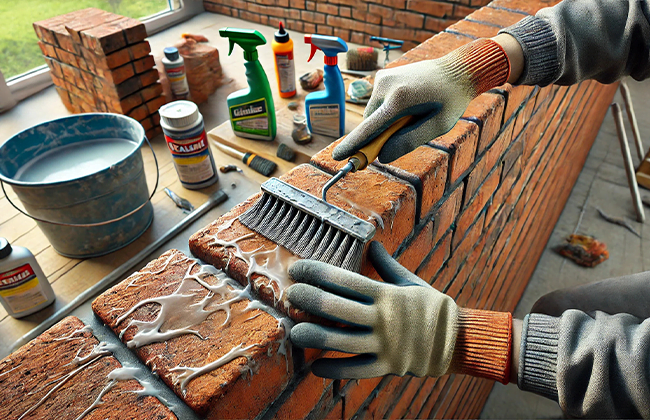
Once you’ve repaired your brick mortar, maintaining the brickwork is essential to ensure its longevity and to prevent future damage. Here’s how you can keep your repaired brickwork in top condition:
Routine Inspection Tips
- Regular Checks: Conduct a visual inspection of your brickwork at least twice a year, typically in the spring and fall. Look for signs of new cracks, mortar erosion, or loose bricks which might indicate underlying issues.
- After Severe Weather: Always check your brickwork following extreme weather events, like heavy rains, freezing temperatures, or storms, as these conditions can accelerate deterioration.
- Monitor Vegetation: Keep an eye on any plants or trees near your brick walls. Roots can grow into the mortar joints, and vines can retain moisture against the brickwork, both of which can cause damage over time.
Cleaning and Sealing
- Gentle Cleaning: To clean your brickwork, avoid harsh chemicals and high-pressure washers, as these can erode the mortar. Instead, use a soft brush and a mild detergent solution to remove dirt and debris gently.
- Proper Sealing: Applying a breathable sealant can help protect the mortar from moisture while allowing any trapped water to evaporate. Make sure to use a sealant suitable for masonry and apply it according to the manufacturer’s instructions.
- Address Moisture Immediately: If you notice any moisture issues, such as water pooling at the base of the wall or damp patches, address these promptly to prevent water from seeping into the mortar and bricks.
By implementing these maintenance practices, you can extend the life of your brickwork and ensure that your recent repairs hold up over time. Regular upkeep not only keeps your home looking great but also prevents minor issues from becoming major repairs down the line. Keep these tips in mind, and your brickwork will continue to add charm and stability to your home for years to come.
Conclusion
After following our comprehensive guide on how to fix brick mortar, you should feel equipped to handle basic repairs. If you notice signs of mortar damage, remember the importance of using the right tools and techniques to achieve long-lasting results. However, if the damage is extensive or if you prefer a professional touch to ensure the durability and safety of your brickwork, don’t hesitate to contact a professional contractor. For expert services in fixing brick mortar, please call (+1) 917-355-8556.
FAQs
Q: What are the first signs that I need to fix brick and mortar?
A: The first signs include visible cracks, eroded mortar, and discoloration. These symptoms indicate that the mortar is weakening and needs attention to prevent further structural damage.
Q: How often should I inspect my brickwork to ensure the mortar is in good condition?
A: It’s wise to inspect your brickwork at least twice a year. Regular checks help catch early signs of wear, allowing you to fix brick mortar before major issues arise.
Q: What is the best season to fix brick mortar?
A: The ideal time to fix brick mortar is during mild weather conditions, typically in late spring or early fall, when temperatures are moderate and there is less chance of rain.
Q: Can I fix brick mortar myself, or should I hire a professional?
A: While minor repairs can be a DIY project, for extensive damage or for ensuring a perfect match and durability, it’s recommended to hire a professional experienced in how to fix brick mortar.
Q: What tools do I need to effectively fix brick and mortar?
A: Essential tools include a chisel, hammer, mortar hawk, pointing trowel, wire brush, and safety equipment. Proper tools ensure that you can effectively remove old mortar and apply new mortar precisely.
Q: Can brick mortar be repaired?
A: Yes, brick mortar can be repaired when it shows signs of deterioration such as cracking or crumbling. The process involves removing the damaged mortar and replacing it with new mortar to restore structural integrity.
Q: Will new mortar stick to old mortar?
A: New mortar can adhere to old mortar if the old surface is properly cleaned and prepared. Ensuring the old mortar is dust-free and slightly damp will help the new mortar bond effectively.
Q: Can you fix the crumbling mortar?
A: Crumbling mortar can be fixed by carefully removing the affected mortar and replacing it with a fresh mix. It’s important to address crumbling mortar promptly to avoid structural issues.
Q: Can you repoint over old mortar?
A: Repointing over old mortar is not advisable. The old mortar should be removed to a sufficient depth to allow the new mortar to bond well and provide durability.
Q: Brick mortar repair cost?
A: The cost to repair brick mortar typically ranges from $5 to $15 per square foot, depending on the extent of damage and the cost of labor in your area.
Q: How to repair mortar between bricks on steps
A: To repair mortar between bricks on steps, remove the damaged mortar, clean the joint thoroughly, and fill it with new mortar, ensuring it’s compacted and shaped to match the existing joints.
Q: How to Repair Brick Mortar
A: Repairing brick mortar involves removing the damaged or old mortar to a depth of about one inch, cleaning the joints thoroughly, and filling them with a new mortar mix that matches the original in color and strength.
Q: How to Repair Mortar in a Brick Wall
A: To repair mortar in a brick wall, chisel out the old mortar to a proper depth, clean the joints, dampen them, and apply a new mortar mix using a pointing trowel for a neat finish.
Q: How to repair mortar joints in brick walls and chimneys
A: Repair mortar joints by removing old, crumbling mortar to a depth of at least ¾ inch, thoroughly cleaning the joints, and refilling them with a suitable new mortar.
Q: How Do You Repair A Damaged Brick Wall?
A: Repair a damaged brick wall by first assessing the extent of damage, then removing loose or damaged mortar and bricks, and replacing them with new mortar and bricks that match the wall’s existing materials.
Q: How to repoint mortar joints
A: To repoint mortar joints, first remove the old mortar to a depth of two times the width of the joint. Clean the area thoroughly. Then apply new mortar, ensuring it’s packed tightly and matches the original appearance.
Q: How to Repair Loose Mortar Joints
A: Repair loose mortar joints by chiseling out the old mortar, cleaning the joint of debris, and applying new mortar. Be sure to compact the mortar well to avoid air pockets and ensure a durable bond.

Transform your home with expert masonry services. Contact us today for a free consultation.


