Are you planning to enhance your backyard? Learning how to pave a patio can transform your outdoor area into a versatile and inviting retreat. Whether you’re considering a cozy spot for your morning coffee or a robust setting for entertaining guests, a well-paved patio adds value and charm to any home.
Planning Your Patio
Planning the perfect patio begins with thoughtful consideration of your needs and the characteristics of your outdoor space. This stage is critical because it sets the groundwork for the entire project, ensuring that the final outcome is both functional and beautiful. Here’s how you can effectively plan your patio:
1. Assessing Your Needs:
Before you draw a single line on your plan, think about how you intend to use the patio. Will it be for large gatherings or intimate family dinners? Do you need space for a grill, dining set, or perhaps a fire pit? Understanding your usage will help determine the size and features of the patio.
2. Analyzing the Space:
Take a good look at your available outdoor space. Consider its shape, slope, and any existing features like trees or garden beds. How will these affect the placement and shape of your patio? You might need to work around some elements or incorporate them into your design.
3. Choosing a Style:
The style of your patio should complement the architecture of your home and the existing landscape design. Whether you’re going for a modern, minimalist look or a more natural, rustic style, the design should create a cohesive visual flow between your home and garden.
4. Budgeting:
Establish a budget early in the planning process. This will guide your decisions on materials and the scale of the patio. Remember, more elaborate designs and higher-quality materials will increase the cost, so plan accordingly to balance beauty with affordability.
5. Legal Considerations:
Check local zoning laws and homeowners association rules, if applicable, before finalizing your plans. You may need permits for construction, especially if you plan to install electrical or plumbing elements.
6. Drafting the Design:
With all the information in hand, create a detailed design. This should include not only the layout but also the type of materials, colors, and textures. If you’re not confident in your design skills, consider hiring a professional to ensure your vision is perfectly translated into reality.
7. Timeline and Phases:
Depending on the complexity, the project might need to be completed in phases. Outline a timeline that accounts for purchasing materials, preparing the site, laying the foundation, and installation. Be realistic about timeframes and consider weather conditions that might affect your schedule.
By thoroughly planning your patio, you ensure that the construction phase goes smoothly, reducing surprises and helping maintain your budget. This foundational work is a crucial step towards creating a patio that will enhance your home’s outdoor space for years to come. Next, we’ll explore the materials you can choose to bring this design to life in the Materials for Paving section.
Materials for Paving
Selecting the right materials for paving your patio is not just about aesthetics; it’s about finding the perfect balance between durability, maintenance, cost, and style. Let’s look at the different types of materials you can use and the tools you’ll need to get the job done.
Types of Paving Materials
Choosing the right paving material for your patio is crucial to ensure that it not only looks great but also stands up to the elements and the wear and tear of daily use. Here’s a deeper look at the options available:
Concrete Pavers:
Concrete is highly versatile and can be made to mimic the look of natural stone or brick at a fraction of the cost. These pavers are manufactured in a variety of textures and colors, providing flexibility in design. They’re also relatively easy to install and repair, making them a popular choice for DIY projects.
Brick:
Offering a classic aesthetic, brick pavers bring a warm, traditional feel to any patio. They are known for their durability and can last for decades if installed correctly. Brick is also naturally slip-resistant, making it a safe choice for areas that receive a lot of rain.
Natural Stone:
For those seeking an upscale and unique look, natural stone is the way to go. Options like bluestone, slate, and limestone offer distinct patterns and shades that can’t be replicated with man-made materials. Natural stone requires a bit more maintenance and a stronger foundation due to its weight and irregular shapes but delivers unparalleled beauty and longevity.
Tools and Supplies
To pave a patio, you will need specific tools to ensure the job is done right and to make the process as smooth as possible. Here’s what you’ll typically need:
- Shovel and Rake: For spreading and leveling base materials like sand and gravel.
- Tamper or Plate Compactor: Essential for compacting the base and the sand layer, ensuring a stable foundation for your pavers.
- Level: To check that the base material and pavers are level, preventing water pooling and uneven surfaces.
- Rubber Mallet: Useful for tapping pavers into place gently without damaging them.
- Masonry Saw: Sometimes necessary for cutting pavers to fit corners and edges.
- String and Stakes: To outline the area where you will install the patio, ensuring it stays true to your design.
- Measuring Tape: For precise measurements of both the space and the pavers.
- Chalk or Marking Paint: To mark areas directly on the ground for digging or adjusting.
Equipped with the right materials and tools, you’re now ready to prepare the site for your patio, which involves clearing the area, setting the base, and ensuring everything is level and ready for paving. Each step you take in preparing the site is crucial for achieving a beautiful and long-lasting patio. Let’s move on to how you can Prepare the Site for your dream outdoor space.
Preparing the Site
Once you’ve chosen your paving materials and gathered your tools, the next step is preparing the site where your patio will be laid. This stage is crucial to ensure a stable and long-lasting patio. Let’s break down the steps involved.
Clearing the Area
The first task is to clear the site of any grass, weeds, or debris. Here’s how to do it effectively:
- Remove Vegetation: Use a spade or a sod cutter to remove any grass. It’s important to get the roots out as well, to prevent any future growth under your patio.
- Level the Soil: Once the area is clear, you need to level the ground. Use a rake and a large level. Make sure the surface is as flat as possible. This step prevents water pooling and ensures that the pavers lay flat and stable.
- Compact the Soil: Use a tamper or a plate compactor to compact the soil. This creates a firm base, reducing the risk of the soil settling unevenly later on.
Creating a Solid Base
After the soil is prepared and leveled, the next step is to create a solid base using gravel and sand:
- Lay Gravel Foundation: Start by spreading a layer of gravel about 4-6 inches deep over the cleared area. This layer provides excellent drainage and acts as a sturdy foundation for the pavers.
- Compact the Gravel: Compact the gravel thoroughly using a plate compactor. This step is vital as it ensures the base is stable and won’t shift over time.
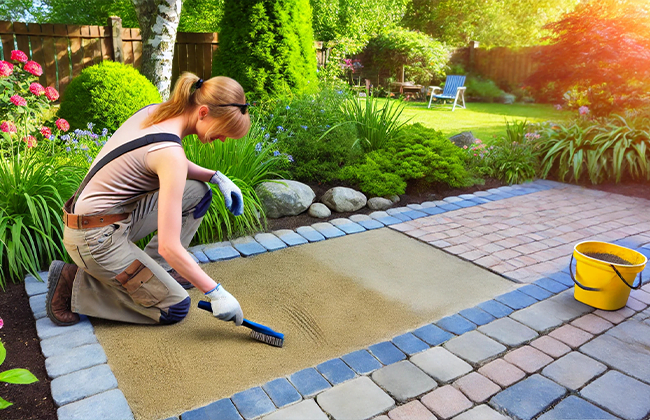
- Add Sand Layer: Over the gravel, add a layer of fine sand, about 1-2 inches thick. The sand acts as a smoother surface on which to lay your pavers and helps to lock them in place.
- Level the Sand: Carefully level the sand with a long, straight board or with the flat side of a rake. This ensures that the surface is even across the entire patio area.
Preparing the site properly is the foundation of a well-laid patio. Skipping these steps or rushing through them can lead to problems like sinking pavers or water damage over time. With the site cleared, leveled, and the base firmly laid, you’re now ready to move on to the next exciting phase: Laying the Pavers. This step will bring your patio design to life, creating a functional and attractive outdoor living space.
Laying the Pavers
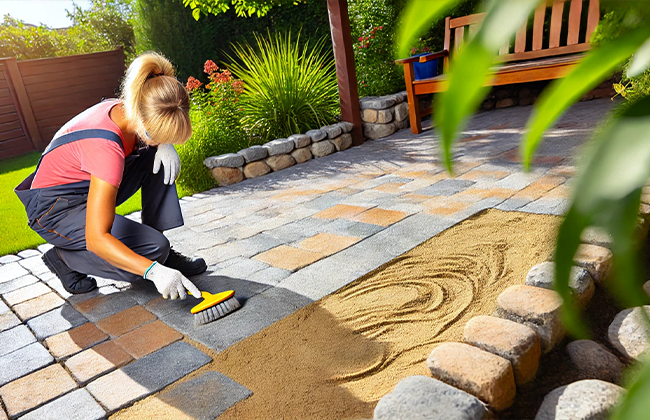
After meticulously preparing the site, the next exciting phase is laying the pavers. This step is where your patio really begins to take shape, and careful attention to detail can significantly enhance both the appearance and longevity of your patio. Here’s how to do it:
Setting Out Your Design
- Plan Your Pattern: Before laying the pavers, decide on the pattern you’d like. Common patterns include herringbone, basket weave, or a simple staggered joint. Each pattern has its charm and complexity, so choose one that complements the style of your home and is within your ability to install.
- Dry Lay a Section: It’s a good idea to dry lay a small section of pavers to ensure your pattern works in the space and to practice the technique. This step helps visualize the end result and allows you to make adjustments without the commitment of adhesive or sand.
- Mark Your Boundaries: Use string lines or marking paint to define the area clearly. This guideline keeps your pattern straight and consistent as you progress.
Installation Techniques
- Laying the Pavers: Begin at a corner or an edge and work your way across. Place each paver down firmly into the sand base, leaving a small gap between each for joint sand.
- Tapping into Place: After placing a paver, tap it gently with a rubber mallet. This action helps bed the paver into the sand evenly, ensuring it’s level with adjoining stones.
- Level as You Go: Use a spirit level regularly to check that the pavers are flat and even. Adjust the level of the sand underneath if necessary to maintain a uniform surface.
- Cutting Pavers: You’ll likely need to cut some pavers to fit your space, especially around edges and corners. Use a masonry saw or a chisel and hammer for this task, depending on the precision required and the thickness of the paver.
- Maintain Consistency: Keep an eye on the spacing and level as you work, making adjustments on the go. Consistency is key to achieving a professional finish.
Laying the pavers correctly is crucial for a durable and attractive patio. It requires patience and precision, but the effort is well worth it when you see the beautiful result. Now that the pavers are securely in place, you’re ready to move onto the final steps: Finishing Touches. This last phase includes filling the joints and sealing your patio, steps that protect your hard work and enhance the overall beauty of the project.

Finishing Touches
Once the pavers are laid, the final steps in creating your patio involve filling the joints and sealing the surface. These finishing touches not only enhance the appearance of your patio but also contribute to its durability and maintenance. Let’s dive into how you can accomplish these effectively.
Filling the Joints
- Choosing the Right Jointing Sand: The choice of sand used to fill the joints between pavers is crucial. Polymeric sand is a popular option because it binds together when wet, helping to lock pavers in place and prevent weed growth and insect intrusion.
- Applying the Sand: Pour the sand over the pavers and use a broom to sweep it into the cracks. Make sure the joints are fully filled by pushing the sand down firmly. This process may need to be repeated to ensure the sand is tightly packed.
- Final Sweep and Clean: After the joints are filled, sweep the surface again to remove excess sand. A light spray with a garden hose can help settle the sand, but be careful not to wash it out of the joints.
Sealing the Patio
- Benefits of Sealing: Sealing your patio can enhance the color of the pavers and protect them from stains, weather conditions, and fading. It also helps to solidify the joint sand, reducing the chance of it washing out.
- Choosing a Sealer: Select a sealer based on the type of paver and your aesthetic preferences. Some sealers enhance the color with a wet look, while others offer a natural finish. Make sure the sealer is appropriate for outdoor use and compatible with your paving material.
- Applying the Sealer: Ensure the patio is completely dry before applying the sealer. Use a roller or a sprayer to apply an even coat over the surface. Follow the manufacturer’s instructions regarding drying times and the number of coats needed.
By carefully filling the joints and sealing the patio, you’ve not only secured the structure of your paving but also extended its lifespan and improved its resistance to elements. This ensures that your patio will remain a beautiful and functional part of your outdoor space for years to come.
With your patio now complete and fully protected, the final step is to move into Maintenance and Care. Regular upkeep will keep your new patio looking its best and functioning beautifully for all your outdoor activities.
Maintenance and Care
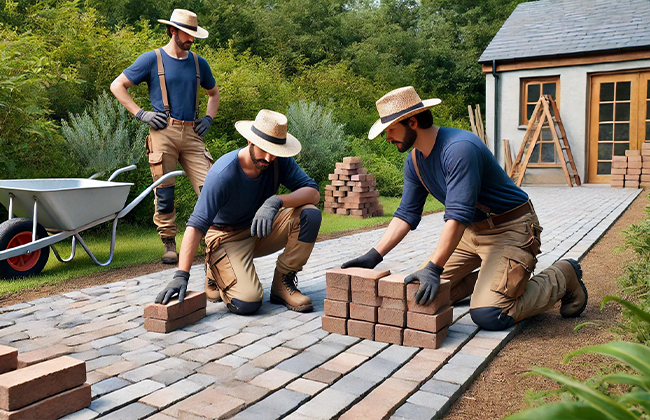
Now that your patio is beautifully installed and finished, regular maintenance is key to keeping it looking its best and functioning properly over time. Here are some essential tips and solutions to common issues that might arise.
Regular Maintenance Tips
- Cleaning: Regularly sweep your patio to remove dirt and debris. For deeper cleaning, use a mild detergent and a stiff brush to scrub the pavers. Avoid using harsh chemicals that can damage the pavers or the sealer.
- Checking for Movement: Periodically check your patio for any movement or settling of pavers. This can happen due to changes in temperature or moisture levels. Early detection helps prevent bigger issues.
- Re-sanding Joints: If you notice sand escaping from the joints, it’s a good time to add more sand. This will keep the pavers stable and prevent weeds and insects from taking hold.
Troubleshooting Common Issues
- Handling Weeds: If weeds do start to appear between your pavers, removing them early is key. You can pull them by hand or use a weed killer designed for use on patios. Make sure the product is safe for your type of paving material.
- Stains: To handle stains, identify the source first—oil, leaves, dirt—and use an appropriate cleaner for the material. For oil stains, use a degreaser; for organic stains like leaves or berries, a mild bleach solution can be effective.
- Loose Pavers: Check any loose pavers to determine if the issue is due to a failing base or just the paver itself. Removing the paver, checking and if necessary, replenishing the base material and re-laying the paver usually solves the problem.
Maintaining your patio doesn’t just preserve its look and utility—it also extends its life, ensuring that it remains a vibrant part of your outdoor living space for years to come. With these care steps in mind, you’re well-equipped to handle the upkeep and enjoy a pristine patio.
As you continue to enjoy and maintain your patio, you might also think about ways to enhance its function and appeal. Next, we will explore how to Customize Your Patio Space, adding personal touches that make your outdoor area truly yours, integrating furniture, accessories, and landscaping to enhance its beauty and functionality.
Customizing Your Patio Space
With your patio built and maintained, it’s time to add personal touches that transform it from a simple paved area into a vibrant outdoor living space. Here’s how you can enhance your patio’s comfort and style with furniture, accessories, and landscaping.
Adding Furniture and Accessories
- Selecting Furniture: Choose furniture that complements the size of your patio and the style of your home. Consider durable materials like teak, wrought iron, or weather-resistant wicker to withstand the elements. For smaller spaces, folding chairs and tables offer flexibility.
- Comfort Elements: Add cushions and throw pillows in outdoor fabrics to bring color and comfort to your seating. These can be updated seasonally to keep your space feeling fresh and vibrant.
- Functional Accessories: Incorporate outdoor rugs to define seating areas and add warmth underfoot. Lighting options such as lanterns or string lights create a cozy atmosphere and extend the usability of your patio into the evening.
- Entertainment Features: Consider adding a fire pit for chilly nights or a small water feature for a soothing ambiance. Outdoor kitchens or bar setups can also elevate your patio, making it perfect for entertaining.
Landscaping Ideas
- Plant Integration: Soften the edges of your patio with border gardens or potted plants. Choose native plants that thrive in your climate for low maintenance beauty. Varying the height and color of the plants can add visual interest and depth to your patio.
- Lighting for Ambiance: Strategic lighting can dramatically change the atmosphere of your patio. Solar path lights, spotlights for highlighting plants, or an overhead pendant light can make the space inviting and accessible after dark.
- Privacy Solutions: If your patio is visible to neighbors, consider adding lattice panels or a vertical garden for privacy. Climbing plants like ivy or wisteria can beautify these structures while increasing your patio’s seclusion.
- Seasonal Changes: Rotate decorations and furnishings according to the seasons. Use umbrellas or awnings for shade in the summer, and warm blankets and heaters for cooler months to enjoy your patio year-round.
By customizing your patio with thoughtful additions of furniture, accessories, and landscaping, you not only enhance its functionality but also create a delightful extension of your home. This personalized touch turns your patio into a sanctuary, perfect for relaxation or entertaining guests. As you continue to refine and enjoy your space, it will reflect your tastes and needs, making every moment spent outdoors even more enjoyable.
Conclusion
Having learned how to pave a patio, incorporating these steps into your project ensures a durable and beautiful outdoor space. From choosing the right materials and preparing the site to laying the pavers and adding personal touches, each phase is crucial for a successful installation. If you’re looking for professional assistance to pave your patio, don’t hesitate to contact a seasoned contractor at (+1) 917-355-8556 for expert guidance and services.
FAQs
Q: What do I need to start when I want to pave a patio?
A: To pave a patio, you’ll need to select appropriate materials, prepare the site by clearing and leveling it, and plan out the layout and design of the patio to ensure it meets your needs and blends well with your home’s aesthetic.
Q: How long does it typically take to pave a patio?
A: The time it takes to pave a patio can vary widely depending on the size and complexity of the design. Generally, the physical laying of pavers might take a couple of days, but preparing the site and setting the base can add extra time to your project.
Q: What’s the best type of material to use for paving a patio?
A: The best material to pave a patio depends on your budget, the climate, and your style preferences. Popular choices include concrete pavers for their versatility, brick for a classic look, and natural stone for a unique, upscale appearance.
Q: Can I pave a patio on uneven ground?
A: Yes, you can pave a patio on uneven ground, but it requires extra preparation. You’ll need to level the area thoroughly, which might involve grading the soil and adding a proper base layer of gravel and sand to ensure stability and drainage.
Q: What maintenance should I expect after I pave a patio?
A: After you pave a patio, regular maintenance includes sweeping, occasional washing, checking for any settling or movement of pavers, and replenishing joint sand as needed to keep the patio stable and looking great.
Q: How To Lay a Paver Patio the Easy Way
A: Start by choosing a flat location, clearing the site of debris and vegetation, and leveling the ground. Lay a gravel base, followed by a layer of sand, and then place your pavers, ensuring they’re level. Fill the joints with polymeric sand for a strong hold.
Q: How to Build a Paver Patio
A: Building a paver patio involves planning the design and layout, preparing the base with proper excavation and materials like gravel and sand, laying the pavers in your chosen pattern, and filling the joints with sand to secure the pavers in place.
Q: How To Install a Paver Patio
A: To install a paver patio, prepare the area by marking the dimensions, excavating to the required depth, and applying a base of crushed stone and sand. Lay the pavers tightly together, cut as necessary for edges, and brush sand over the completed surface to fill gaps.
Q: Is it cheaper to pave or concrete a patio?
A: Generally, paving with materials like bricks or stones can be more expensive upfront compared to pouring a concrete slab. However, pavers offer better drainage, aesthetic appeal, and can be repaired individually, potentially saving money on long-term maintenance.
Q: How do you prepare the ground for patio pavers?
A: To prepare the ground for patio pavers, remove any sod and debris, level the area, and ensure proper drainage by grading the site. Apply a base layer of crushed stone, tamp it down for stability, and add a layer of sand to provide a smooth surface for laying pavers.
Q: What is the cheapest way to pave a patio?
A: The cheapest way to pave a patio is to use concrete pavers or reclaimed bricks. You can also look for local materials or sales to reduce costs. Preparing the site and installing the pavers yourself can also significantly cut down on expenses.
Q: How to lay a patio for beginners?
A: For beginners, it’s best to start with a simple design. Mark the area, excavate to the necessary depth, and apply a base layer of gravel and sand. Lay the pavers from one corner, using a rubber mallet to set them into place, and finish with sand in the joints.
Q: What is cheaper than paving?
A: Gravel is typically cheaper than paving and can be a versatile choice for many outdoor spaces. It’s easy to install and maintain, providing a permeable surface that reduces runoff and enhances natural landscaping aesthetics.
Q: What is the cheapest alternative to pavers?
A: The cheapest alternative to pavers is usually crushed stone or pea gravel. These materials are inexpensive, easy to install, and provide a permeable surface that helps with drainage and prevents erosion.
Q: Can you lay pavers directly on dirt?
A: It’s not recommended to lay pavers directly on dirt, as it can lead to uneven settling and movement. A proper base of crushed stone and sand is necessary to provide stability and drainage for a long-lasting patio.
Q: Do I really need sand under pavers?
A: Yes, sand is necessary under pavers as it acts as a leveling and stabilizing layer, ensuring the pavers remain flat and in place over time. It also facilitates proper drainage, helping to prevent water accumulation and shifting.
Q: What is the best tool to dig for pavers?
A: The best tool for digging when preparing for pavers is a flat shovel or a garden spade. These tools help in efficiently removing soil and leveling the ground. For larger areas, renting a compact excavator or a sod cutter may be more effective.
Q: What is the least expensive way to build a patio?
A: Using gravel or decomposed granite is the least expensive way to build a patio. These materials are not only affordable but also easy to install, making them ideal for budget-conscious homeowners.
Q: What is the cheapest sub-base for a patio?
A: Crushed gravel or limestone is typically the cheapest sub-base for a patio. It provides a firm, stable foundation and is relatively inexpensive compared to other materials like decomposed granite or sand.
Q: How to Lay pavers without base?
A: Laying pavers without a base is not advisable as it compromises the durability and stability of the patio. For lasting results, always use a proper base of crushed stone and sand to support the pavers.
Q: What are the first steps to take when you want to pave a patio?
A: When you’re ready to pave a patio, start by planning the layout and choosing materials that match your outdoor decor and budget. Next, measure and mark the area, clear the ground of any vegetation or debris, and lay down a base of crushed stone followed by a layer of sand to ensure stability and drainage.
Q: Can I pave a patio around existing landscaping?
A: Yes, you can pave a patio around existing landscaping by carefully planning the design to incorporate the natural elements. Use flexible pavers to adapt to the shape of your garden or trees, and consider using edging materials to define the patio space while protecting your plants and green areas.
Q: How to pave a patio around existing landscaping features?
A: Yes, you can integrate a new patio with existing landscaping by carefully planning the patio layout to complement natural elements. Choose flexible paving solutions and thoughtful placement to blend the patio seamlessly with trees, shrubs, and other garden features while maintaining the health and visibility of your greenery.
Q: How to pave a patio on a slope?
A: Paving a patio on a slope requires extra steps to ensure stability and proper drainage. Start by leveling the ground as much as possible and consider incorporating a retaining wall to manage soil erosion. Use a strong base of crushed stone layered with sand, and check levels frequently as you lay pavers to ensure a consistent slope for water runoff.


