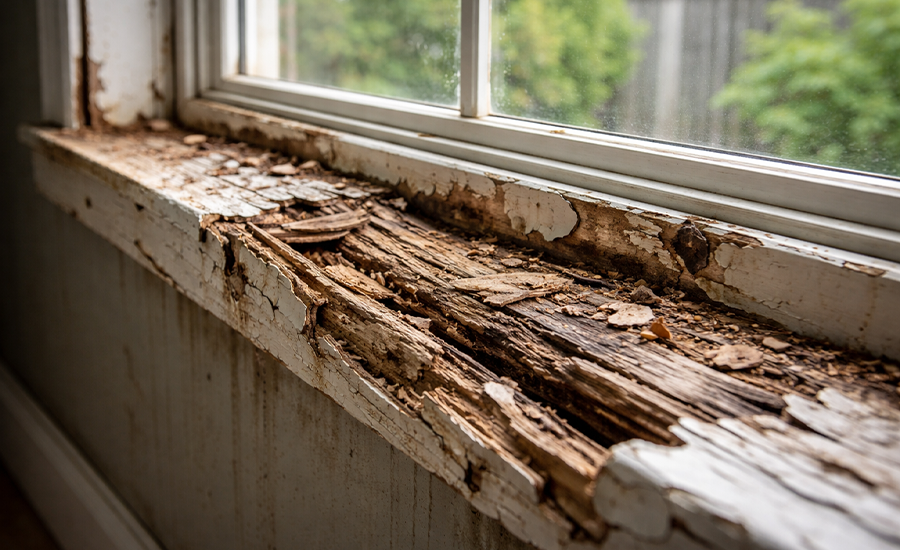
Bad tuckpointing can lead to significant problems in your masonry, including water damage, structural instability, and unsightly repairs. Tuckpointing is crucial for maintaining the integrity and appearance of brickwork. When done poorly, it compromises both the strength and beauty of the structure. Understanding the signs, causes, and solutions for bad tuckpointing can help you keep your masonry in top condition. Whether you’re dealing with cracks, gaps, or mismatched mortar, knowing what to look for and how to address these issues is key to preserving your property.
What is Tuckpointing?
Tuckpointing is a crucial maintenance process for brick and stone structures. It involves the meticulous repair and replacement of the mortar joints between bricks or stones. This process helps maintain the structural integrity and aesthetic appeal of buildings, preventing water infiltration and further damage.
Understanding Tuckpointing
Tuckpointing is the process of repairing mortar joints in brickwork or stonework. Over time, weather conditions and wear can cause the mortar to deteriorate, leading to potential damage. Tuckpointing involves removing the damaged mortar and replacing it with new mortar, ensuring the structure remains strong and attractive.
The Process of Tuckpointing
- Inspection and Preparation: The first step in tuckpointing is inspecting the brickwork to identify areas where the mortar has deteriorated. Once identified, the damaged mortar is carefully removed using specialized tools. This step is crucial to ensure that the new mortar adheres properly and provides a strong bond.
- Mixing the Mortar: The next step involves mixing the mortar. It’s essential to use a mortar mix that matches the original in terms of composition and color. This ensures that the repair blends seamlessly with the existing brickwork.
- Applying the Mortar: The new mortar is then applied to the joints using a pointing trowel. The mortar is packed firmly into the joints, filling all gaps and ensuring a solid bond. This step requires precision to avoid overfilling or leaving gaps.
- Tooling and Finishing: After the mortar is applied, it is tooled to create a smooth and uniform finish. Tooling not only enhances the appearance of the brickwork but also helps to compact the mortar, making it more durable.
- Curing: Finally, the mortar is left to cure. Proper curing is essential to ensure the longevity of the repair. The mortar must be kept moist and protected from extreme weather conditions during the curing process.
Importance of Proper Tuckpointing
Proper tuckpointing is crucial for several reasons. It helps prevent water infiltration, which can cause severe damage to the structure. Additionally, it maintains the aesthetic appeal of the building, preserving its historical or architectural value.
Preventing Water Damage
One of the primary functions of tuckpointing is to prevent water from seeping into the brickwork. When mortar joints are damaged or missing, water can penetrate the structure, leading to issues such as mold growth, brick spalling, and even structural damage. Proper tuckpointing seals these joints, providing a barrier against water infiltration.
Maintaining Structural Integrity
Over time, mortar joints can weaken due to exposure to the elements. Proper tuckpointing restores the strength of these joints, ensuring that the brickwork remains stable and secure. This is especially important for older buildings where the original mortar may have deteriorated significantly.
Aesthetic Considerations
In addition to its functional benefits, tuckpointing also enhances the appearance of brickwork. By using a mortar mix that matches the original, tuckpointing can restore the brickwork to its former glory, preserving the building’s historical or architectural significance.
The Role of Skilled Professionals
While some homeowners may attempt DIY tuckpointing, it’s generally advisable to hire skilled professionals for the job. Experienced tuckpointing specialists have the tools and knowledge to perform the work accurately, ensuring the best results. They can also identify underlying issues that may not be apparent to the untrained eye, providing a comprehensive solution to masonry problems.
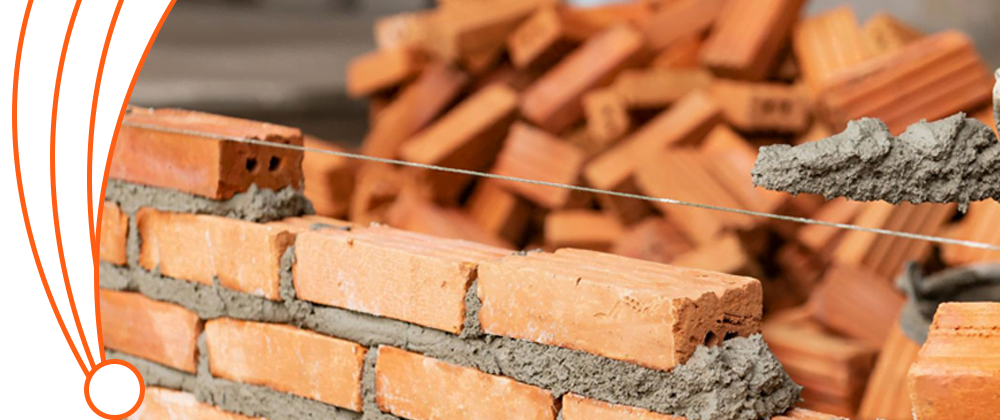
Signs of Bad Tuckpointing
Identifying bad tuckpointing is crucial to maintaining the integrity and appearance of your masonry. Poor tuckpointing can lead to significant structural and aesthetic issues if not addressed promptly.
Here are the main signs that indicate bad tuckpointing:
1. Visible Cracks and Gaps
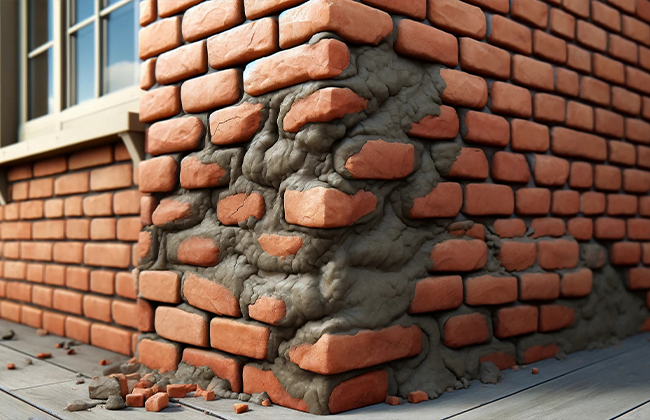
One of the most apparent signs of bad tuckpointing is the presence of visible cracks and gaps in the mortar joints. These gaps allow water to seep into the structure, leading to further deterioration. Over time, moisture can penetrate deep into the wall, causing the bricks to loosen and the mortar to crumble. This can result in water damage, mold growth, and even structural instability. Regular inspections can help catch these issues early, preventing more extensive damage.
2. Uneven Mortar Application
Uneven or poorly applied mortar is another indicator of bad tuckpointing. This can result from using the wrong mortar mix or improper application techniques. When mortar is applied unevenly, it not only looks unsightly but also fails to provide the necessary support to the bricks. Uneven mortar can create weak points in the wall, making it more susceptible to weather damage and further deterioration. Consistency in mortar application is key to ensuring a strong and durable repair.
3. Color Mismatch
A noticeable color difference between the new and old mortar can be a sign of bad tuckpointing. Tuckpointing should blend seamlessly with the existing mortar to maintain the aesthetic continuity of the brickwork. When there is a color mismatch, it usually indicates that the wrong type of mortar was used, which can affect the mortar’s performance and longevity. This mismatch not only stands out visually but can also suggest that the repair was not done with the necessary attention to detail.
4. Loose or Crumbling Mortar
If the new mortar is loose or crumbling shortly after the tuckpointing process, it indicates that the job was not done correctly. This issue can arise from inadequate preparation, poor-quality materials, or incorrect curing times. Loose or crumbling mortar fails to hold the bricks in place, leading to rapid deterioration of the brickwork. This can cause the structure to become unstable, posing safety risks and requiring more extensive and costly repairs. Proper preparation and using high-quality materials are essential to ensure the longevity of the repair.
Causes of Bad Tuckpointing
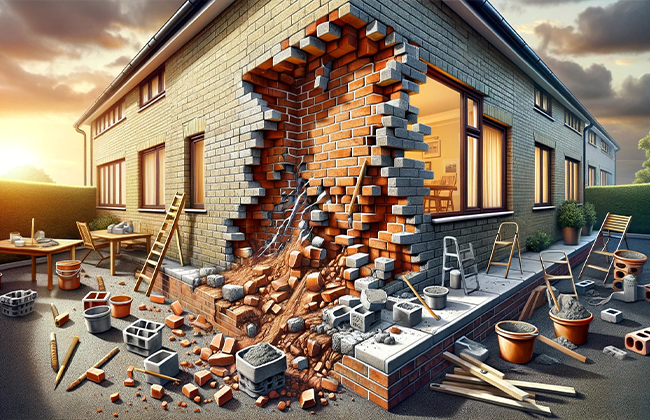
Understanding the causes of bad tuckpointing can help you avoid common mistakes and ensure that your masonry work is durable and effective.
Here are some of the main causes:
1. Inadequate Preparation
Proper preparation is key to successful tuckpointing. Inadequate preparation, such as not removing all the damaged mortar or failing to clean the joints thoroughly, can lead to poor results. Before applying new mortar, it’s essential to ensure that the joints are clean and free of debris. This allows the new mortar to bond properly and create a strong, durable joint. Skipping or rushing through the preparation process can lead to weak joints that deteriorate quickly, causing the tuckpointing to fail.
2. Poor-Quality Materials
Using inferior quality materials, such as the wrong type of mortar or low-quality bricks, can cause tuckpointing to fail prematurely. It’s essential to choose the right materials for the job to ensure longevity and durability. High-quality mortar that matches the original composition and color of the existing mortar is crucial for a seamless and effective repair. Low-quality materials might be cheaper upfront but can lead to higher costs over time due to frequent repairs and maintenance.
3. Incorrect Mortar Mix
The mortar mix must be suitable for the specific type of brick or stone used in the structure. Using the wrong mix can result in weak joints that deteriorate quickly, leading to bad tuckpointing. Different bricks and stones require different mortar compositions. Using a mortar mix that doesn’t match the original can cause compatibility issues, weakening the bond and leading to premature failure of the tuckpointing work.
4. Improper Application Techniques
Applying mortar incorrectly, whether by hand or using inappropriate tools, can lead to bad tuckpointing. Skilled professionals should perform the job to ensure the best results. Proper application techniques involve packing the mortar firmly into the joints, tooling the surface to create a smooth finish, and allowing adequate curing time to ensure a strong bond. Incorrect application can result in an uneven finish and weak joints, which are more prone to damage.
Table: Causes of Bad Tuckpointing and Their Effects
| Cause | Description | Effects |
| Inadequate Preparation | Not removing all damaged mortar or cleaning joints thoroughly | Poor bonding, weak joints |
| Poor-Quality Materials | Using inferior mortar or low-quality bricks | Premature failure, reduced durability |
| Incorrect Mortar Mix | Using a mix unsuitable for the type of brick or stone | Weak joints, rapid deterioration |
| Improper Application | Incorrect techniques or tools used during mortar application | Ineffective repair, compromised structural integrity |
Solutions to Bad Tuckpointing
Addressing bad tuckpointing promptly can help maintain the integrity and appearance of your masonry.
Here are some effective solutions to ensure your brickwork remains in excellent condition:
1. Proper Inspection and Assessment
Before starting any repair work, conduct a thorough inspection and assessment of the masonry. Identify the extent of the damage and the underlying causes to determine the best course of action. This step is crucial because it helps pinpoint the specific areas that need attention and ensures that the repairs are effective. A detailed inspection can reveal hidden issues that might not be immediately apparent, such as internal moisture problems or deeper structural weaknesses.
Steps for Proper Inspection and Assessment:
- Visual Examination: Start with a visual examination of the entire masonry surface. Look for visible signs of damage like cracks, gaps, and color mismatches in the mortar. Take note of any areas where the bricks seem loose or the mortar is crumbling.
- Testing for Weak Mortar: Use a tool like a chisel or a screwdriver to gently probe the mortar joints. This helps to identify areas where the mortar is weak or deteriorated. If the tool easily penetrates the mortar, it indicates that the joint is compromised and needs repair.
- Check for Moisture: Moisture is a common cause of mortar deterioration. Inspect the masonry for signs of water damage, such as efflorescence (white powdery deposits), mold, or damp spots. Use a moisture meter if necessary to measure the moisture content in the walls.
- Assess Structural Integrity: Examine the overall structure of the wall. Look for any signs of bowing, leaning, or other structural issues that might affect the integrity of the masonry. Structural problems should be addressed before tuckpointing to ensure long-lasting results.
- Document Findings: Document all findings during the inspection process. Take photographs and notes to create a detailed record of the masonry’s condition. This documentation will help in planning the repair work and ensuring that all issues are addressed.
Importance of Inspection and Assessment:
Conducting a thorough inspection and assessment helps in creating a targeted repair plan. By identifying the extent of the damage and understanding the underlying causes, you can choose the most appropriate materials and techniques for the repair work. This step ensures that the tuckpointing is effective and durable, preventing future issues and extending the lifespan of the masonry.
2. Choosing the Right Materials
Selecting high-quality materials is essential for successful tuckpointing. The right materials ensure durability, proper bonding, and a seamless appearance that matches the existing masonry. Here’s a detailed look at how to choose the right materials for tuckpointing:
Importance of Material Selection
Choosing the right materials for tuckpointing is crucial for several reasons. First, it ensures the longevity of the repair work. Using inferior materials can lead to premature failure, requiring more frequent repairs. Second, the right materials ensure that the new mortar bonds well with the existing brick or stone, maintaining the structural integrity of the masonry. Lastly, matching the color and composition of the new mortar with the existing mortar helps maintain the aesthetic appeal of the structure.
Steps for Selecting the Right Materials:
- Identify the Type of Brick or Stone: Different types of bricks and stones have different properties and require specific types of mortar. Identify whether your structure is made of clay bricks, concrete blocks, limestone, or another material. Each type has unique characteristics that influence the choice of mortar.
- Match the Mortar Composition: The new mortar should match the composition of the existing mortar to ensure compatibility. Mortar typically consists of sand, cement, lime, and water. The proportions of these ingredients can vary, so it’s important to analyze the existing mortar or consult with a professional to determine the correct mix.
- Consider Color Matching: Color matching is important for maintaining the visual continuity of the masonry. The color of the mortar can be influenced by the type of sand used and the curing process. To achieve a good match, use sand that is similar in color and texture to the original mortar. You can also use mortar colorants to adjust the shade if necessary.
- Use High-Quality Materials: Always opt for high-quality cement, lime, and sand. Low-quality materials can compromise the strength and durability of the mortar. High-quality materials ensure a stronger bond and a longer-lasting repair.
- Test the Mortar Mix: Before applying the new mortar, it’s a good idea to test the mix on a small, inconspicuous area. This allows you to check the color match and make any necessary adjustments. Testing also helps ensure that the mix has the right consistency and bonding properties.
Benefits of Using the Right Materials:
Using the right materials for tuckpointing offers several benefits. It ensures a strong and durable repair that can withstand weathering and environmental stress. Proper material selection also helps in achieving a seamless and aesthetically pleasing finish, preserving the look and value of the masonry. Additionally, it reduces the need for frequent repairs, saving time and money in the long run.
Table: Steps for Choosing the Right Materials and Their Importance
| Step | Description | Importance |
| Identify the Type of Brick or Stone | Determine the material of the structure to select compatible mortar | Ensures proper bonding and structural integrity |
| Match the Mortar Composition | Analyze existing mortar to match new mortar composition | Prevents compatibility issues |
| Consider Color Matching | Use similar sand or colorants to match the mortar color | Maintains aesthetic continuity |
| Use High-Quality Materials | Choose high-quality cement, lime, and sand | Enhances strength and durability |
| Test the Mortar Mix | Apply a test mix to a small area to check color and consistency | Allows for adjustments and ensures a good match |

3. Hiring Skilled Professionals
Hiring experienced and skilled professionals for tuckpointing is crucial to ensure the job is done correctly and to achieve long-lasting, aesthetically pleasing results. Tuckpointing is a specialized skill that requires knowledge, precision, and the right tools.
Here’s why hiring professionals is important and how to choose the right ones:
Importance of Hiring Skilled Professionals
- Expertise and Knowledge: Skilled professionals have extensive experience and training in tuckpointing. They understand the nuances of different mortar types, brick compositions, and application techniques. Their expertise ensures that the mortar is applied correctly, providing a strong bond that enhances the structural integrity of the masonry.
- Proper Tools and Techniques: Professionals use specialized tools and techniques to achieve precise and clean results. They know how to remove old mortar without damaging the bricks and how to apply new mortar evenly. This precision is critical for both the durability and appearance of the masonry.
- Aesthetic Quality: Experienced professionals pay attention to details, such as color matching and texture, to ensure that the new mortar blends seamlessly with the existing masonry. This attention to detail preserves the visual continuity and historical value of the structure.
- Efficiency and Safety: Professionals work efficiently and safely, minimizing disruptions and potential hazards. They follow best practices and safety protocols to protect both the workers and the property during the tuckpointing process.
How to Choose the Right Professionals:
- Check Credentials and Experience: Look for professionals with proper credentials, certifications, and a proven track record in tuckpointing. Experience is key, so ask for examples of previous work or references from past clients.
- Get Multiple Quotes: Obtain quotes from several professionals to compare prices and services. This helps you understand the market rate and ensures you are getting a fair price for quality work.
- Ask for a Detailed Proposal: A reputable professional will provide a detailed proposal outlining the scope of work, materials to be used, timeline, and costs. This transparency helps you make an informed decision and ensures there are no surprises during the project.
- Look for Reviews and Testimonials: Check online reviews and testimonials from previous clients. Positive feedback and high ratings are good indicators of a professional’s reliability and quality of work.
- Inspect Completed Projects: If possible, visit sites where the professional has completed tuckpointing work. This allows you to see the quality of their work firsthand and assess their attention to detail and craftsmanship.
Benefits of Hiring Skilled Professionals:
- Durability: Professional tuckpointing ensures that the repairs are durable and long-lasting, reducing the need for frequent maintenance.
- Aesthetic Appeal: Skilled professionals ensure that the tuckpointing work enhances the overall look of the masonry, preserving its aesthetic appeal.
- Cost-Effectiveness: While hiring professionals might seem expensive initially, it saves money in the long run by preventing poor-quality repairs that require frequent fixes.
- Peace of Mind: Knowing that the work is being handled by experts gives you peace of mind, ensuring that your property is in good hands.
4. Regular Maintenance
Regular maintenance of your masonry can prevent the need for extensive repairs. Conduct periodic inspections and address any minor issues before they become significant problems. This proactive approach not only preserves the structural integrity of your masonry but also extends its lifespan and keeps it looking its best. Here’s how to implement effective regular maintenance:
Importance of Regular Maintenance
Regular maintenance is crucial because it helps catch small issues before they turn into major problems. Minor cracks, gaps, or signs of wear can be easily fixed if detected early, preventing more extensive damage that would require significant repairs. Maintaining your masonry regularly also ensures that the aesthetic appeal of the structure remains intact, preserving its value and appearance.
Steps for Regular Maintenance:
- Periodic Inspections: Conduct thorough inspections of your masonry at least twice a year, preferably in spring and fall. Look for signs of damage such as cracks, loose or crumbling mortar, and water stains. Pay special attention to areas that are exposed to harsh weather conditions or moisture.
- Clean the Masonry: Regularly clean the brick or stone surfaces to remove dirt, algae, moss, and other debris. Use a mild detergent and a soft brush to avoid damaging the mortar. For tougher stains, a professional-grade masonry cleaner might be necessary.
- Repointing Minor Cracks: If you notice small cracks or gaps in the mortar joints, repoint them promptly. Remove any loose mortar and replace it with fresh mortar that matches the existing composition and color. This prevents water from seeping into the structure and causing further damage.
- Seal the Masonry: Apply a high-quality masonry sealant to protect the brick or stone from moisture penetration. Sealing helps prevent water damage, freeze-thaw cycles, and the growth of mold or mildew. Reapply the sealant every few years, or as recommended by the manufacturer.
- Check for Vegetation Growth: Plants, vines, and tree roots can cause significant damage to masonry. Ensure that no vegetation is growing on or too close to the structure. Remove any that are found to prevent roots from infiltrating and weakening the mortar joints.
- Monitor and Repair Water Damage: Water is one of the biggest enemies of masonry. Inspect for signs of water damage such as efflorescence (white powdery residue), damp spots, or mold growth. Address any sources of water infiltration immediately, such as leaking gutters or downspouts, to prevent further deterioration.
Benefits of Regular Maintenance:
- Prevents Major Repairs: Addressing minor issues early reduces the likelihood of major repairs, saving time and money in the long run.
- Preserves Aesthetic Appeal: Regular cleaning and maintenance keep your masonry looking clean and well-maintained, enhancing its visual appeal.
- Extends Lifespan: Proper maintenance extends the lifespan of your masonry by preventing deterioration and structural damage.
- Increases Property Value: Well-maintained masonry can increase the value of your property by maintaining its structural integrity and appearance.
Conclusion
Bad tuckpointing can cause severe issues for your masonry, from weakened structures to unattractive finishes. Ensuring that tuckpointing is done correctly helps maintain the beauty and durability of your brickwork. Regular inspections, proper material selection, and skilled professionals are essential for preventing bad tuckpointing. If you are looking for a professional contractor for tuckpointing, contact us at (+1) 917-355-8556. Protect your masonry from bad tuckpointing and ensure long-lasting results by seeking expert help.
FAQs
What is bad tuckpointing and how can it affect my home?
Bad tuckpointing occurs when mortar repairs are done poorly, leading to weak joints and potential water damage. This can cause bricks to loosen and even structural instability.
How can I identify bad tuckpointing on my brickwork?
You can identify bad tuckpointing by looking for visible cracks, gaps, uneven mortar application, and color mismatches. These signs indicate that the mortar joints are not properly sealed.
Why is bad tuckpointing a concern for my property?
Bad tuckpointing is a concern because it can lead to significant structural damage. Water can seep through poorly sealed joints, causing mold growth, brick deterioration, and even foundation issues.
Can bad tuckpointing be repaired, and how?
Yes, bad tuckpointing can be repaired by removing the faulty mortar and applying new mortar correctly. It’s important to hire skilled professionals to ensure the repair is durable and matches the existing masonry.
What steps can I take to prevent bad tuckpointing?
To prevent bad tuckpointing, regularly inspect your masonry for early signs of damage, use high-quality materials, and hire experienced professionals for any tuckpointing work. Regular maintenance is key to avoiding major repairs.


