 ChatGPT
 Perplexity
 Google AI
 Claude

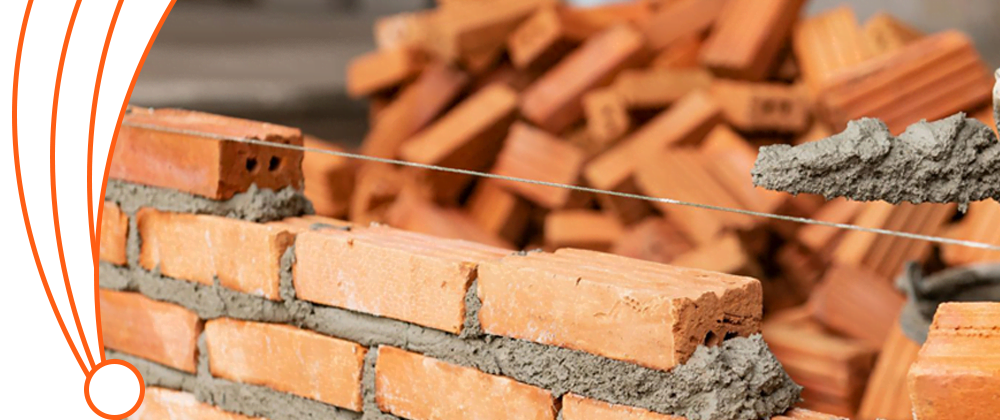
In today’s world, with hundreds of modern constructions, flush pointing or repointing is the most commonly used process for maintaining masonry and sealing mortar joints, which promotes better ventilation and insulation while protecting against water entering the masonry. However, flush pointing should be done with a step-by-step guide to ensure excellent results and durability of the structural framework. Flush pointing helps restore masonry by enhancing its façade appearance and providing smooth finishes to the brick units. Using the right tools and materials is essential when flush pointing, as it enables the best possible outcomes.
In this blog, we’ll provide you with a step-by-step guide on how to properly perform flush-pointing using the appropriate tools and materials compatible with your property type.
Essential Materials & Equipment Required for Flush Pointing
The availability of the following tools and materials is critical when performing flush pointing:
- Narrow blade trowel
- repointing scrapper
- Metal-bristle scrubber
- Masonry bonding mixtures
- Mortar blending tools
- Surface cleaning tools
- Site-safety accessories
- Hydration sprays
Step-wise Process of Flush Pointing
Here’s a breakdown of the flush pointing procedure, step by step:
Surface condition analysis
Only proceed if the surface is sound. If the structure has water damage or is unstable, these issues must be addressed first. Before starting the job, inspect the wall or surface. Look for:
- Loose or cracked mortar
- Damaged bricks or stones
- Moisture or mold in joints
Excavating Old Mortar
If you’re repointing an existing structure, the first practical step is to remove the old mortar from the joints:
- Use a joint raker, hammer, and chisel, or an angle grinder.
- Rake out the mortar to a depth of at least 15–20mm or until solid mortar is reached.
- Ensure that you do not damage the bricks or stones during removal.
- Clean the joints thoroughly using a wire brush to eliminate dust and debris.
This depth is important to ensure lasting adhesion. Learn more about how deep brick pointing should be for structural integrity.
Dampening the Joints
Dry bricks or stones can suck moisture from the new mortar too quickly, causing it to crack. To avoid this:
- Dampen the joints using a spray bottle or brush with water.
- Ensure they’re moist, not soaked.
Formulate the Mortar Mix
Now, prepare the mortar mixture using the right proportions:
- 1 part cement to 4-6 parts sand, depending on the type of wall being built.
- Add clean water gradually and mix until you achieve a thick paste-like consistency.
- Let the mix rest for 10–15 minutes before use.
Applying mortar in the Joints
With the mortar ready, begin filling the joints:
- Load mortar onto the pointing trowel.
- Press it into the joint using a small tool or trowel edge, ensuring there are no air pockets.
- Compact the mortar well into the joint for a firm bond.

Finishing the Mortar
Once filled, immediately shape the joint:
- Level the mortar flush with the face of the masonry.
- Use the trowel edge to trim off excess and smooth the joint.
- The surface of the mortar should be even with no recesses or bulges.
Allowing Mortar to Cure Properly
Proper curing is essential for mortar strength and durability:
- Protect the wall from direct sunlight, rain, or strong winds.
- Spray the joints lightly with water 2–3 times daily for at least 3-7 days, especially in hot or dry climates.
- Alternatively, use wet burlap or curing blankets if needed.
Conclusion
In conclusion, performing step-by-step flush pointing gives proper finishing and strengthens the mortar bonds. Properly done flush pointing leads to meticulous results. Flush pointing is a relatively expensive method, but it provides long-term cost efficiency with high performance, ensuring your residential and commercial property is excellently sealed and preventing water penetration.
For a clearer understanding of the pros and cons before starting your project, check out our full guide on the advantages and disadvantages of flush pointing.
Sardar Restoration Corp. proudly serves every corner of NYC, including the Bronx, Manhattan, Brooklyn, Westchester, and Queens. Our services are designed to meet your needs, providing top-quality solutions wherever you are. Check our service areas to see how we can assist you in your location.
Contact us today at (+1) 917-355-8556 or sardarrestoration@gmail.com, or visit us at 2770 Fish Ave, Bronx, NY 10469, United States.
FAQs
Do you offer flush pointing for both residential and commercial properties?
Yes! Sardar Restoration Corp. offers comprehensive flush pointing services for a wide range of properties, including residential and commercial buildings.
Do you remove the old mortar before applying the new one?
Yes! It’s essential to remove the old mortar before applying the new, fresh one. Our flush pointing contractor in NYC properly chiseled out the old mortar to the appropriate depth and applied new mortar for optimal adhesion and best outcomes.
Do you use standard cement mortar or also offer lime-based mortar?
Sardar Restoration Corp. uses both cement- and lime-based mortars, depending on the property type and which mortar best suits your property.
Can I book an inspection or get a quote online?
Yes! Sardar Restoration Corp. Is 24/7 available online and onsite. You can easily book your property inspections, and we’ll provide you with a detailed estimate with 100% transparency.