 ChatGPT
 Perplexity
 Google AI
 Claude

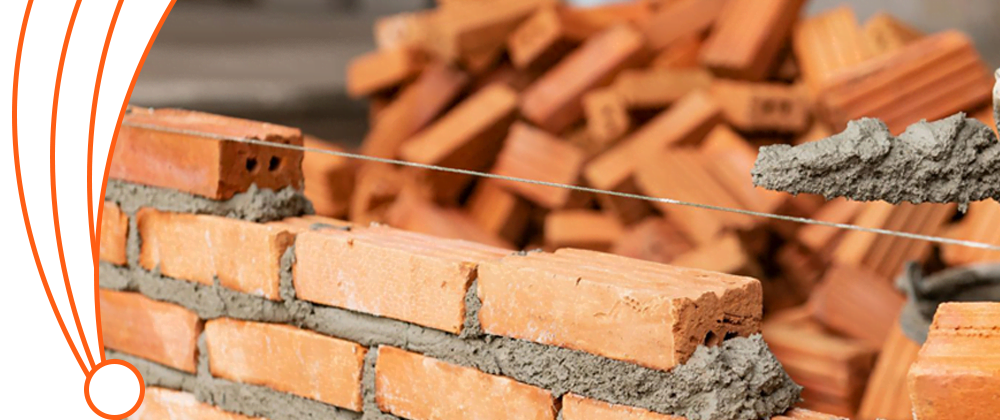
Brickwork maintenance through repointing removes damaged mortar joints from bricks to achieve both stronger structures and improved aesthetics. Outdoor weathering combined with natural element use cause mortar to break down leading to building structural instability. Correct repointing technique knowledge stands as vital for builders who want to prevent mistakes and extend the lifespan of masonry structures. This step-by-step guide will walk you through the repointing process, from inspecting the brickwork to applying and curing new mortar.
Before diving into the step-by-step process of repointing, it’s essential to understand some key concepts that will guide your work.
How Is Brick Repointing Done? Step By Step Guide
Over time, mortar joints between bricks deteriorate, and repointing is required to restore the wall’s appearance and integrity. Below is a step-by-step guide on how to perform brick repointing.
Before we get into the steps, learn more about brick pointing and its Purpose to understand the importance of repointing to preserve the stability and aesthetics of your masonry.
Step 1: Inspect the Brickwork
Start by carefully inspecting the mortar joints for deterioration, such as cracks, crumbling, or missing mortar. This will help you determine the extent of the damage and plan your work accordingly. Identifying areas that need more attention will ensure a thorough job.
Step 2: Remove the Old Mortar
Once you’ve identified the areas to be repointed, use a mortar rake or angle grinder to remove the old, damaged mortar carefully. The general rule is to rake out the old mortar to a depth of at least twice the thickness of the joint (usually around ½ to ¾ inch deep). This will create enough space for the new mortar to bond correctly.
Step 3: Clean the Joints
Clear away old mortar components then use either a wire brush or compressed air to remove all leftover debris and dust and loose particles. Stringently cleaning the brick surface before repair work yields a powerful connection between fresh mortar and brick structure. Before applying new mortar to the brick it is advisable to hydrate the joint area so the bricks won’t soak up moisture too rapidly.
Step 4: Mix the New Mortar
Match your mortar mixture to the brick type you use combined with local weather considerations. Supporters typically suggest using lime-based mortar on historic buildings so bricks receive proper ventilation. Modern construction requires cement-based mortar for bonding applications. Create a proper consistency for the mortar mixture by smoothing it without making it dry or excessively wet.
Step 5: Apply the Mortar
A pointing trowel helps you spread new mortar between bricks while forcing it down into tight contact so air pockets do not form. Work by sections that allow proper filling and compacting of each joint. Make sure mortar levels match adjacent brickwork or maintain indicated profile requirements.
Step 6: Smooth and Shape the Joints
A jointing tool should be used to create a smooth appearance following mortar application to the joints. Every joint must present the same aesthetic profile as the rest of the masonry. Standard masonry joint profiles exist in three types: flush, recessed and weathered. Both aesthetics and water runoff from walls depend heavily on the precise shape chosen for joint composition.
Step 7: Allow the Mortar to Set
Allow the mortar to set for a short period but not fully dry. Mist the joints lightly with water to keep them moist during curing. This will help prevent the mortar from drying out too quickly, which can cause cracking.
Step 8: Finish and Clean Up
Once the mortar has sufficiently cured (typically after 3–5 days), use a soft brush to remove any excess mortar from the brick face. Be sure not to disturb the newly pointed joints during this process. Inspect the work and make sure the joints are smooth, consistent, and appropriately sealed.
What Is The Rule For Pointing To Brick Walls?
Proper repointing ensures the longevity and structural integrity of brick masonry. The right techniques help prevent moisture penetration, maintain stability, and enhance the aesthetic appeal of brickwork. Below are the key rules for successful repointing.
Correct Depth of Raking Out Old Mortar
To properly repoint the external walls, builders must remove the existing mortar to depths that match twice the width of the joint (typically between ½ to ¾ inches deep). Deep raking is integral to the process, resulting in adequate mortar bonding and minimizing the risk of premature structural failure.
Cleaning the Joints Properly
After raking out the old mortar, clean the joints thoroughly using a wire brush, compressed air, or water. Cleaning mortar joints will remove dust, debris, and loose particles that might disrupt new mortar bonding. A surface dampening of the joints should occur right before applying new mortar, as this slows down fast moisture absorption by the bricks.
Choosing the Right Mortar Mix
To prevent structural damage to the bricks and achieve a uniform appearance, the repair mortar should match the original mortar’s strength composition and color. Apply a flexible lime-based mortar on soft brickwork while retaining versatility, and use a cement-based mortar for modern bricks unless it threatens their structural integrity.

Applying the Mortar Correctly
Use a pointing trowel or mortar gun to fill the joints with mortar, ensuring that it’s packed tightly and compacted to remove any air pockets. Work in small sections to avoid premature drying. Ensure that the mortar is flush with the brick surface or follows the specific pointing profile required for your project.
Selecting the Right Pointing Profile
The selection of a fitting profile determines both brickwork longevity and construction appearance. Common profiles include:
- Flush Pointing – Even with the brick surface, for a smooth finish.
- Recessed Pointing – Set back from the brick face, giving a shadow effect.
- Weathered Pointing – Sloped to direct water away from the joints.
- Tuck Pointing – Provides a decorative thin line effect.
Curing and Moisture Control
The mortar requires the correct curing procedure before proceeding. The proper setting requires regular watering sessions for the newly pointed joints over 3–5 days. Extreme weather, including sun exposure and extreme cold and rainfall, should be avoided during curing because they impair the setting process.
Maintaining Proper Joint Thickness
The entire surface requires uniform mortar joint thickness, measuring between 10mm and 12mm (3/8 to ½ inch). The wall’s appearance and strength depend entirely on maintaining consistent joint thickness between 10mm and 12mm (3/8 to ½ inch).
Be sure to check out our detailed guides on each topic to learn more about:
What Are The Common Mistakes When Repointing Brickwork?
Repointing is an essential skill in masonry work, but it’s easy to make mistakes if not done properly. These errors can lead to structural issues, aesthetic damage, and more frequent repairs in the future. Understanding and avoiding these mistakes will help you achieve lasting, professional results.
Not Raking Out the Old Mortar Properly
One of the most common mistakes when repointing is failing to remove the old mortar to the correct depth. If the mortar is not raked out deep enough (typically at least ½ to ¾ inch deep), the new mortar will not bond well with the brick. This weakens the structure and can cause the new mortar to crack and fall out over time.
Tip: Deliberately remove every piece of deteriorated mortar up to its specified depth until joints are completely clean of dust debris and remaining mortar residue.
Using the Wrong Mortar Mix
Another mistake is using the wrong type of mortar for the job. The mix should match the brick type and weather conditions. Soft older bricks do poorly when builders apply cement-based mortar to them because the mortar strength can generate cracks throughout the brickwork. Soft bricks alongside historic buildings benefit from lime-based mortars which offer maximum flexibility and allow air circulation.
Tip: The mortar selection should always align with brick requirements and building environmental needs. Lime mortar serves as the preferred option for historic constructions but modern structures often require cement-based mortar.
Not Keeping the Mortar Moist
Most builders make a common error when they let mortar dry too fast. Irreputable drying processes will create cracks between materials which ultimately weakens the bond between them. The effective bonding and setting up of mortar requires proper curing as its fundamental requirement. Water misting of joints throughout several days functions to avoid rapid moisture loss and subsequent formation of cracks.
Tip: The mortar requires you to maintain constant moisture levels for three to five days after its application. By maintaining moisture for several days the mortar achieves proper curing while stopping premature drying.
Incorrect Joint Profiles
Choosing the wrong joint profile can affect both the function and appearance of the wall. For example, flush pointing might be visually appealing but doesn’t perform well in areas prone to heavy rain, as it can trap water in the joints. Weathered or recessed joint profiles function best for wall protection through directing water away.
Tip: Choose a joint profile according to weather conditions and site location. Each wall joint profile presents distinctive benefits among flush and recessed joints as well as weathered and tuck pointing profiles.
Not Compacting the Mortar Enough
Another mistake is not compacting the mortar enough when filling the joints. If the mortar is loosely packed, it can easily crumble or fall out over time. Ensure that the mortar is pushed firmly into the joints, leaving no air pockets.
Tip: Use a pointing trowel or mortar gun to pack the mortar tightly into the joints. Make sure the mortar is fully compacted to avoid future failures.
Overfilling the Joints
Overfilling the mortar joints can lead to an uneven finish and unnecessary wastage of mortar. It’s important to only fill the joints to the correct depth, ensuring that the mortar is level with the surrounding bricks or slightly recessed, depending on the pointing style.
Tip: Make sure the mortar sits flush with the brick surface or slightly recessed according to the desired profile, and avoid overfilling the joints.
Failing to Clean Excess Mortar
Once the mortar is applied, excess mortar on the surface of the bricks should be cleaned off promptly. If left too long, the mortar can set on the brick face and be difficult to remove. Proper cleaning of bricks during curing time results in finished masonry which presents itself as clean and professional.
Tip: A gentle brush along with a sponge should be used to clean the brick surfaces during this period while simultaneously removing leftover mortar before the curing completes. The brushing method prevents marking of the wall while simultaneously preserving its overall appearance.
Repointing in Bad Weather
Weather conditions significantly influence the outcome of brick repointing projects. Extreme weather conditions will force the mortar to set too fast and inconsistently resulting in weak bond strength and shortened mortar lifespan.
Tip: Ideally, repoint during moderate temperatures (between 40°F and 80°F), and avoid working in extreme weather conditions such as direct sunlight, frost, or heavy rain.
Avoiding these common mistakes will help you achieve a durable and effective repointing job.
Learn more about
- Brick Pointing,
- The Purpose of Brick Pointing,
- Masonry Repair and Restoration,
- How You Tell If You Need Repointing, and
- The Cost of Brick Pointing to ensure you’re fully prepared to begin the job.
These concepts will provide the foundation for successfully completing your repointing project.
For more detailed information on the topic, don’t forget to learn how deep brick pointing should be and the difference between mortar and pointing to ensure that you’re using the correct techniques and materials.
Wherever you are, Sardar Restoration Corp’s services are tailored to meet local needs. Contact us today at (+1) 917-355-8556 or sardarrestoration@gmail.com, or visit us at 2770 Fish Ave, Bronx, NY 10469, United States. Let us bring excellence to your next project!
FAQs
What are the key steps in brick repointing?
Brick repointing involves removing old mortar, cleaning joints, applying fresh mortar, and shaping joints for a durable, water-resistant finish.
How long does it take to repoint bricks?
The repointing process typically takes a few days, depending on the area size and weather conditions, ensuring proper curing for longevity.
What type of mortar is best for repointing bricks?
The best mortar mix depends on the building type. Lime mortar is ideal for historic structures, while cement-based mortar suits modern masonry.
Discover the best materials for brick pointing and choose the right one for your project.
How often should brick repointing be done?
Repointing is typically needed every 20–30 years, but environmental factors and mortar condition can affect the frequency.
Does brick repointing require a specific mortar mix for different walls?
Yes, the mortar mix varies based on the type of bricks and environmental exposure. Skilled bricklayers ensure proper mortar selection and application.
Find out how bricklayers handle pointing to maintain brick durability.


