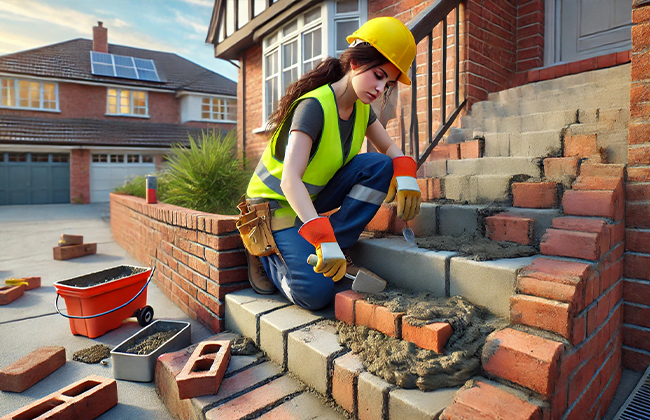
Building brick stairs can be a rewarding DIY project that enhances the functionality and charm of your outdoor spaces. Whether you’re looking to connect different levels of your garden or provide a sturdy entrance to your home, understanding the basics of how to make brick stairs and the necessary materials is crucial for success.
Getting Started with Brick Stairs
Building brick stairs might seem like a daunting task, but with the right guidance and materials, you’ll find it’s a project that adds both charm and value to your home. Let’s break down what you need to get started.
Overview of Materials Needed
To ensure your brick stairs are both durable and attractive, gather the following materials:
- Bricks: The quantity depends on the size and number of steps.
- Mortar mix: For binding the bricks together.
- Gravel: Used as a base material under the bricks.
- Sand: To mix with the mortar and ensure a smooth application.
- Rebar or wire mesh: These are optional but recommended for reinforcing the stairs, especially in high-traffic areas.
Tools for the Job
Having the right tools can make the difference between a frustrating project and a fun one. Here’s what you’ll need:
- Trowel: For spreading mortar.
- Spirit level: To keep everything perfectly horizontal and vertical.
- Rubber mallet: For gently tapping bricks into place without cracking them.
- Spade: Essential for digging out the area where your stairs will be set.
- Measuring tape and carpenter’s square: For accurate measuring and aligning.
- Safety gear: Gloves and goggles to protect you during the construction process.
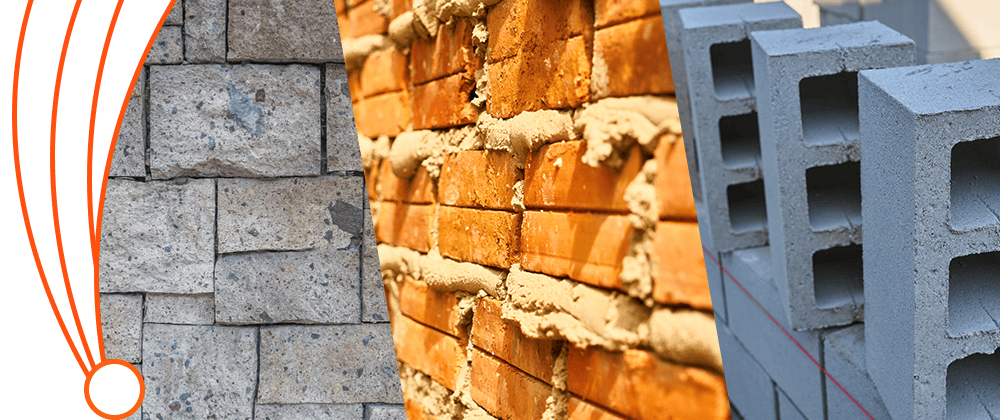
Choosing the Right Bricks
Choosing the correct bricks is crucial for the aesthetics and longevity of your stairs:
- Face bricks: Known for their durability and visual appeal.
- Frost-resistant bricks: A must-have if you’re in a region that experiences freezing temperatures, to prevent weather-induced damage.
With these materials and tools in hand, you’re well-prepared to start your project. Next up, we’ll plan out the layout and dimensions of your stairs to ensure a solid foundation and beautiful results.
Planning Your Stairs
When you’re ready to take on the challenge of building brick stairs, careful planning is crucial. Not only does it prevent common pitfalls, but it also ensures that your stairs are both functional and beautifully integrated into your landscape. Let’s dive into the specifics.
1. Determining the Location and Size
First things first, decide where your stairs will go. Consider the flow of your yard and how the stairs will be used. Do they lead up to a porch, down to a garden, or perhaps connect different levels of your outdoor space?
Once the location is pinned down, measure the total distance from the top elevation to the bottom to determine the overall height of your stairs.
2. Design Considerations for Brick Stairs
Brick stairs can be more than just functional; they can also be a standout design element. Think about the style of your home and garden. Do you want a traditional look with straight, symmetrical stairs, or would a more organic, curved design better suit your space?
The color and texture of the bricks should complement the existing structures and landscaping to create a cohesive look.
3. Calculating the Number of Steps Needed
Here’s where a bit of math comes into play. The average height of a step (known as the riser) is about 7 inches, and the depth (or tread) is usually about 12 inches. To find out how many steps you need, divide the total height of the area by the height of each riser. It’s always good to round up to ensure each step isn’t too steep.
By taking the time to plan properly, you’re setting the stage for a smoother building process. Your next step?
Preparing the foundation and base, which are key to ensuring that your stairs are sturdy and long-lasting. Let’s get those materials ready and start digging!
Transform your home with expert masonry services. Contact us today for a free consultation.
Foundation and Base Preparation
Preparing your stairs begins from the ground up. Here’s how to ensure your foundation is solid, level, and ready for the beautiful brickwork to come.
Digging the Foundation
- Mark the Layout: Use stakes and string to define the perimeter of your stair foundation.
- Depth Requirements: Ensure you dig at least 6 inches below the frost line to prevent shifting during freeze-thaw cycles.
- Clear the Area: Remove debris and organic material that could decompose and destabilize the foundation.
Creating a Solid Base
- Lay the Gravel: Start with a 3-4 inch layer of gravel for excellent drainage and a stable base.
- Top with Sand: Add a 2-3 inch layer of sand on top of the gravel to create a smooth, level surface.
- Compact Each Layer: Use a hand tamper or a mechanical compactor to thoroughly compact each layer, ensuring the base is solid.
Ensuring Level and Alignment
- Frequent Checks: Use a spirit level frequently as you prepare the base to ensure everything is perfectly horizontal.
- Adjust as Necessary: Make minor adjustments by adding or removing sand to maintain level across the width and length of the foundation.
With these steps, your foundation will be as ready as you are to start laying the bricks. Remember, a solid start is key to the stability and longevity of your brick stairs. Let’s proceed with the same level of care as we move on to laying the bricks, ensuring each step is meticulously crafted for both beauty and function.
Laying the Bricks
As we move on to laying the bricks, your project begins to take shape. Here’s how to do it right, ensuring each brick sits perfectly in place to create stunning, durable stairs.
Mixing the Mortar
- Perfect Consistency: Aim for a mortar consistency that resembles thick peanut butter. It should be moist enough to adhere but firm enough to hold its shape.
- Mix Slowly: Add water gradually to your dry mix while stirring constantly to avoid lumps. This ensures even distribution of moisture.
- Let it Rest: Allow the mortar to sit for about five minutes after mixing. This lets the ingredients fully absorb water, resulting in a stronger bond.
Laying the First Layer of Bricks
- Start at the Base: Begin laying your bricks at the lowest part of the stairs. Use your trowel to apply a layer of mortar to the base where your bricks will sit.
- Press Firmly: Place each brick onto the mortar and press it down firmly. Use the handle of your trowel to tap each brick into place, ensuring it’s securely embedded in the mortar.
- Check Alignment: Use a level after setting each brick to ensure all bricks are even and straight. Adjust as necessary by tapping the brick or adding a bit more mortar underneath.
Tips for Strong Joints and Even Spacing
- Spacing Matters: Keep joints between bricks consistent by using spacers or a small piece of wood as a guide.
- Mortar Joints: Apply sufficient mortar between bricks to fill the gaps fully. This not only strengthens the structure but also prevents water ingress.
- Smooth it Out: Use the jointer tool to smooth out the mortar joints before they fully set, creating a clean, professional finish.
With your bricks laid neatly and your mortar set just right, your brick stairs are really starting to come together. As we keep building up, focusing on each step’s stability and aesthetics, you’ll soon see how rewarding building your own brick stairs can be. Next up, we’ll start building the steps themselves, where precision and creativity come together.
Transform your home with expert masonry services. Contact us today for a free consultation.
Building the Steps
Now, let’s focus on building the steps themselves—a crucial stage where precision meets aesthetics. Here’s how you can construct steps that are not only sturdy but also beautifully tailored to fit your space.
Constructing Riser and Tread
- Measure Accurately: Each riser (the vertical part of the step) and tread (the horizontal part) needs precise measurement to ensure comfort and safety. The riser should be about 7 inches high, and the tread around 12 inches deep.
- Apply Mortar: Spread mortar on the area where you’ll place the riser, setting the first brick at the base of your stairway. Continue building up to the desired height.
- Set Treads: Once the riser is in place, begin setting the treads. Apply a layer of mortar on top of the completed riser, then position the bricks horizontally to form the tread. Ensure each is level and secure.
Techniques for Sturdy Steps
- Overlap for Strength: Use the overlapping method, where each layer of bricks is staggered. This technique, much like laying bricks for a wall, enhances the strength and stability of your steps.
- Check Consistency: Regularly check that each step is uniform with a level and tape measure. Consistency is key to both the appearance and safety of your stairs.
- Reinforcement: Consider adding rebar or mesh within the mortar layers for extra stability, especially if your stairs will see heavy use.
Customizing Step Width and Height
- Tailor to Your Space: Adjust the width and height of the steps according to the area available and your specific needs. Wider steps might be necessary for high-traffic areas or as a design choice.
- Aesthetic Considerations: Align the aesthetics of your steps with the surrounding environment. Custom dimensions can complement your landscape, making the stairs a focal point or a subtle addition.
With your steps built and looking great, you’re close to completing this project. Now it’s time to move on to the finishing touches, where you’ll seal, smooth, and perfect your work to ensure your new brick stairs are not only safe and sturdy but also a beautiful addition to your home. Let’s make sure every detail is polished to perfection.
Finishing Touches
Now that your brick stairs are constructed, it’s time to add those final touches that will seal their durability and elevate their appearance. Let’s walk through the steps to ensure your stairs not only last but also look great through the seasons.
Applying Finishing Mortar
- Smooth Out the Joints: Once all bricks are laid, go back and fill any gaps with finishing mortar. This not only secures the bricks further but also gives your stairs a neat, finished look.
- Tool the Joints: Use a jointing tool to compress and shape the mortar joints. This process, known as ‘tooling’, helps waterproof the joints and makes them stronger.
- Clean the Bricks: After the mortar sets slightly, clean off any excess with a stiff brush. This step ensures that no mortar smears remain on the brick faces, keeping them looking clean and professional.
Sealing and Waterproofing Your Stairs
- Choose the Right Sealant: Select a sealant appropriate for exterior brick surfaces. This will help repel water and protect the bricks from weathering and stains.
- Apply Sealant: Using a sprayer or a brush, apply the sealant evenly over all the bricks and mortar. Make sure to cover all exposed areas thoroughly to create a barrier against moisture.
- Allow to Dry: Follow the manufacturer’s instructions for drying times to ensure the sealant sets properly. Avoid using the stairs during this period.
Decorative Techniques to Enhance Aesthetic Appeal
- Color Enhancement: Consider applying a color enhancer if you want to bring out the natural tones of the bricks.
- Incorporate Lighting: Adding lights can not only enhance safety by illuminating the steps at night but also highlight the beauty of your brickwork.
- Landscaping: Soften the look of your brick stairs by planting flowers or small shrubs along the sides. This integration can make the stairs appear more naturally a part of your garden or yard.
With these finishing touches, your brick stairs are now ready to withstand the elements and look good doing it. Regular maintenance is key to keeping them in top shape, so let’s shift our focus to how you can keep your newly built brick stairs looking their best year after year.
Maintaining Brick Stairs
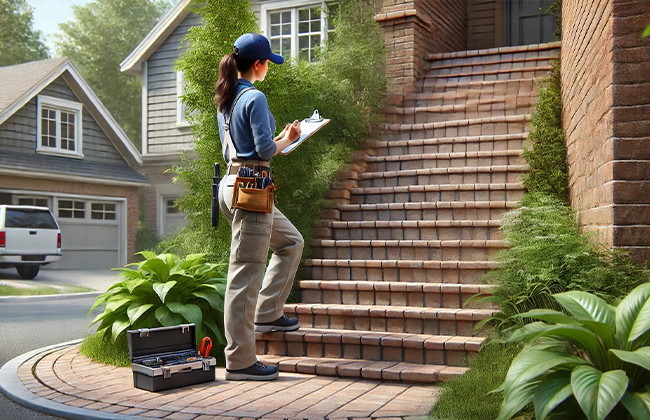
Your new brick stairs are built and looking fantastic, but like any outdoor structure, they’ll last longer and look better with proper care. Here’s how you can maintain your brick stairs to ensure they remain safe and attractive for years to come.
Routine Maintenance Tips
- Regular Cleaning: Sweep the stairs regularly to remove debris and dirt that can accumulate and cause stains or slipping hazards. A hose-down every few weeks can help wash away any buildup.
- Weed Control: Keep an eye out for weeds growing in the joints between bricks. Pull them out manually or use a weed killer if necessary, ensuring it’s safe for use around bricks.
- Inspect Regularly: At least twice a year, inspect your stairs for any signs of movement, cracking, or mortar deterioration. Early detection of these issues can prevent more serious damage.
Repairing Damaged Bricks
- Identify Loose or Damaged Bricks: Check for bricks that have become loose or are visibly damaged. These should be repaired or replaced promptly to maintain the integrity of the staircase.
- Remove and Replace: Carefully remove the damaged brick, clearing out the old mortar. Replace it with a new brick and fresh mortar, ensuring it matches the existing bricks as closely as possible.
- Repointing Mortar: If the mortar has crumbled or receded, it may be time to repoint your stairs. Remove the old mortar to a sufficient depth, and refill with new mortar. This not only supports the bricks but also seals against water penetration.
Long-term Care for Brick Stairs
- Sealant Reapplication: Depending on your climate and the type of sealant used, reapply a brick sealant every few years to help prevent water damage and staining.
- Avoid Harsh Chemicals: When cleaning, avoid using harsh chemicals that can erode brick and mortar. Stick to mild soap and water or products specifically designed for cleaning brick.
- Seasonal Preparations: In areas with severe winters, make sure to remove ice and snow promptly to prevent freezing and cracking. Use ice-melt products cautiously, as some can be corrosive to masonry materials.
With these maintenance tips, your brick stairs will continue to serve as a functional and beautiful entrance to your home. Regular care ensures that minor issues don’t turn into costly repairs, keeping your stairs safe and appealing for every step you take.
Conclusion
After following the detailed steps on how to make brick stairs, you should have a functional and aesthetically pleasing addition to your outdoor space. Regular maintenance ensures the longevity of your stairs, and addressing issues promptly prevents major repairs. If you’re seeking professional assistance for your brick stairs repair or maintenance, don’t hesitate to contact (+1) 917-355-8556 for expert services.
FAQs
Q: What are the initial steps on how to make brick stairs?
A: Start by planning your design and gathering the necessary materials. Accurate measurements and a solid foundation are essential for durable and safe brick stairs.
Q: How often should I perform maintenance on brick stairs?
A: Regular maintenance, including sweeping and checking for loose bricks, should be done semi-annually to ensure the integrity and longevity of your brick stairs.
Q: What common mistakes should I avoid when learning how to make brick stairs?
A: Avoid poor planning and inadequate foundation preparation, as these can lead to structural issues and uneven steps that compromise both safety and aesthetics.
Q: Can I customize the design when learning how to make brick stairs?
A: Absolutely! You can tailor the width and height of the steps to fit your specific space and design preferences, making your brick stairs unique and functional.
Q: What is the best way to ensure the durability of my brick stairs?
A: Using quality materials, ensuring proper installation, and regular maintenance are key factors in extending the life of your brick stairs.
Q: How to build stairs using bricks?
A: Building brick stairs involves planning the design, preparing a solid foundation, laying bricks with mortar, and ensuring each step is level and stable.
Q: Can you lay brick steps on dirt?
A: It’s possible, but not recommended. For stability and longevity, lay a gravel base and compacted sand under the bricks.
Q: What do you put under brick steps?
A: A base layer of gravel covered by compacted sand provides a stable and level foundation for brick steps.
Q: How to lay bricks with mortar?
A: Apply a layer of mortar directly onto the base or previous bricklayer, place your brick, then tap it gently into place and check for level.
Q: How to make brick stairs on a slope?
A: Start at the lowest point, create a stable base, and ensure each step is level as you build up the slope.
Q: How to build brick steps on concrete?
A: Ensure the concrete is clean and roughened for good adhesion, then lay bricks using mortar to secure them firmly to the concrete.
Q: Are brick steps expensive?
A: The cost can vary, but brick steps are generally more expensive than wooden ones due to material costs and labor-intensive installation.
Q: What mortar to use for brick steps?
A: Use a mortar mix designated for exterior brickwork, ideally type S mortar, which offers good bonding and structural strength.
Q: How do you anchor stairs to brick?
A: Use concrete screws or masonry anchors that penetrate into the existing brick structure to ensure stability and security.
Q: How long do brick stairs last?
A: With proper installation and maintenance, brick stairs can last several decades, often outlasting the lifespan of softer materials.
Q: How many bricks are required for the staircase?
A: The number depends on the size and design of the stairs, but a typical step might use between 12 and 20 bricks.
Q: How many blocks does it take to make stairs?
A: Similar to brick, the number of concrete blocks needed depends on the dimensions and height of the staircase, with larger blocks reducing the total count.
Transform your home with expert masonry services. Contact us today for a free consultation.