Are you looking to understand what is tuckpointing brick and why it’s vital for maintaining the integrity of your brick structures?
Tuckpointing is not just a cosmetic upgrade; it’s a crucial restoration technique that reinforces mortar joints, enhances structural stability, and prevents moisture from seeping into your bricks. Proper tuckpointing can dramatically increase the longevity and aesthetic appeal of your building, making it a wise choice for any property owner concerned about the health of their brickwork.
What is Tuckpointing?
Tuckpointing might sound fancy, but it’s a practical skill in the world of masonry that every building owner should know about. Imagine it as a form of special care for your brick walls that not only enhances their look but also fortifies their durability. Let’s dive deeper into what makes tuckpointing a key player in maintaining and restoring the charm and strength of brick structures.
Definition and Historical Context
This technique has roots that reach back to the late 17th century in England. Initially devised as a cost-effective way to mimic high-quality brickwork, tuckpointing involves filling the joints between bricks with a contrasting mortar line that creates a precise, elegant appearance. It’s like optical illusion art for buildings, making them look sharper and more meticulously assembled than they might actually be. Beyond its beauty, this method was a game-changer in historical architecture, allowing builders to achieve an upscale look without the upscale cost.
Importance of Tuckpointing in Masonry Work
Beyond aesthetics, tuckpointing plays a critical role in building maintenance. It effectively seals the spaces between bricks, thwarting moisture and environmental wear from degrading the structure. For buildings old and new, this can prevent a slew of issues like cracking, crumbling, and water damage—common enemies of brickwork. Especially in areas where the climate puts buildings through the wringer, tuckpointing acts as a shield, preserving both the physical integrity and historical value of the structure. This dual benefit of enhancing both visual appeal and structural soundness makes tuckpointing a valuable practice for any masonry work.
As we move forward, let’s explore the tuckpointing process to fully grasp how this essential maintenance is carried out and what it entails for the longevity and aesthetics of brick constructions.
The Tuckpointing Process
Tuckpointing isn’t just about maintaining the structure; it’s about revitalizing your brickwork with precision and care. Below, we detail the step-by-step process along with the essential tools you’ll need to ensure your brickwork not only looks its best but also stands strong against the elements.
Step-by-Step Guide on How Tuckpointing is Done
Before diving into the nuts and bolts, it’s crucial to understand that each step in tuckpointing is aimed at restoring and enhancing the masonry’s integrity and aesthetics.
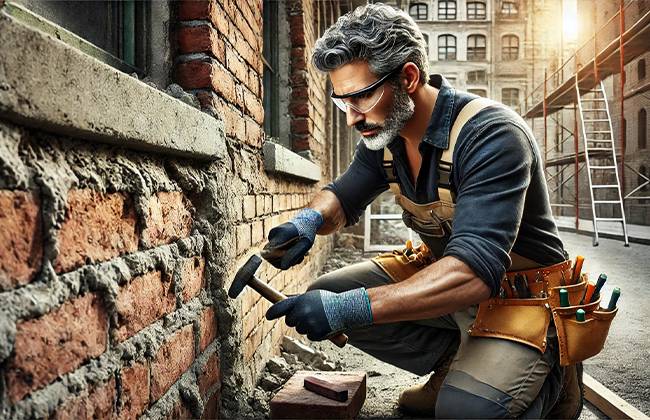
- Removing Old Mortar: Begin by carefully removing the deteriorated mortar from between the bricks. A grinder or a chisel and hammer are typically used, focusing on not damaging the bricks.
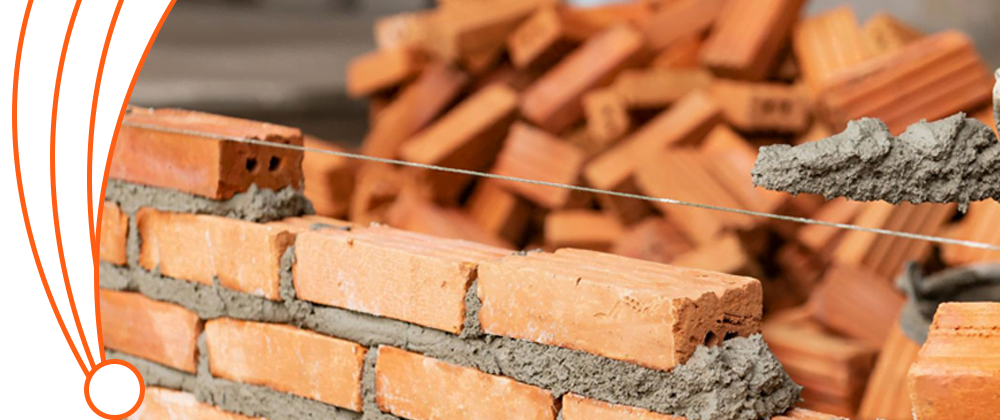
- Preparing the Mortar: Mix a new batch of mortar that matches the color and composition of the existing brickwork. This ensures the repairs will be inconspicuous.
- Applying New Mortar: Use a trowel to fill the joints with the new mortar, ensuring it is packed firmly to avoid any gaps or air pockets.
- Adding the Tuckpointing Line: Once the joints are filled, apply a thin line of a contrasting color mortar over the top. This line, known as a fillet, is what gives tuckpointing its distinctive, refined look.
- Setting and Curing: Allow the mortar to set and cure properly, which can take several days depending on the weather conditions. This is crucial for the durability of the work.
Tools and Materials Needed for Tuckpointing
To execute this process effectively, having the right tools is essential:
- Grinder or Chisel and Hammer: For the initial removal of old mortar.
- Mortar Mix: Specifically chosen to blend with the existing structure.
- Trowel: For applying and smoothing the new mortar.
- Pointing Tool: For precise placement of the contrasting mortar line.
- Brush and Sponge: For cleaning excess mortar and achieving a clean finish.
With these tools and a step-by-step approach, tuckpointing can be performed efficiently, ensuring your brickwork remains beautiful and robust. Now, let’s move forward and discuss the significant benefits that tuckpointing provides to brickwork, which goes beyond mere aesthetics to include enhanced durability and protection.
Benefits of Tuckpointing Brickwork
Tuckpointing isn’t just a repair technique; it’s a preventative measure that keeps brick structures looking great and standing strong. Here’s why this age-old practice still holds significant value for modern masonry:
Enhancing Structural Integrity
First and foremost, tuckpointing strengthens the overall structure of a brick building. By replacing the old, crumbling mortar with new, robust mortar, the entire wall becomes more stable and secure. It’s kind of like tightening up the stitches in a well-worn quilt—suddenly, everything holds together much better. This reinforcement prevents further deterioration and extends the building’s lifespan, making tuckpointing a smart investment for any property owner.
Preventing Water Damage and Erosion
One of tuckpointing’s superpowers is its ability to keep water out. Old, damaged mortar can become a gateway for water to seep into your walls, leading to all sorts of nasty issues like mold, mildew, and structural weakening. By sealing these potential entry points, tuckpointing acts as a shield against moisture intrusion. It’s your building’s first line of defense against the elements, helping to prevent the costly damages that water and frost can inflict over time.
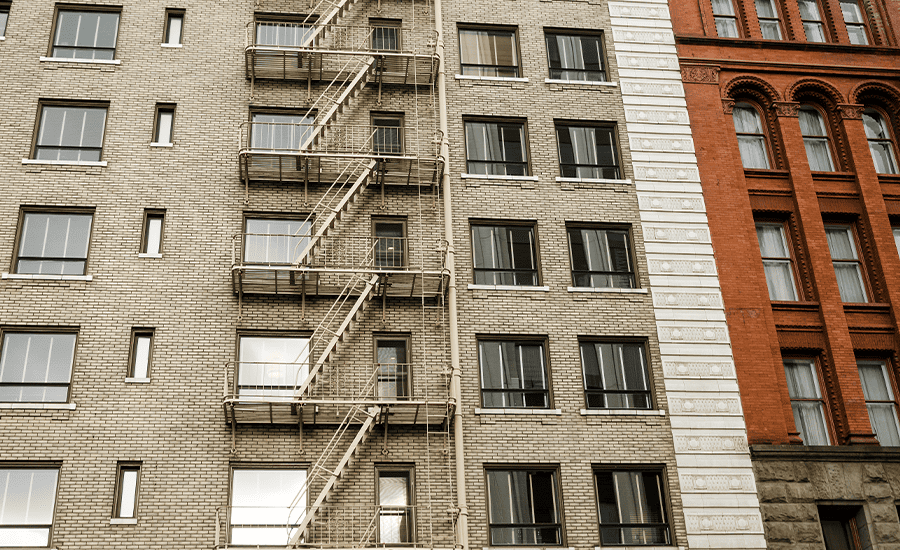
Improving the Visual Appeal of Brick Structures
Let’s not forget about curb appeal! Tuckpointing dramatically enhances the look of brick buildings, making them appear cleaner and more meticulously cared for. Whether you’re looking to preserve the historical integrity of an older structure or simply want to boost the aesthetic value of your property, tuckpointing provides a noticeable upgrade. It’s amazing how much fresher a building can look with just this one change—it’s like giving your home a mini facelift!
With these benefits, it’s clear that tuckpointing is not just about maintaining appearances; it’s a crucial maintenance strategy that protects and enhances the value of brick structures. So, when and why is tuckpointing necessary?
Up next, we’ll dive into the indicators that it’s time to consider tuckpointing and the reasons it should be a regular part of your building maintenance routine.
When and Why is Tuckpointing Necessary?
You might be wondering, “When should I consider tuckpointing for my building?” It’s not just about aesthetics; it’s about preserving the structure’s health and functionality. Let’s delve into the signs that indicate tuckpointing is needed and why it plays a crucial role in building maintenance.
Signs That Your Building Needs Tuckpointing
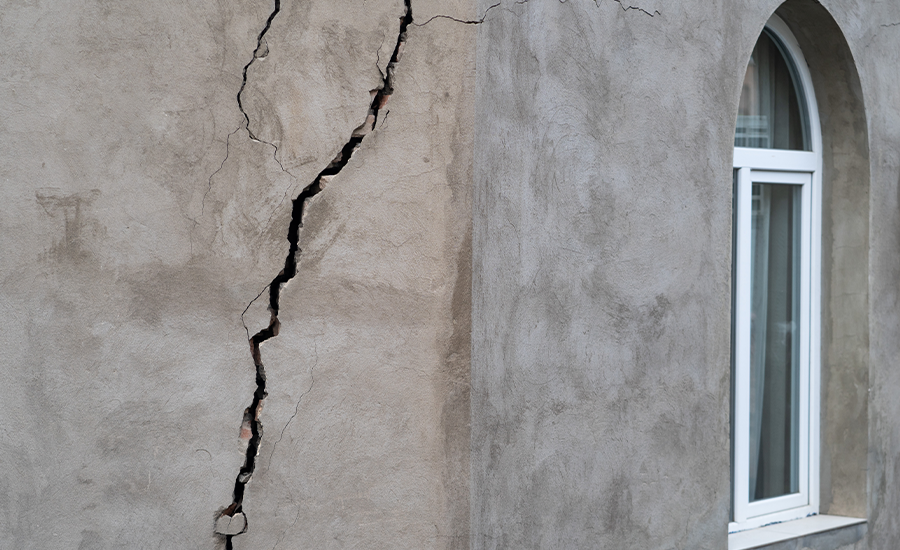
- Mortar Deterioration: If you notice the mortar between your bricks is crumbling, cracking, or missing in spots, that’s a red flag. These gaps can let in water and pests, both of which can cause serious damage over time.
- Discoloration or Staining: Are there signs of moisture inside your building near brick walls? This could be due to failed mortar that’s allowing water to penetrate and leave behind unsightly stains.
- Loose Bricks: When the mortar isn’t doing its job, bricks can start to loosen. This compromises the structural integrity of the wall and can lead to more significant damage if not addressed.
- Efflorescence: This is a white, powdery deposit that appears on brick surfaces. It’s caused by water moving through the wall and carrying salts to the surface. If you see this, water is getting into your walls, and tuckpointing might be necessary.
The Role of Tuckpointing in Building Maintenance
Tuckpointing isn’t just a reactive measure; it’s a proactive strategy that can save you a lot of headache and expense down the line. Here’s why it’s so important:
- Prevents Further Damage: By filling in the gaps and cracks, tuckpointing stops the progression of damage. It’s much like patching a small hole in your tire before it becomes a blowout.
- Enhances Building Longevity: Regular tuckpointing can significantly extend the life of a building by ensuring that its walls remain solid and secure.
- Improves Energy Efficiency: Sealed joints mean less air leakage. This keeps your heating and cooling inside where it belongs, reducing your energy bills.
- Maintains Property Value: A well-maintained building is a valuable building. Tuckpointing keeps your property looking good and functioning well, which is crucial if you ever decide to sell.
Understanding when and why tuckpointing is necessary can help you make informed decisions about maintaining your property effectively. With these insights, you’re better equipped to spot issues early and take action before minor problems become major ones. Now, let’s move forward and explore how to choose the right mortar for tuckpointing, ensuring that your building not only stays structurally sound but also retains its aesthetic appeal.
How to Choose the Right Mortar for Tuckpointing
Choosing the right mortar for tuckpointing is not just about picking up a bag of premix and getting to work. It involves understanding the specific needs of your building’s brickwork and ensuring the new mortar not only matches but enhances the existing structure. Let’s explore the different types of mortar and how to achieve a seamless color match.
Types of Mortar Used in Tuckpointing
- Type N Mortar: This is a common choice for tuckpointing due to its medium-strength (750 psi) which makes it ideal for exterior and above-grade walls that are exposed to severe weather and high heat.
- Type O Mortar: Offering a lower strength (350 psi), Type O is best suited for interior or non-load-bearing applications where the mortar primarily needs to be cosmetic.
- Type S Mortar: For areas where the brickwork requires higher strength and better bonding capabilities, Type S (1800 psi) is recommended. It’s great for foundations, retaining walls, and other areas where the mortar needs to resist soil pressure and wind.
- Lime Mortar: For historic buildings, lime mortar is often used because it offers breathability and flexibility, which are crucial in older structures that need a softer mortar that can accommodate structural movements without cracking.
Color Matching Techniques for Seamless Aesthetics
Color matching is critical in tuckpointing, not just for aesthetic reasons but also to ensure the longevity of the repair. Here’s how you can achieve a perfect match:
- Sample Comparison: Before starting the tuckpointing project, compare different mortar samples against the existing mortar in different lights and weather conditions. This will help you see how the mortar will look once cured.
- Custom Mixing: Sometimes, the perfect match requires a custom mix. Adding pigments to standard mortar mixes can achieve the desired color. It’s a trial-and-error process that might take a few attempts to get right.
- Expert Consultation: When in doubt, consulting with a masonry expert or a specialist in historic restorations can provide insights into the most appropriate type of mortar and pigments for your specific building.
Choosing the right mortar for tuckpointing is as much an art as it is a science. It requires a deep understanding of the materials and techniques that will best preserve and enhance your building’s brickwork.
With the right mortar selected, you’re ready to move forward in your tuckpointing project. But before you grab your tools, let’s weigh the pros and cons of DIY tuckpointing versus hiring professional services, ensuring you make the best decision for your property’s needs.
DIY Tuckpointing vs. Professional Services
When considering tuckpointing, you might be tempted to tackle the project on your own. Let’s weigh the benefits and drawbacks of DIY tuckpointing before you decide, and explore how to identify and hire a professional tuckpointer if you choose not to go it alone.
Pros and Cons of DIY Tuckpointing
Taking on tuckpointing by yourself can be appealing for several reasons, but it’s important to consider both sides of the coin before diving in.
Pros:
- Cost Savings: Handling tuckpointing yourself can significantly reduce the costs associated with labor. If you’re handy and have a few basic tools, DIY might be a cost-effective option.
- Flexibility: You set your own schedule and pace, which can be especially convenient if you have a busy lifestyle or if the project isn’t urgent.
- Personal Satisfaction: There’s a rewarding feeling that comes with completing home improvement projects yourself. It can increase your connection to your home and pride in your living space.
Cons:
- Time-Consuming: Tuckpointing can be more time-consuming than anticipated, especially if you’re learning as you go.
- Risk of Mistakes: Without the proper experience, there’s a higher risk of making mistakes that could compromise the structure’s integrity or lead to further repairs.
- Physical Demands: The job can be physically demanding, requiring a good deal of manual labor, precision, and sometimes, working at heights.
How to Find and Choose a Professional Tuckpointer
Choosing to hire a professional might be the safer route if the cons of DIY tuckpointing seem daunting. Here’s how to make sure you pick the right expert for the job:
- Research: Start by searching online for tuckpointing services in your area. Check out reviews on sites like Yelp, Google, and Angie’s List to see what other customers have said about their work.
- Verify Credentials: Ensure the contractor is licensed, insured, and bonded. This protects you in case of accidents or damage to your property during the project.
- Ask for References: A reputable contractor should be able to provide references. Follow up with these references to ask about their experience with the contractor’s professionalism and quality of work.
- Get Multiple Quotes: Don’t settle for the first estimate. Get multiple quotes to compare prices and understand what’s included in the service.
- Interview Candidates: Finally, meet with potential contractors. This gives you a chance to discuss the project details and gauge whether they communicate and conduct themselves professionally.
Deciding whether to DIY or hire a professional for tuckpointing involves a careful assessment. Consider your skills, the project’s requirements, and your available time. If you opt for professional services, taking these steps can help. You will find a reliable contractor who will deliver quality workmanship.
As we move forward, understanding the costs involved is crucial. Next, we’ll delve into Cost Considerations in Tuckpointing to help you plan and budget for this essential maintenance.
Cost Considerations in Tuckpointing
When planning a tuckpointing project, understanding the associated costs is essential. Tuckpointing can be an investment that not only preserves but also enhances the value of your property. Let’s break down the average cost ranges for tuckpointing projects and explore the factors that can influence these costs.
Average Cost Ranges for Tuckpointing Projects
The cost of tuckpointing can vary widely based on several factors, but to give you a ballpark:
- Small-Scale Projects: For minor tuckpointing work, such as a small residential wall, costs might range from $500 to $1,000.
- Medium-Scale Projects: Larger areas, such as an entire home or a small commercial building, could see costs ranging from $1,000 to $3,000.
- Large-Scale Projects: For extensive tuckpointing work on larger buildings or multiple properties, costs could climb to $3,000 to $10,000 or more.
Factors Affecting the Cost of Tuckpointing
Several elements can influence the final price tag of your tuckpointing project:
- Extent of Damage: The more extensive the damage to the mortar, the more time and materials will be required to complete the project, which can increase costs.
- Property Size and Layout: Larger buildings with more intricate brickwork will typically incur higher costs due to the increased labor and materials needed.
- Accessibility: Hard-to-reach areas may require special equipment or extra labor to ensure safety and precision, adding to the cost.
- Material Costs: The type of mortar used can affect the cost, especially if custom colors or materials are needed to match historical architecture.
- Regional Labor Rates: Labor costs can vary significantly depending on where you live. Urban areas tend to have higher rates than rural areas.
- Seasonal Factors: Weather conditions can influence the timing and duration of tuckpointing projects. Ideal conditions might reduce costs by allowing for faster completion.
Understanding these costs and factors will help you budget more accurately and set realistic expectations for your tuckpointing project. Remember, while the upfront cost may seem substantial, the long-term benefits are significant. Protecting your property from structural issues and enhancing its aesthetic appeal can make it a worthwhile investment.
Next, we’ll explore Preventative Measures and Care Tips. This ensures that your tuckpointing results last as long as possible and continue to offer both functional and visual benefits.
Preventative Measures and Care Tips
Investing in routine maintenance not only preserves the aesthetic appeal of your brickwork but also enhances its durability. Here are targeted strategies for both regular upkeep and extending the life of your masonry.
Regular Maintenance Tips for Tuckpointed Brickwork
Keeping your tuckpointed brickwork in excellent condition doesn’t have to be a chore. With these simple, regular practices, you can maintain the integrity and beauty of your masonry year-round.
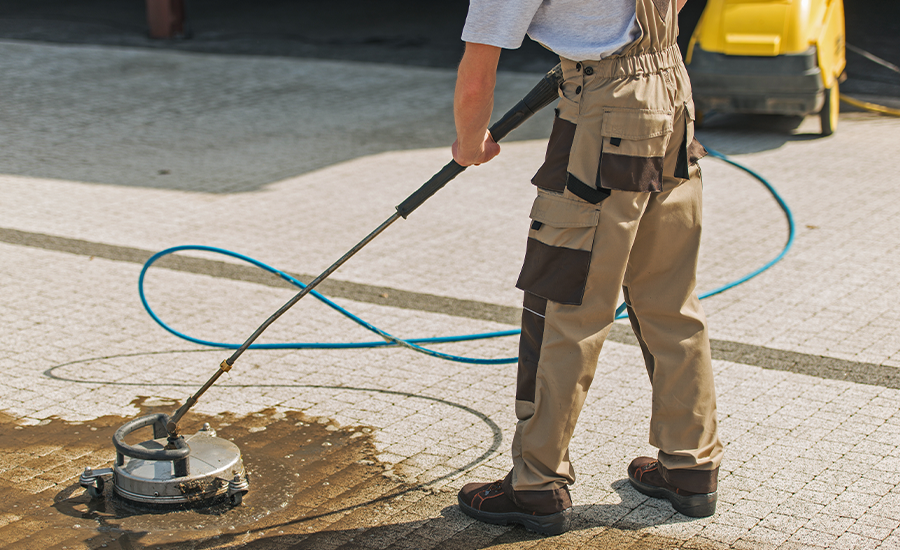
- Regular Cleaning: Gently wash brickwork with water and a soft brush to remove dirt and debris. Avoid using harsh chemicals or high-pressure washers, which can damage the mortar.
- Inspect Regularly: Conduct an annual inspection to identify any signs of damage such as cracks or loose bricks, allowing for timely repairs.
- Reapply Sealant: Use a breathable sealant every few years to protect the mortar from water while allowing internal moisture to escape.
- Control Vegetation: Prevent vines and plants from growing close to the walls, as their roots can worsen small cracks and damage the mortar.
- Address Moisture Issues: Ensure gutters and drainage systems direct water away from brickwork to prevent moisture buildup, which is critical to avoid mortar deterioration.
How to Extend the Lifespan of Your Brick Masonry
Maximizing the lifespan of your brick masonry involves more than just regular cleaning; it requires strategic care and timely interventions.
- Use Compatible Materials: Always match new mortar to the existing material in type, color, and composition for repairs to ensure cohesion and longevity.
- Shield from Extreme Elements: Protect brickwork from severe weather with eaves or awnings that provide shelter from rain and sun.
- Manage Environmental Stress: Be mindful of the natural expansion and contraction of materials due to temperature and humidity changes, and adjust maintenance accordingly.
- Professional Assessments: Schedule professional evaluations every few years to catch potential issues early and get expert maintenance tips.
By integrating these maintenance and care strategies into your routine, your tuckpointed brickwork will not only look better but last longer. This safeguards your investment and maintains the structural health of your property.
Conclusion
In conclusion, regular maintenance and understanding the benefits of tuckpointing brick are essential. They preserve the structural integrity and aesthetic value of your buildings. By implementing preventative measures and opting for professional tuckpointing services, you can protect your investment. This also maintains the beauty of your property. If you’re seeking a professional contractor for tuckpointing brick repair, don’t hesitate to reach out. Call (+1) 917-355-8556 for expert assistance and quality service.
FAQs
Q: What is tuckpointing brick and why is it important?
A: Tuckpointing brick involves renewing the mortar joints in brick structures. It’s crucial because it strengthens the structure and prevents moisture penetration. This also enhances the building’s appearance, thus extending the life of your property.
Q: How often should tuckpointing bricks be done?
A: The frequency depends on exposure to elements and the initial construction quality. Generally, you should assess tuckpointing every 25 to 30 years. This ensures the integrity and appearance of your brickwork.
Q: Can tuckpointing brick save money in the long run?
A: Absolutely! By addressing early signs of mortar damage, tuckpointing prevents more severe damage to bricks and structural issues, potentially saving thousands in extensive repairs and energy costs due to improved insulation.
Q: What signs indicate the need for what is tuckpointing brick?
A: Key signs include deteriorating mortar, visible cracks, loose bricks, and water leakage inside your property. These symptoms suggest that the mortar has lost its integrity and needs renewal.
Q: Is DIY tuckpointing brick advisable or should I hire professionals?
A: While DIY can be tempting, professional tuckpointing ensures the color match and mortar mix are appropriate. This approach is durable, reducing the risk of future issues. It also ensures a quality finish.
Q: What materials are required for tuckpointing brick?
A: For tuckpointing brick, essential materials include the right type of mortar to match the existing structure. You will need a chisel and hammer for removing old mortar. A trowel is necessary for applying the new mortar accurately.
Q: What are the initial steps in tuckpointing brick?
A: The first steps in tuckpointing brick involve carefully removing the deteriorated mortar. Use tools like a grinder or chisel, then clean the joints thoroughly. Next, apply and shape the new mortar to restore structural integrity and aesthetics.