Are you noticing cracks or deterioration in the mortar joints of your brickwork? Repairing loose mortar joints isn’t just about aesthetics; it’s essential for maintaining the structural integrity of your building. Whether it’s the shifting of foundations, weather effects, or simple wear and tear, it’s crucial to address these issues promptly to prevent further damage. In this guide, we’ll dive into how to repair loose mortar joints effectively, ensuring your structure stays strong and visually appealing.
The Basics of Mortar Joints: What You Need to Know
You might not think much about mortar joints, those seemingly insignificant gaps between bricks or stones, but guess what?
They’re the unsung heroes of masonry. These joints, filled with a blend of cement, lime, sand, and water, play a crucial role in ensuring the structural integrity and longevity of buildings. Let’s break down what these joints are and why they’re so important.
Definition and Function
So, what’s the big deal with mortar joints?
Well, they’re essentially the glue holding your building together. Mortar acts as a buffer and adhesive between masonry units, preventing them from grinding against each other and wearing down. Especially in areas with a lot of seismic activity or harsh weather, the flexibility and strength of mortar joints are vital. They allow a building to bend and shift without falling apart—kind of like how a good book’s binding keeps it intact no matter how many times you read it.
Types of Mortar Joints
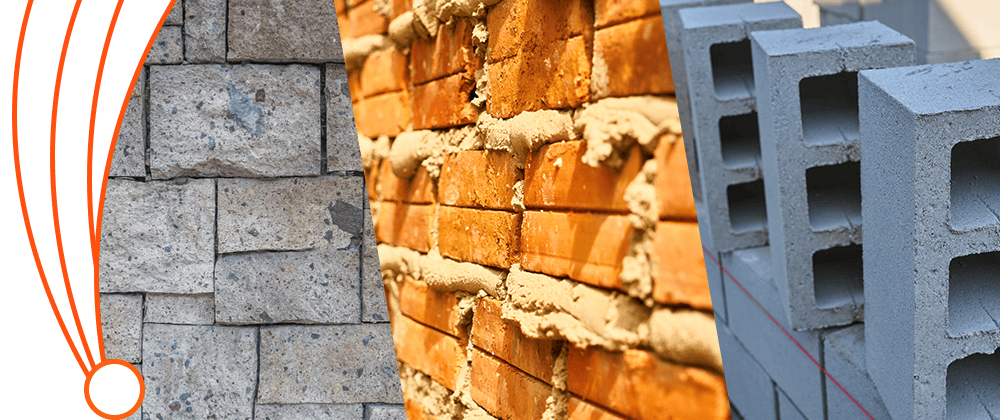
Choosing the right type of mortar joint can make a big difference in how long and well a building stands. Here’s a quick rundown of the common types:
- Concave Joint: This is your go-to joint for residential buildings. Its rounded shape helps seal out water, making it perfect for exterior walls.
- Vee Joint: Similar to the concave but with a sharper “V” shape, it’s great for areas that see a lot of rain.
- Flush Joint: These joints are flush with the brick face, giving a smooth, clean look. They’re more about aesthetics and are popular in interiors.
- Weathered Joint: Built to withstand the elements, this joint slopes outward at the top to steer clear of water intrusion.
- Raked Joint: Want a bit of drama? The raked joint, with its recessed mortar, creates striking shadows and textures on the wall. Just make sure it’s sealed well to stand up to the weather.
With this groundwork laid, you’re better prepared to tackle any masonry project or maintenance with confidence. Keep your joints in great shape, and they’ll keep your structure solid and stylish.
So, what’s next?
We’ll delve into spotting potential problems with these crucial components, helping you catch issues before they turn into bigger headaches. Stay tuned!
Identifying Issues with Mortar Joints
Keeping an eye on the little things can save you a big headache later. Mortar joints may be small, but their health is a big deal for the structural integrity of your building. Here’s how you can spot issues before they turn into major problems.
Early Signs of Deterioration
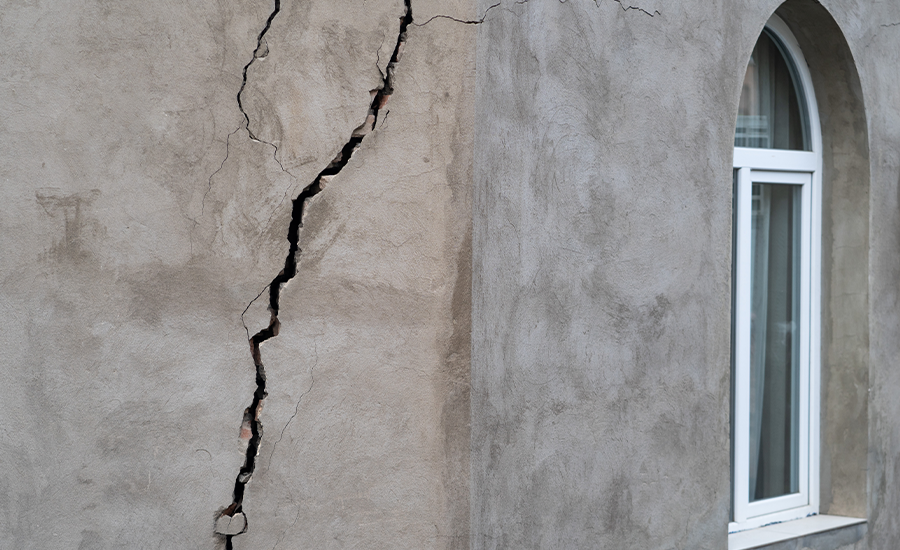
Ever wondered what the early warning signs of failing mortar joints look like? It’s not always dramatic, but catching these signs early can prevent a lot of damage:
- Cracking and Crumbling: If you see cracks or crumbling mortar, it’s a clear sign that the mortar is losing its grip. This could be due to age, water damage, or poor installation.
- Discoloration: Changes in color can indicate moisture issues. If your mortar is turning white, it might be efflorescence, a sign that water is moving through the mortar.
- Loose Bricks or Stones: When mortar fails, bricks can start to loosen. This is a definite red flag that your mortar joints need attention.
Being proactive and checking for these signs during routine maintenance can save you time and money. It’s all about spotting the small stuff before it turns into a bigger issue.
Consequences of Neglecting Loose Mortar Joints
Ignoring the signs of wear and tear in mortar joints isn’t just a bad idea—it’s risky. Here’s what could happen if you let things slide:
- Structural Damage: As mortar joints deteriorate, the stability of your entire wall or structure can be compromised.
- Water Damage and Mold: Loose or cracked mortar can allow water to seep in, leading to water damage and potentially mold growth inside your walls.
- Increased Repair Costs: The longer you wait, the more extensive (and expensive) the repairs can be. Catching issues early usually means simpler, more cost-effective repairs.
By understanding these signs and consequences, you’re better equipped to take care of your masonry work. Don’t wait until it’s too late! Up next, we’ll talk about the tools and materials you’ll need to tackle these repairs. Knowing what tools are best can make the repair process smoother and more effective.
Transform your home with expert masonry services. Contact us today for a free consultation.
Tools and Materials for Repair
Before you roll up your sleeves to fix those loose mortar joints, let’s make sure you have the right toolkit for the job. Proper tools and materials are not just about making the repair easier; they’re about making it last. Here’s what you’ll need to gather:
Essential Tools List
Getting your tools in order is the first step to any successful repair job. Here’s a handy checklist:
- Masonry chisel and hammer: For removing the old, damaged mortar without damaging the bricks.
- Pointing trowel: Essential for applying new mortar precisely.
- Wire brush: To clean out loose debris and old mortar from the joints.
- Mortar mix: Obviously, you’ll need mortar, but the type will depend on the repair.
- Bucket and mixing tool: For preparing the mortar.
- Safety glasses and gloves: Always protect yourself from flying debris and harsh materials.
Make sure these tools are at your side before you start; it’ll make the whole process smoother and safer.
Selecting the Right Mortar
Now, not all mortar is created equal, and choosing the right type can make or break your repair:
- Type N mortar: This is a general-purpose mortar with good strength and durability. It’s great for above-ground exterior walls.
- Type S mortar: Offering high strength, it’s perfect for below-ground applications or areas needing extra durability, like retaining walls.
- Lime mortar: If you’re working on a historic building, lime mortar is often required to maintain structural integrity and historical accuracy.
Matching the mortar to the specific needs of your repair not only ensures durability but also maintains the aesthetic consistency of your structure.
By equipping yourself with the right tools and materials, you’re setting yourself up for a successful repair. Next, we’ll dive into the step-by-step process of how to actually repair those loose mortar joints. Let’s get those tools ready and move on to making your masonry look as good as new!
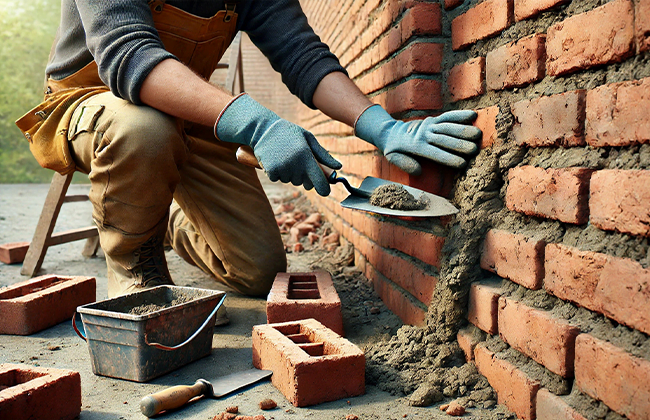
Step-by-Step Repair Process
Fixing loose mortar joints isn’t just about slapping on some new mortar; it’s a craft that requires patience and precision. Follow these steps to ensure your repair work is not only effective but also durable. Let’s get into it:
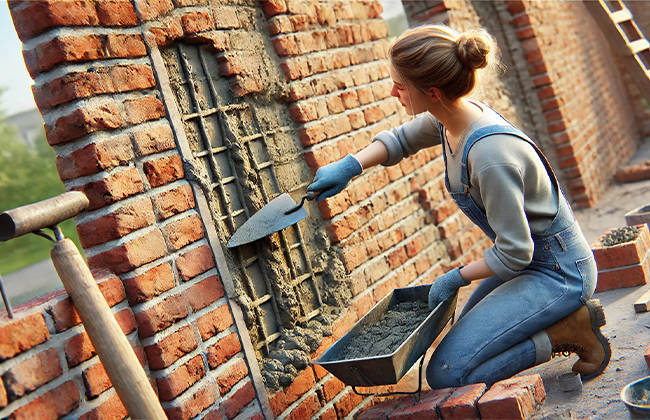
Preparing the Area
First things first, you need to prepare the area properly to ensure the new mortar adheres well and lasts:
- Clear the Joint: Use your masonry chisel and hammer to carefully remove the old, loose mortar. Be gentle to avoid damaging the bricks.
- Clean the Joint: Once the old mortar is out, brush away all the debris with a wire brush. This step is crucial for good adhesion of the new mortar.
- Dampen the Joint: Lightly wet the area with water. This prevents the bricks from absorbing all the moisture from the new mortar too quickly, which can weaken the bond.
Mixing and Applying Mortar
With the area prepped, it’s time to mix up some mortar and get it into those joints:
- Mix the Mortar: Follow the manufacturer’s instructions to mix your mortar to a peanut butter-like consistency. It should be moist but hold its shape.
- Apply the Mortar: Use your pointing trowel to press mortar into the joints, filling them completely. Make sure to pack the mortar tightly to avoid air pockets, which can weaken the structure.
- Tool the Mortar: Once the joint is filled, use a jointing tool to smooth and shape the mortar to match the existing joints. This not only looks better but also helps in shedding water away from the joint.
Finishing Touches
The devil is in the details, so don’t skip on these finishing touches:
- Brush Off Excess: After the mortar starts to set, gently brush off any excess from the brick faces with a soft brush. This will clean up any smudges or loose bits.
- Cure the Mortar: Keep the new mortar damp for a few days by misting it with water. This slows the curing process and results in a stronger joint.
- Inspect Your Work: Once everything is dry, take a good look at your work to ensure there are no gaps or inconsistencies.
There you have it! With these steps, you’ve not only repaired your loose mortar joints but also ensured that your masonry will stand the test of time. Now, let’s talk about maintenance to prevent future issues and keep your repairs looking sharp for years to come.
Maintenance to Prevent Future Issues
Maintaining your mortar joints is like taking care of a classic car; it needs regular attention and a keen eye to stay in top shape. Here’s how to keep those joints lasting longer and looking better.
Routine Inspection and Maintenance
Keeping a consistent maintenance schedule is key. Inspect your masonry in spring and fall—these seasons are perfect because they prepare you for the extremes of summer and winter. During inspections, look for any signs of deterioration such as cracks or erosion in the mortar. It’s also a good idea to clean out any debris or vegetation that has accumulated in the joints; these can retain moisture and cause further damage.
Regularly applying a breathable water repellent can also help protect the mortar from excessive moisture while still allowing the masonry to ventilate, which is crucial to prevent moisture entrapment.
When to Call a Professional
Knowing when to call in a professional can save you from making costly mistakes. Here are a few scenarios where expert help is crucial:
- If you notice significant or widespread damage, it’s best to consult a professional mason. They can assess the structural integrity and suggest the best course of repair.
- For historic buildings, always opt for professional services. These structures often require specific techniques and materials that maintain historical accuracy.
- If you’ve addressed the same issue multiple times without long-term improvement, this could indicate a deeper, underlying problem that would benefit from professional diagnosis and treatment.
Following these maintenance tips not only prolongs the life of your repairs but also protects the overall health of your building, ensuring it remains solid and secure for years to come. Now, let’s turn our attention to some practical tips and frequent missteps to avoid mortar repair.
Do’s and Don’ts: Common Mistakes in Mortar Repair
When tackling DIY mortar repairs, knowing what to do—and what not to do—can make a big difference. Whether you’re a seasoned DIYer or a newbie, steering clear of common pitfalls is crucial. Let’s dive into some practical tips and debunk a few myths to help you nail your next mortar repair project.
Practical Tips
- Do:
- Test the Mortar Match: Before starting the repair, make sure the new mortar matches the old in color and composition. A mismatch can lead to not only aesthetic issues but also structural problems if the mortars expand and contract differently.
- Prepare the Joints Thoroughly: Remove all damaged mortar to a sufficient depth, at least twice the width of the joint, to ensure a good bonding surface for the new mortar.
- Dampen the Bricks: Lightly wetting the bricks before applying new mortar helps prevent them from sucking the moisture out of the mortar too quickly, which can weaken the bond.
- Don’t:
- Overlook Proper Curing: Mortar needs time to cure slowly to reach its full strength. Avoid rushing this stage; keep the new mortar damp and covered if necessary, especially under hot or windy conditions.
- Skimp on Cleaning: Ensure that all debris and dust are cleared from the joints after removing the old mortar. Clean joints are key to good adhesion.
- Use the Wrong Tools: Employ the right tools for mixing and applying mortar; this can include a pointing trowel, a hawk, and a mixing hoe. Using improper tools can lead to poor application techniques.
Myths vs. Reality
1. Myth: Quicker is Better
- Reality: Good things take time, and mortar repair is no exception. Rushing through the process can lead to weak joints that might need another repair sooner than you’d think.
2. Myth: Stronger Mortar is Always Better
- Reality: While a strong mortar might seem like the best choice, it’s essential to match the strength of the new mortar to the existing masonry. A mortar that’s too strong can actually damage historic masonry, as it won’t allow the structure to flex and breathe.
3. Myth: All Mortar is the Same
- Reality: Not all mortar is created equal. There are various types designed for different applications and environments. Choosing the wrong type can lead to failure of the joints and subsequent damage to the masonry.
Armed with these dos, don’ts, and myth-busting facts, you’re better prepared to approach your next mortar repair project with confidence. Remember, the right preparation, techniques, and materials are key to a successful repair that stands the test of time.
Transform your home with expert masonry services. Contact us today for a free consultation.
Conclusion
Taking care of your building’s mortar joints is essential in maintaining its structure and aesthetics. If you’ve followed our guide, you should feel confident in tackling minor repairs to repair loose mortar joints. However, for extensive damage or if you’re unsure about doing it yourself, it’s wise to consult with a professional. If you’re looking for a reliable contractor to repair loose mortar joints, don’t hesitate to contact us at (+1) 917-355-8556. We’re here to help ensure your repairs are done right!
FAQs
Q: What causes the need to repair loose mortar joints?
A: Mortar joints can loosen due to environmental factors, building settling, or simply aging. Regular inspections can help you identify and repair loose mortar joints before they lead to significant damage.
Q: How often should I check and repair loose mortar joints?
A: It’s good practice to inspect your mortar joints annually. If you notice signs of wear such as cracks or erosion, it’s time to repair loose mortar joints to maintain the integrity of your structure.
Q: Can I repair loose mortar joints myself?
A: Yes, minor repairs can be DIY projects if you have the right tools and materials. However, for significant damage or historic structures, seeking professional help to repair loose mortar joints is recommended.
Q: What’s the best season to repair loose mortar joints?
A: Late spring or early fall are ideal times to repair loose mortar joints, as moderate temperatures and dry weather allow the mortar to set properly.
Q: How long does it take for mortar to cure after repairing loose mortar joints?
A: It typically takes about 28 days for mortar to fully cure. During this time, keeping the area moist can help the curing process, ensuring the repair remains durable.
Q: How do you fix runny mortar?
A: To fix runny mortar, gradually add more dry mortar mix until the consistency resembles thick peanut butter. Add the dry mix slowly to avoid over-correcting.
Q: How do you seal loose mortar?
A: Seal loose mortar by removing any deteriorated mortar, dampening the area, and applying a new layer of mortar. Smooth the new mortar to ensure a tight seal with the existing structure.
Q: Can you fill in mortar joints?
A: Filling in mortar joints is possible and typically involves the process of repointing, where old mortar is removed and replaced with new mortar to restore the joint’s integrity.
Q: What is a common repair for deteriorated mortar joints?
A: The most common repair for deteriorated mortar joints is repointing. This process involves removing the old mortar and replacing it with new mortar to ensure structural stability.
Q: How do you repair mortar in a brick wall?
A: To repair mortar in a brick wall, remove the old, damaged mortar, clean the area thoroughly, and apply new mortar, making sure it matches the existing mortar in color and texture.
Q: What is brick mortar repair in a tube?
A: Brick mortar repair in a tube offers a quick, convenient solution for small repairs. It’s a pre-mixed formula that can be applied directly to cracks and small voids.
Q: How do you repair mortar between bricks on steps?
A: Repair mortar between bricks on steps by chiseling out the old mortar, cleaning the joints, and applying new mortar. Press the mortar firmly to fill the joints completely.
Q: What is the cost of brick mortar repair?
A: Brick mortar repair costs can vary, typically ranging from $5 to $15 per square foot, influenced by the extent of the damage and local labor costs.
Q: How often should you repair loose mortar joints?
A: To maintain the structural integrity of your building, it’s advisable to inspect and potentially repair loose mortar joints every two to five years, depending on environmental conditions and the initial quality of the mortar. Regular inspections can catch issues early, reducing the need for more extensive repairs.
Transform your home with expert masonry services. Contact us today for a free consultation.