Welcome to our comprehensive guide on red brick repair, where we explore everything you need to know about maintaining and restoring these classic building elements. From identifying signs of damage to executing precise repairs, we cover the essentials, helping you keep your red brickwork in pristine condition. Whether you’re tackling a small project or facing more significant challenges, this guide offers insights and techniques that cater to both beginners and seasoned pros. Dive into the world of red brick repair with us, and learn how to keep your brickwork looking its best for years to come.
Understanding Red Brick Repair
Explore the essentials of red brick repair, diving into its rich history, advantages in construction, and common issues that can arise, providing a solid foundation for both newbies and seasoned DIY enthusiasts.
What is Red Brick and Why is it Popular?
Brief history and composition of red brick: Red bricks have been a cornerstone in construction for centuries. Originating from fired clay, these bricks are known for their durability and traditional aesthetic. They’re made by mixing clay, sand, and lime, and then baking them in a kiln. This process gives red bricks their signature color and strength.
Advantages of using red brick in constructions: Red bricks aren’t just about good looks; they’re practical too. They’re fire-resistant, provide excellent insulation, and can withstand harsh weather conditions. Plus, their timeless charm adds to the curb appeal and value of your property.
Common issues faced by red brick structures: Like all building materials, red bricks have their vulnerabilities. Over time, they can suffer from wear and tear due to environmental factors like extreme weather and moisture. This wear can lead to issues like mortar erosion, cracks, and even structural damage if not addressed timely.
Early Signs of Red Brick Damage
Cracking and chipping: Identifying early warning signs: Spotting small cracks or chips in your bricks? That’s your cue to take action. These seemingly minor signs can escalate into bigger problems, such as water seepage or structural weaknesses. Catching them early can save you a lot of trouble down the road.
Discoloration and efflorescence: What it means for your bricks: Noticed any white, powdery residue on your bricks? That’s efflorescence, caused by water bringing salt to the surface. While it’s not a structural threat, it can be an eyesore. Also, keep an eye out for discoloration, which can indicate moisture issues.
The importance of regular inspections: Regularly checking your brickwork is like giving your home a health checkup. It helps you catch issues early, ensuring your red brick stays in top-notch condition. Plus, it’s a great opportunity to admire your beautiful home, right?
Techniques in Red Brick Repair
Delve into the practical side of red brick repair, covering everything from assessing damage and choosing the right tools, to a step-by-step guide on repairing and restoring bricks, making it a handy reference for effective maintenance.
Assessing the Damage
How to thoroughly inspect your red brickwork: To start, take a leisurely walk around your property and give your red brickwork a good, long look. Check for any visible cracks, loose bricks, or areas where the mortar seems to be eroding. Don’t forget to look at areas that might be less obvious, like under windows or near gutters. If you spot something odd, make a note of it – it’ll come in handy later.
When to call in a professional: Okay, so you’ve done your detective work and found some issues. Now, the question is, should you handle it yourself or call in the pros? If it’s minor stuff like small cracks or a bit of repointing, and you’re handy with DIY projects, go for it. But if you’re staring at big structural issues or extensive damage, it’s time to ring up a professional. Safety first, always!
Essential Tools and Materials
The toolkit every red brick repair job needs: Ready to roll up your sleeves and get to work? You’ll need a few tools. Gather a chisel, hammer, trowel, wire brush, and safety gear like gloves and goggles. These are your trusty sidekicks in the world of brick repair.
Selecting the right mortar and materials for repair: Picking the right mortar is crucial. The wrong type can cause more harm than good. You want a mortar that matches the strength and color of the existing one. When in doubt, consult a professional or take a sample of your old mortar to a hardware store for advice.
Step-by-Step Repair Guide
Cleaning the area: Before you start the actual repair, give the area a good clean. Brush off any loose debris and mortar. This step ensures a clean surface for the new mortar to adhere to.
Removing damaged bricks: If you’ve got damaged bricks, carefully chisel them out without damaging the surrounding ones. It’s a bit like surgery for your house – gentle and precise. Once the old brick is out, clean the cavity so it’s ready for a new brick.
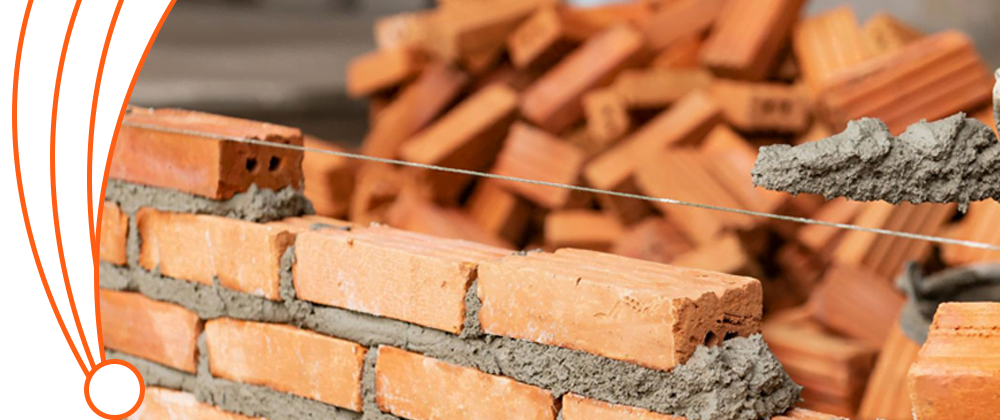
Mortar mixing and brick laying: Mix your mortar according to the manufacturer’s instructions. Spread the mortar on the bottom and sides of the cavity, then slide the new brick in. Make sure it’s level and in line with the others. Wipe off any excess mortar before it dries – it’s much harder to clean off later.
Finishing touches: Once the mortar is dry, take a step back and admire your handiwork. If necessary, touch up the area to blend the new mortar with the old. It’s all about making your repair work look seamless.
Preventative Measures and Maintenance
Discover key strategies for preserving the integrity of red brickwork, including regular maintenance schedules, effective cleaning and sealing practices, and proactive measures to prevent future damage, ensuring your red brick structures stand the test of time.
Regular Maintenance Tips
Schedule and checklist for red brick maintenance: Having a regular maintenance schedule is like taking your car for an oil change – necessary and smart. About twice a year, do a thorough inspection of your brickwork. Look for cracks, loose bricks, and signs of moisture. Keep a checklist: spring inspection, fall inspection, and a special check-up after any major storms.
Cleaning and sealing: Long-term care practices: Your bricks need a good bath too, but gently. You can use a mild detergent and a soft brush to clean them. Avoid harsh chemicals or high-pressure washers, as they can do more harm than good. After cleaning, applying a sealant can help protect the bricks from moisture and weather damage. Think of it as sunscreen for your bricks!
Preventing Future Damage
Addressing environmental factors: Mother Nature can be tough on your bricks. Things like tree roots growing too close to your home, or water constantly splashing against certain areas, can cause damage over time. Try to mitigate these environmental factors. Trim those tree roots, redirect downspouts, and make sure your yard slopes away from your home to prevent water accumulation.
Protective coatings and other preventive measures: Applying a protective coating to your bricks can be a game changer. It’s like an invisible shield that helps protect against moisture and weathering. Also, consider installing eaves and gutters if you don’t already have them – they’re great for directing rainwater away from your brick walls. These little steps can significantly extend the life of your red brickwork.
Conclusion
In conclusion, mastering red brick repair is about understanding the material, applying the right techniques, and implementing regular maintenance. Whether you’re fixing minor cracks or undertaking more substantial repairs, the key lies in consistent care and timely intervention. Armed with the knowledge from our guide, you’re now equipped to handle various red brick repair challenges, ensuring the longevity and beauty of your brick structures. Remember, maintaining red brickwork not only preserves its aesthetic appeal but also contributes to the structural integrity of your property.
FAQs
Q: How often should I inspect my red brick structures for damage?
A: Regular inspections twice a year are recommended for red brick structures. It’s best to check them in spring and fall to catch any issues arising from seasonal changes, ensuring timely repairs.
Q: Can I do red brick repair work myself, or should I hire a professional?
A: If the damage is minor, like small cracks or repointing, and you’re comfortable with DIY projects, you can certainly handle it yourself. For more complex issues, such as structural damage, seeking professional assistance is advisable.
Q: What are the common mistakes to avoid in red brick repair?
A: Common mistakes include using the wrong mortar type, applying excessive pressure while cleaning, and neglecting to properly prepare the area before repair. Always match the mortar to the existing one and be gentle during cleaning and repair.
Q: How can I prevent future damage to my red brickwork?
A: Prevent future damage by regular maintenance, using appropriate sealants, addressing environmental factors like water runoff, and ensuring proper drainage around the brick structures to avoid water accumulation.
Q: What’s the best way to clean red bricks without causing damage?
A: The best way to clean red bricks is using a soft brush and a mild detergent solution. Avoid harsh chemicals and high-pressure washing, as these can erode the mortar and damage the bricks.


