 ChatGPT
 Perplexity
 Google AI
 Claude

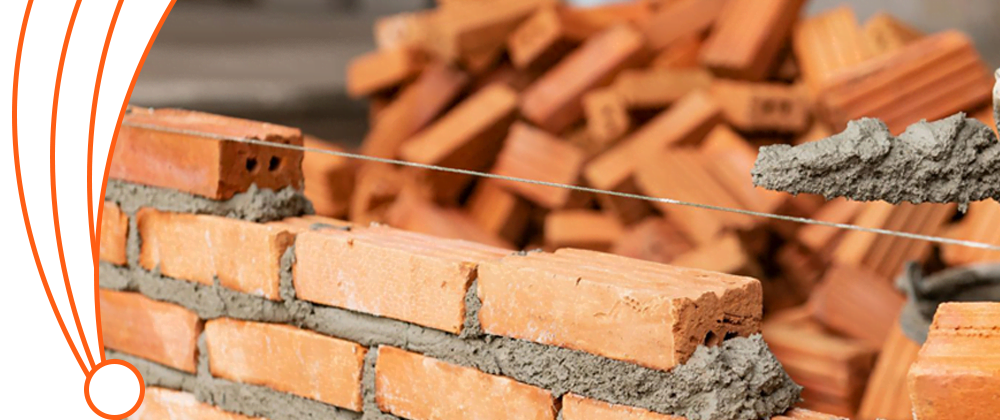
Repointing is a core component in masonry repairs and restorations for residential and commercial properties, making the brick structures stronger and ensuring their load-bearing integrity remains intact. In repointing, it’s important to rake out the old mortar before layering the new mortar because it helps in optimal adhesion, and if repointing is done without removing the old mortar, it leads to costly repairs and extensive masonry damage. Make sure to identify the areas where there is a need for repointing so that it can be a hassle-free process with timely repairing of your brickwork.
In this blog, we’ll thoroughly discuss the drawbacks of not performing repointing tasks properly and without removing the old mortar.
Why Must Old Mortar Be Removed?
The following are the reasons that tell us that properly raking out the old mortar before repointing is important for better structural soundness. If the old mortar is not removed before repointing, it can cause the following problems:
Weak Bonding
When a new mortar is applied over the old mortar, it lacks the bonding ability and is damaged easily because mortar should be placed over a smooth surface for effective adhesion. It leads to accelerated deterioration within months.
Moisture Retention
The existing mortar already has some moisture penetrated in it, due to which the mortar joints got weakened, and if the repointing is done without removing the old mortar, it can trap moisture, which leads to freeze-thaw damage and joint cracking.
Compromised Strength
Repointing without joint excavation has insufficient strength and load-bearing capacity, due to which the bricks become wobbly and the stones get out of their place. Superficial joint treatments lead to structural shifts and drooping.
For a better understanding of how to ensure strong, long-term brickwork, read about the best techniques for long-lasting brick repointing.
Some Situations Where Mortar Removal Isn’t Required
Most of the time, repointing is important, but here are some of the cases where superficial repairs are considered adequate. Let’s have a look at such conditions:
- Immediate visual touch-ups that don’t require any deep structural repairs.
- Non-permanent patchwork in historic structures for architectural beauty.
- For the visual aesthetics of facades, garden walls, and retaining walls that don’t require structural interventions.

The Cost of Taking Shortcuts in Repointing
Repointing must be done with proper progressive procedure, but some of the repointing contractors go for shortcuts and stopgap repairs, in which they just repoint without raking out the old mortar, which leads to early mortar deterioration, weak strength, and frequent hefty repairs.
| Shortcuts | Premature Failure |
|---|---|
| Overlay without excavation | Splits in the mortar and flaking occur. |
| Improper bonding mix | Incompatibility of mortar and early mortar deterioration |
| Damp joints overfill | Leads to underlying water damage and biological growth |
| Poor surface prep | Calls for frequent repairs and reduced structural longevity. |
How Should Repointing Be Performed?
Let’s have a look at the step-by-step guide on how to perform repointing in the easiest and most budget-friendly way. Here’s a roadmap to your success in repointing:
Evaluation: The condition of mortar joints should be checked properly, and their depth should be determined.
Careful Mortar Extraction: Then, the mortar should be skillfully carved out for level excavation with utmost care.
Clearing debris from joints: the cleared joints should be neat & clean, and for that, the surface should be scrubbed and gently rinsed.
Mortar Blending: The new mortar should be composed of compatible materials for exact color, texture, and strength.
Mortar layering: Then, the mortar should be applied in multiple layers and properly tamped down.
Joint Profiling: For visual consistency and finishing, the mortar joints should be tooled and smoothed.
Mortar Setting: Let mortar cure properly for better strength and to prevent early cracks in the mortar.
Want a full explanation of the steps involved? See how brick repointing is professionally done.
Conclusion
To maintain the structural integrity of any residential or commercial masonry, repointing must be done correctly. Proper mortar removal is a critical first step. While there may be rare cases where full excavation isn’t necessary, skipping this process in most situations leads to damage and higher repair costs. It’s always best to consult experienced professionals to ensure your brickwork is handled with care.
Sardar Restoration Corp. proudly serves every corner of NYC, including the Bronx, Manhattan, Brooklyn, Westchester, and Queens. Our services are designed to meet your needs, providing top-quality solutions wherever you are. Check our service areas to see how we can assist you in your location.
Contact us today at (+1) 917-355-8556 or sardarrestoration@gmail.com, or visit us at 2770 Fish Ave, Bronx, NY 10469, United States.
FAQs
How deep should old mortar be removed during repointing?
Old mortar should be removed up to ½ inch during repointing for a smooth base and optimal bonding, but in contemporary structures, mortar should be removed ¾ inch.
Do you repoint both residential and commercial properties?
Yes! Sardar Restoration Corp. offers repointing services for both residential and commercial properties in NYC and its adjacent areas, ensuring proper compliance with regulatory bodies.
Will pressure washing help instead of repointing?
No! Our repointing contractor never recommends you pressure wash instead of repointing because it doesn’t strengthen mortar but weakens it more and seeps into the joints.
Do you replace mortar with sealants or colored caulk?
No! Sardar Restoration Corp. does not rely only on sealants because, without repointing, they can also penetrate moisture. So, it’s better to replace mortar for excellent adhesion and a proper seal.